> ## Documentation Index
> Fetch the complete documentation index at: https://v0.x-docs.novu.co/llms.txt
> Use this file to discover all available pages before exploring further.
# How to send push notifications in an Android app (react native) with FCM and Novu
> Learn how to send FCM push notifications in a React native Android app using Novu and FCM
## Prerequisites
To complete this tutorial, you will need the following:
* A [Firebase](https://firebase.google.com/) account
* A [Novu](https://web.novu.co/?utm_campaign=docs-gs-guides-fcm-android) account
* An [Expo](https://expo.dev) account
Push notifications are notifications that are sent to a user’s devices whether the user is using the app or not. We’ll be using the Firebase Cloud Messaging (FCM) integration of Novu to send these notifications. You can find the complete code for this project in our [Github repo.](https://github.com/novuhq/fcm-react-native-android)
## Start a React-Native project
We'll use the `create-expo` tool to initialize a new expo app. It creates a new React Native app with the expo package installed. We're naming our app `fcm-novu-rn2` and hence using the following command:
```javascript theme={null}
npx create-expo-app fcm-novu-rn2
```
If it asks you to choose a template, choose the 'blank' template.
Now, go to the project directory and install the `react-native-firebase` package using the following command:
```bash theme={null}
npm install --save @react-native-firebase/app
```
Once this is installed, install the messaging module of Firebase using the following command:
```bash theme={null}
npm i --save @react-native-firebase/messaging
```
## Getting the FCM token
Now, we need to grab the `token key` from FCM. We'll need this to send notifications using FCM. We're using `useEffect` to grab this key as follows:
```jsx theme={null}
// import messaging module
import messaging from '@react-native-firebase/messaging';
// Request permission to send notifications
const authStatus = await messaging().requestPermission();
// Check if permission is granted or provisional
const enabled =
authStatus === messaging.AuthorizationStatus.AUTHORIZED ||
authStatus === messaging.AuthorizationStatus.PROVISIONAL;
// If permission is granted or provisional, proceed
if (enabled) {
// Log the authorization status
console.log('Authorization status:', authStatus);
// Retrieve the FCM token for the device
const token = await messaging().getToken();
// Log the FCM token
console.log('FCM Token is:', token);
// Return a function to unsubscribe from notifications
return unsubscribe;
} else {
// If permission is not granted, log the error status
console.log('Could not grab token...', authStatus);
}
```
## FCM handlers
FCM uses something called a `background handler` to, as the name suggests handle notifications when the app is in the background. So, we'll add it to our app:
```jsx theme={null}
// Background message handler for incoming messages while the app is in bg
messaging().setBackgroundMessageHandler(async (remoteMessage) => {
// Log a message indicating that a message was handled in the background
console.log('Message handled in the background!', remoteMessage);
});
```
Similarly, we also need a `foreground handler` to handle notifications when the app is in the foreground. In our case, we're updating a state's value in our handler. Here's our foreground handler:
```jsx theme={null}
// handle incoming messages while the app is in the foreground
const unsubscribe = messaging().onMessage(async (remoteMessage) => {
// Log a message indicating that the onMessage event is working
console.log('working!!!!');
// Update state with the received message
setNotification(remoteMessage);
});
return unsubscribe;
```
## Setting up Expo
In order to load projects from Expo CLI, we need a dev client to be installed in our app. To install it, execute the following command from the root of the project directory:
```bash theme={null}
npx expo install expo-dev-client
```
Once installed, log into your expo account using the following command:
```bash theme={null}
eas login
```
It'll ask for your username and password and log you in.
Now, we are ready to create our build of the app. Use the following command to create a development build of the app for the Android platform:
```bash theme={null}
eas build --profile development --platform android
```
If expo asks if you want to automatically create an EAS project for your app, choose yes. Do the same when it asks you if you want to generate a new keystore.
Do not change the Android package name, even if EAS asks you to!
## Setting up Firebase
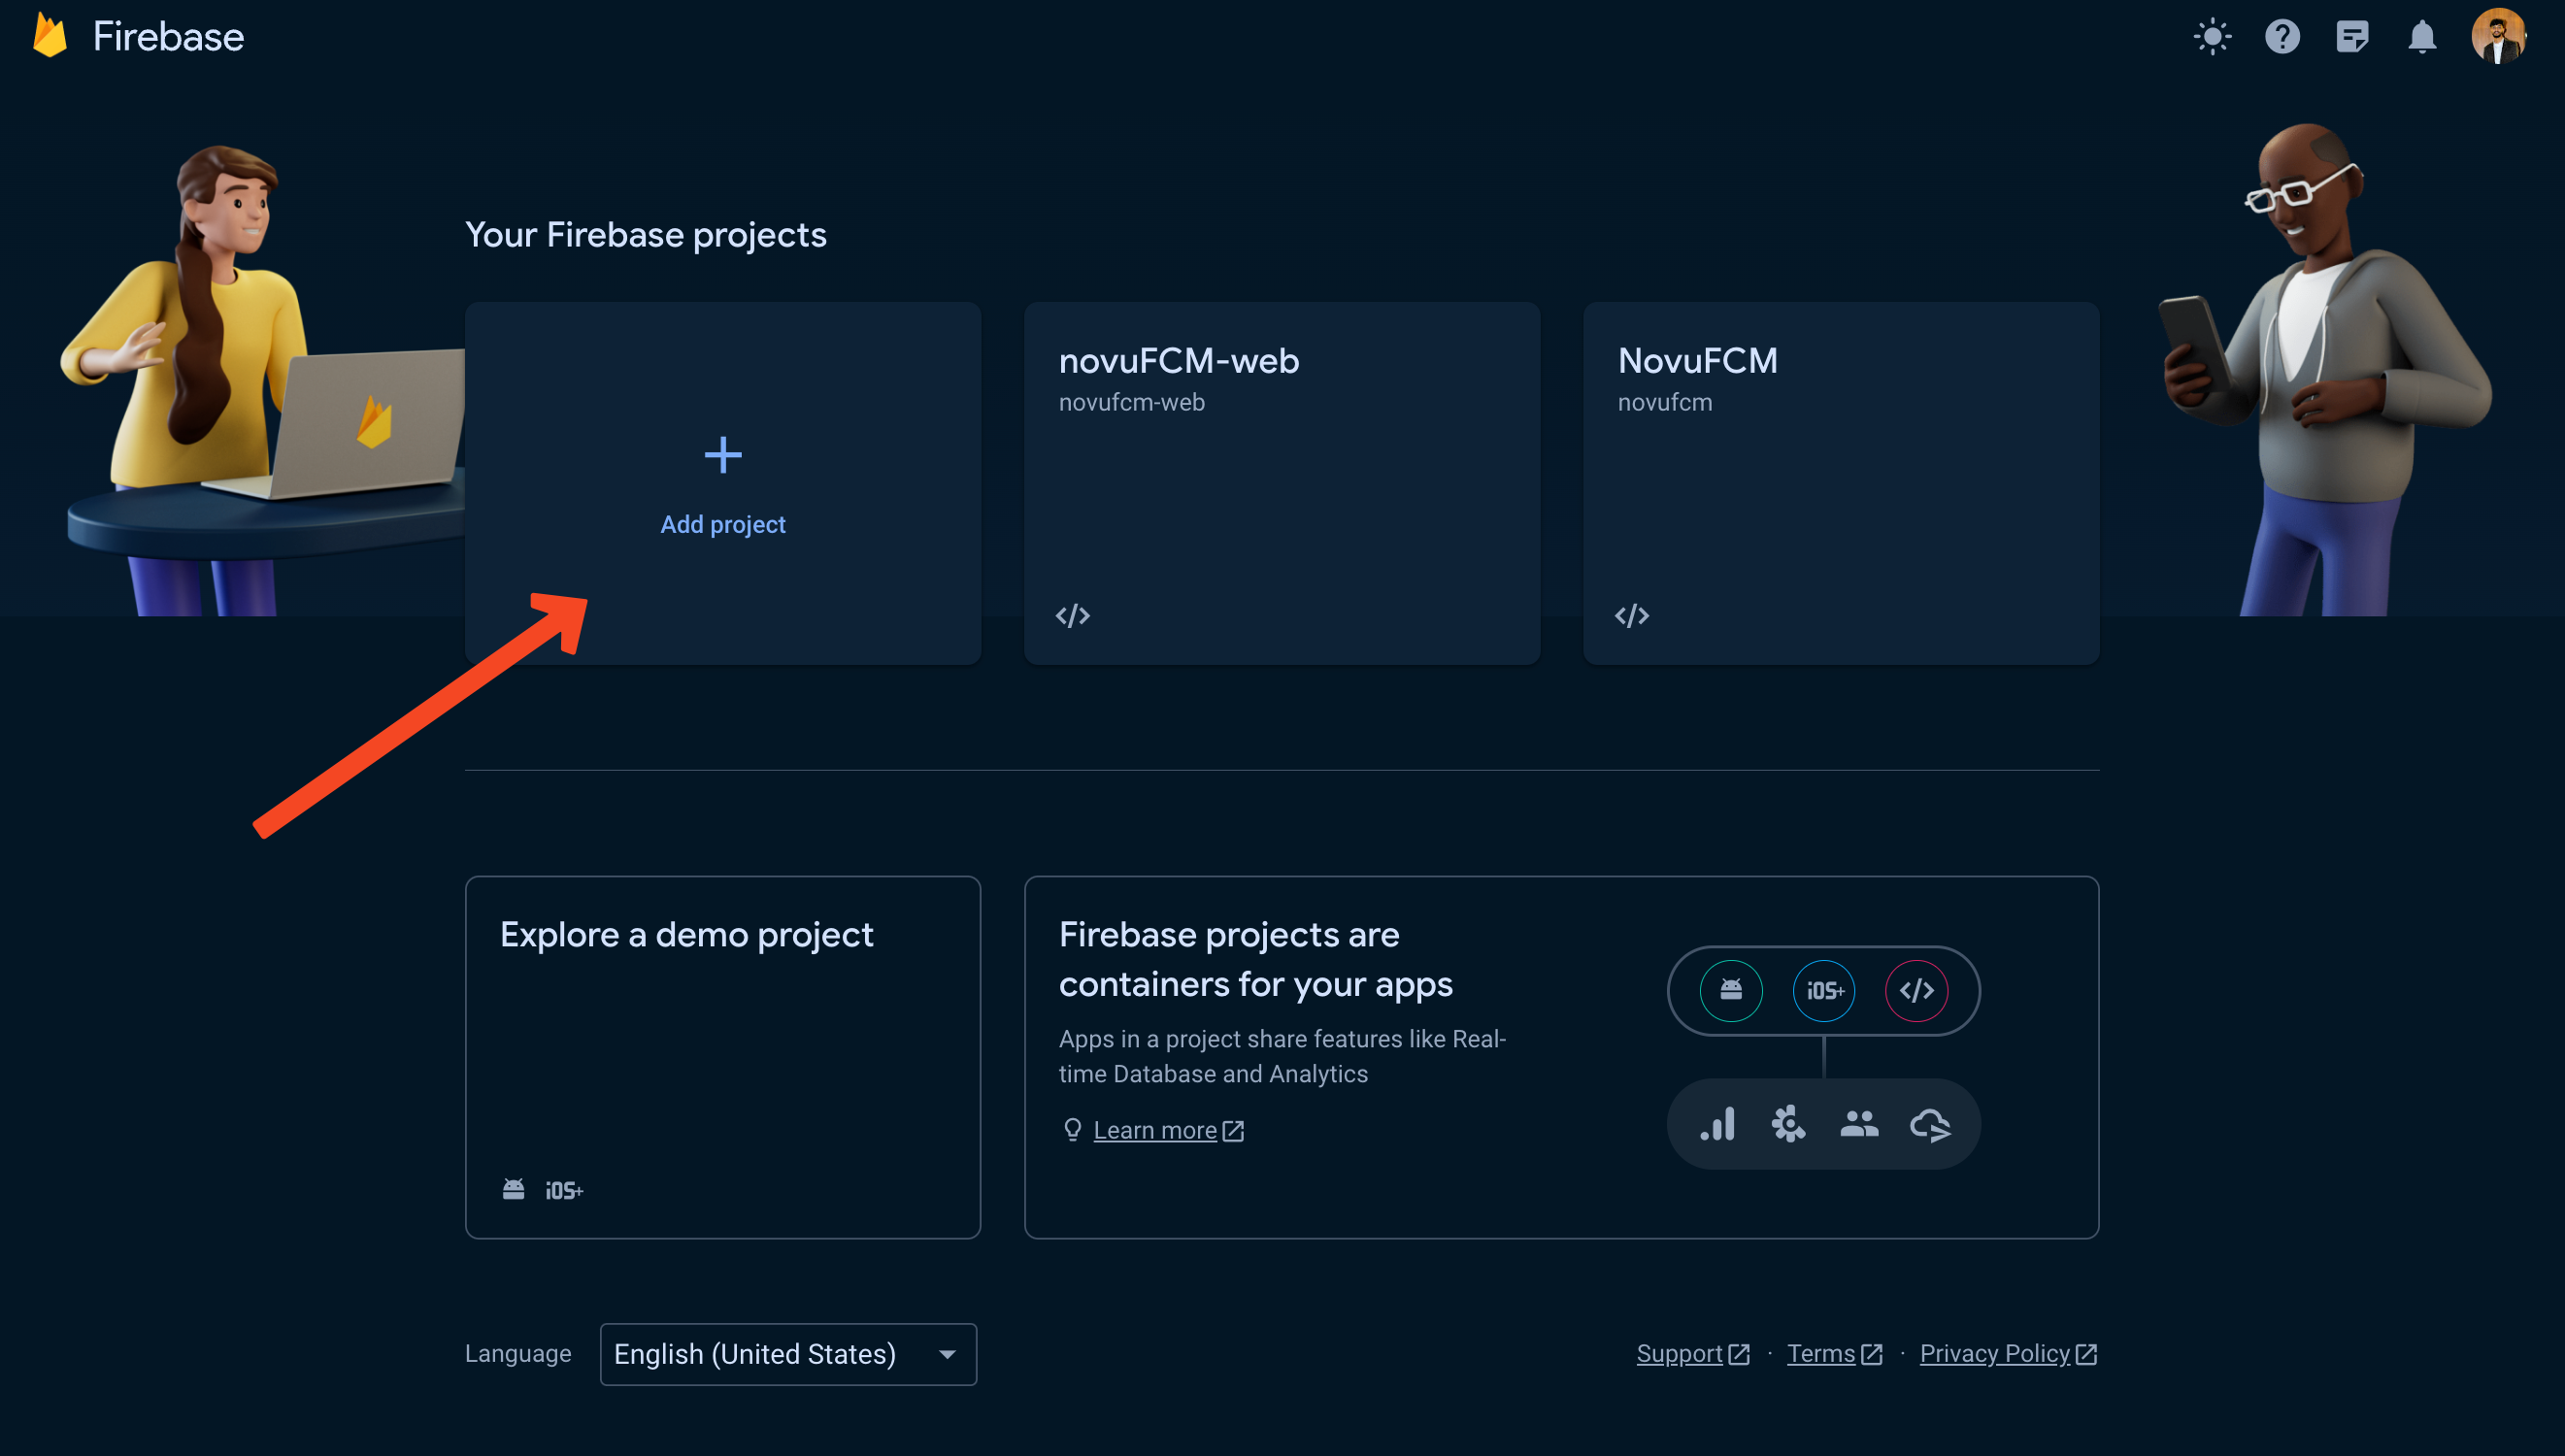
1. Create a Firebase account if you don't already have one. Then, create a new project and all the relevant details.
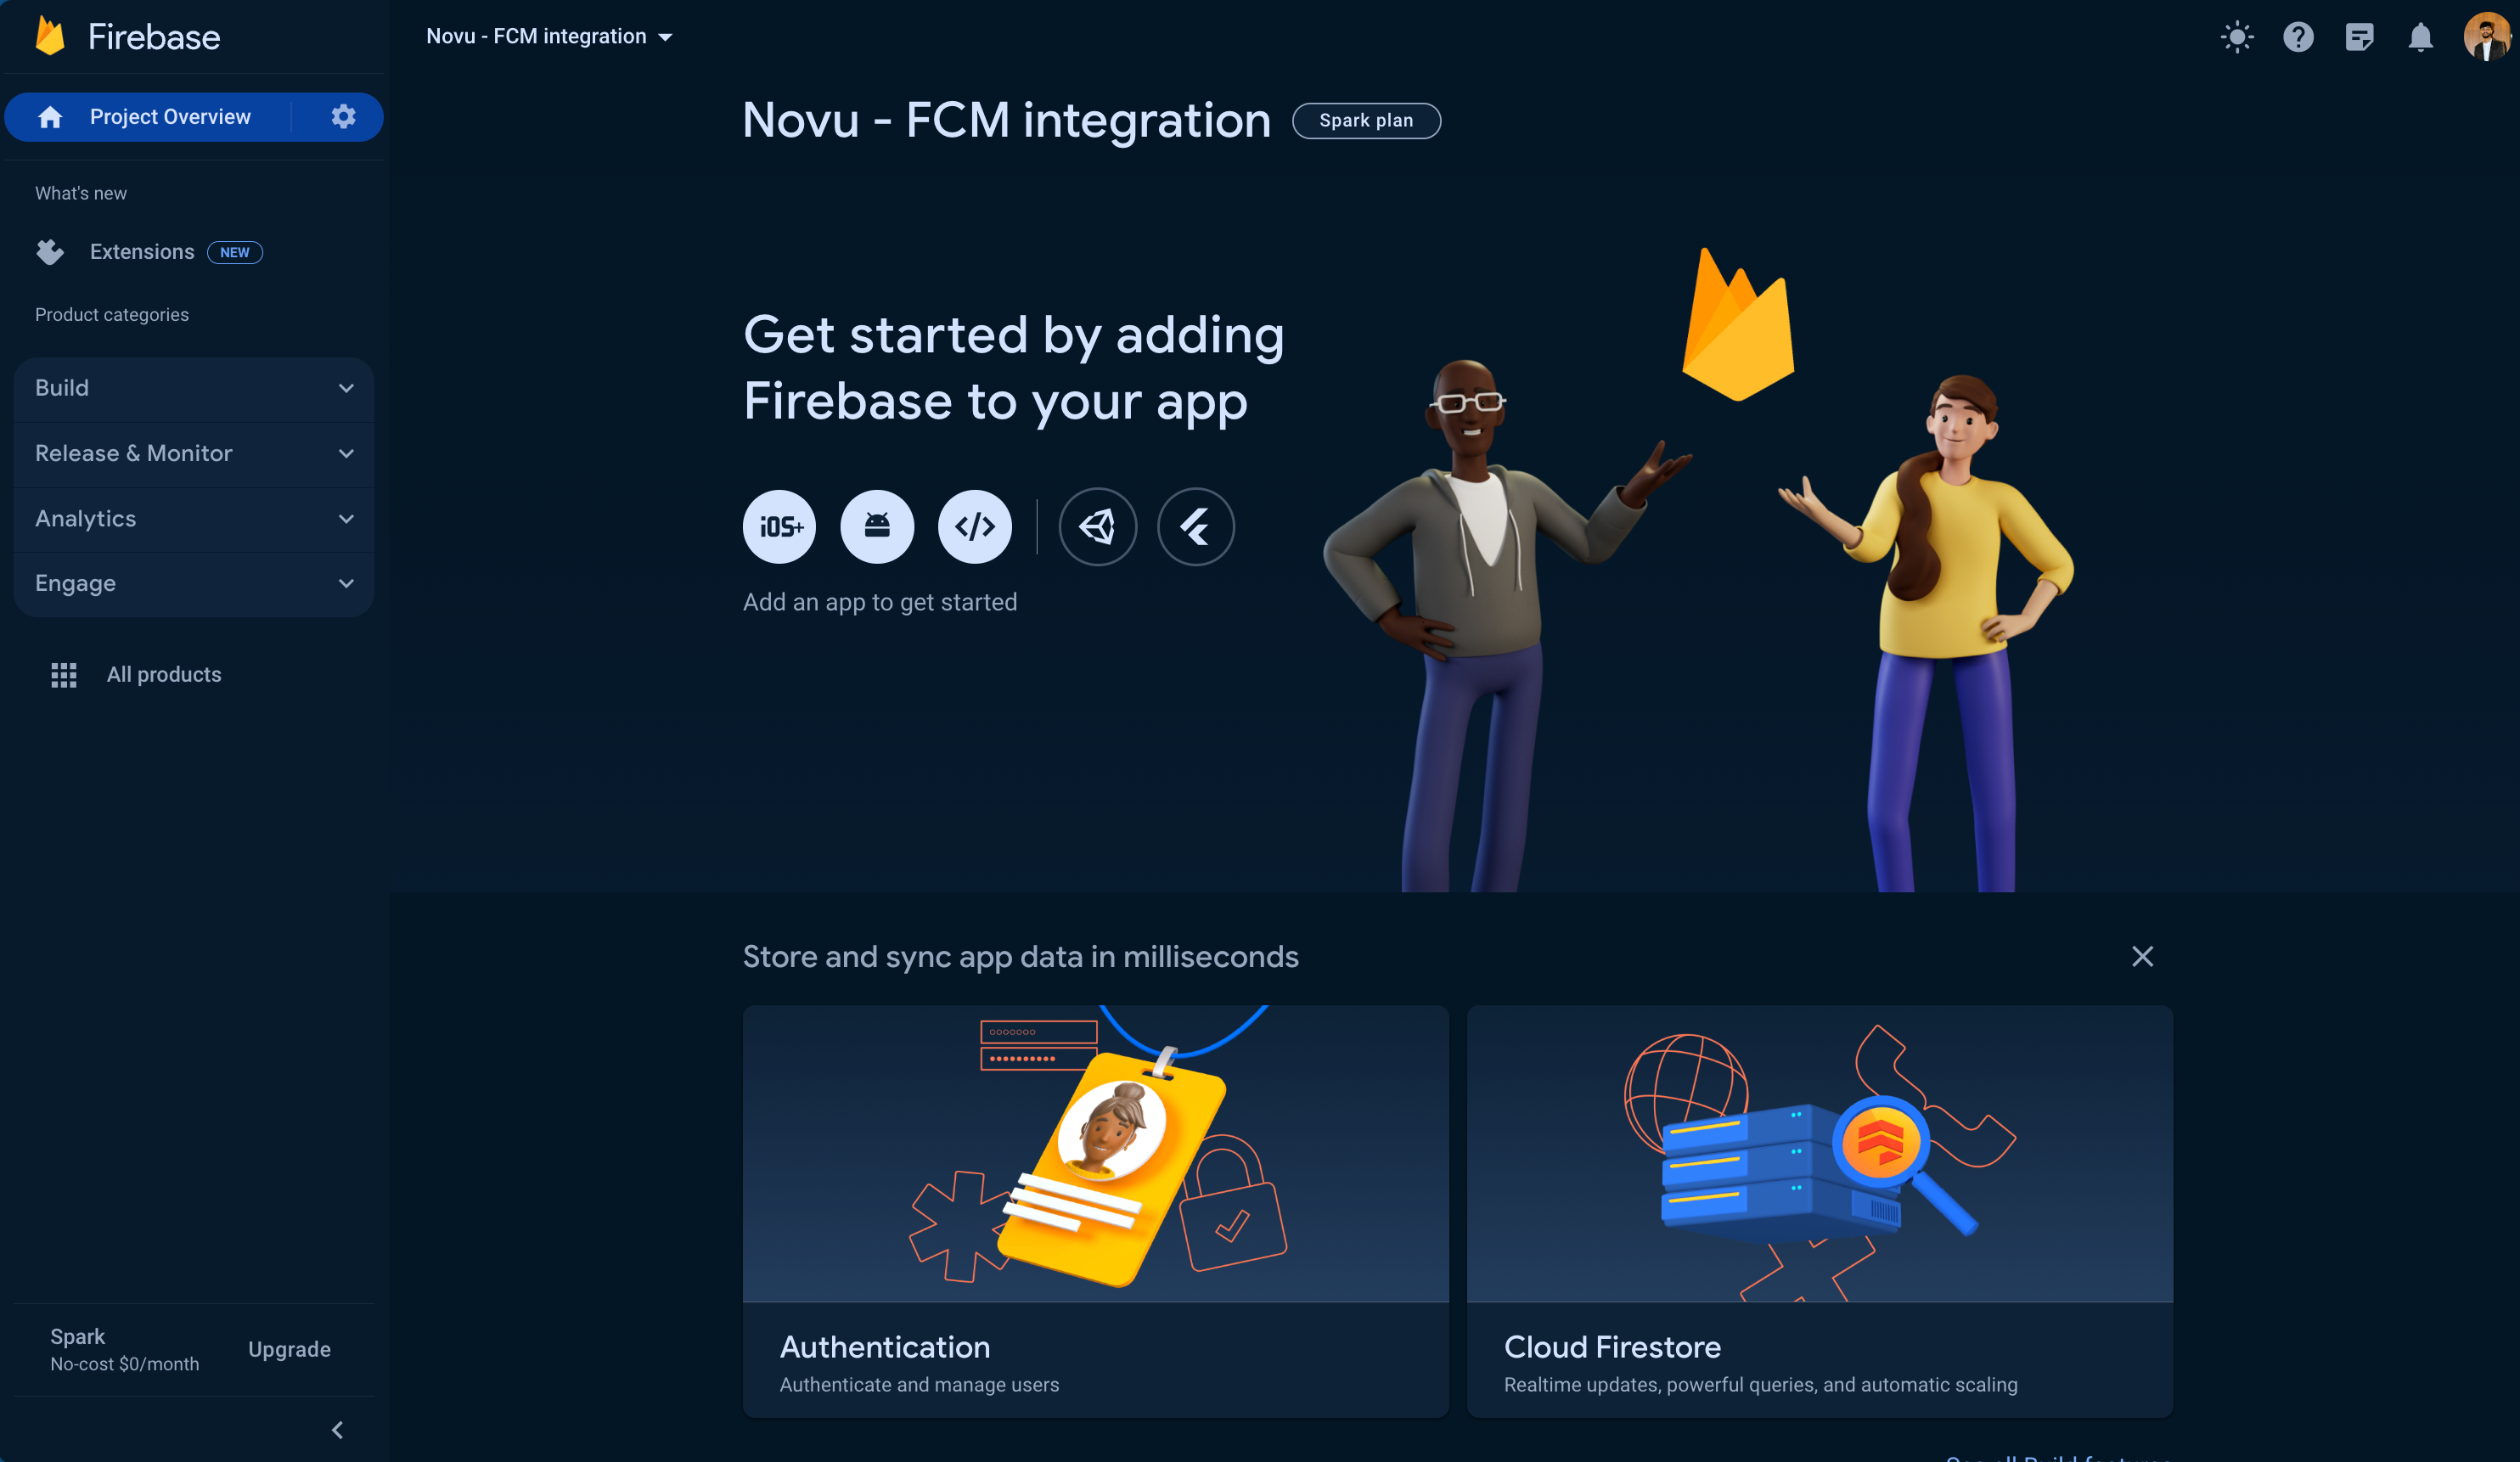
 2. Once your project has been created, you'll be greeted with this welcome screen and asked to add Firebase to your app, so let's do that.
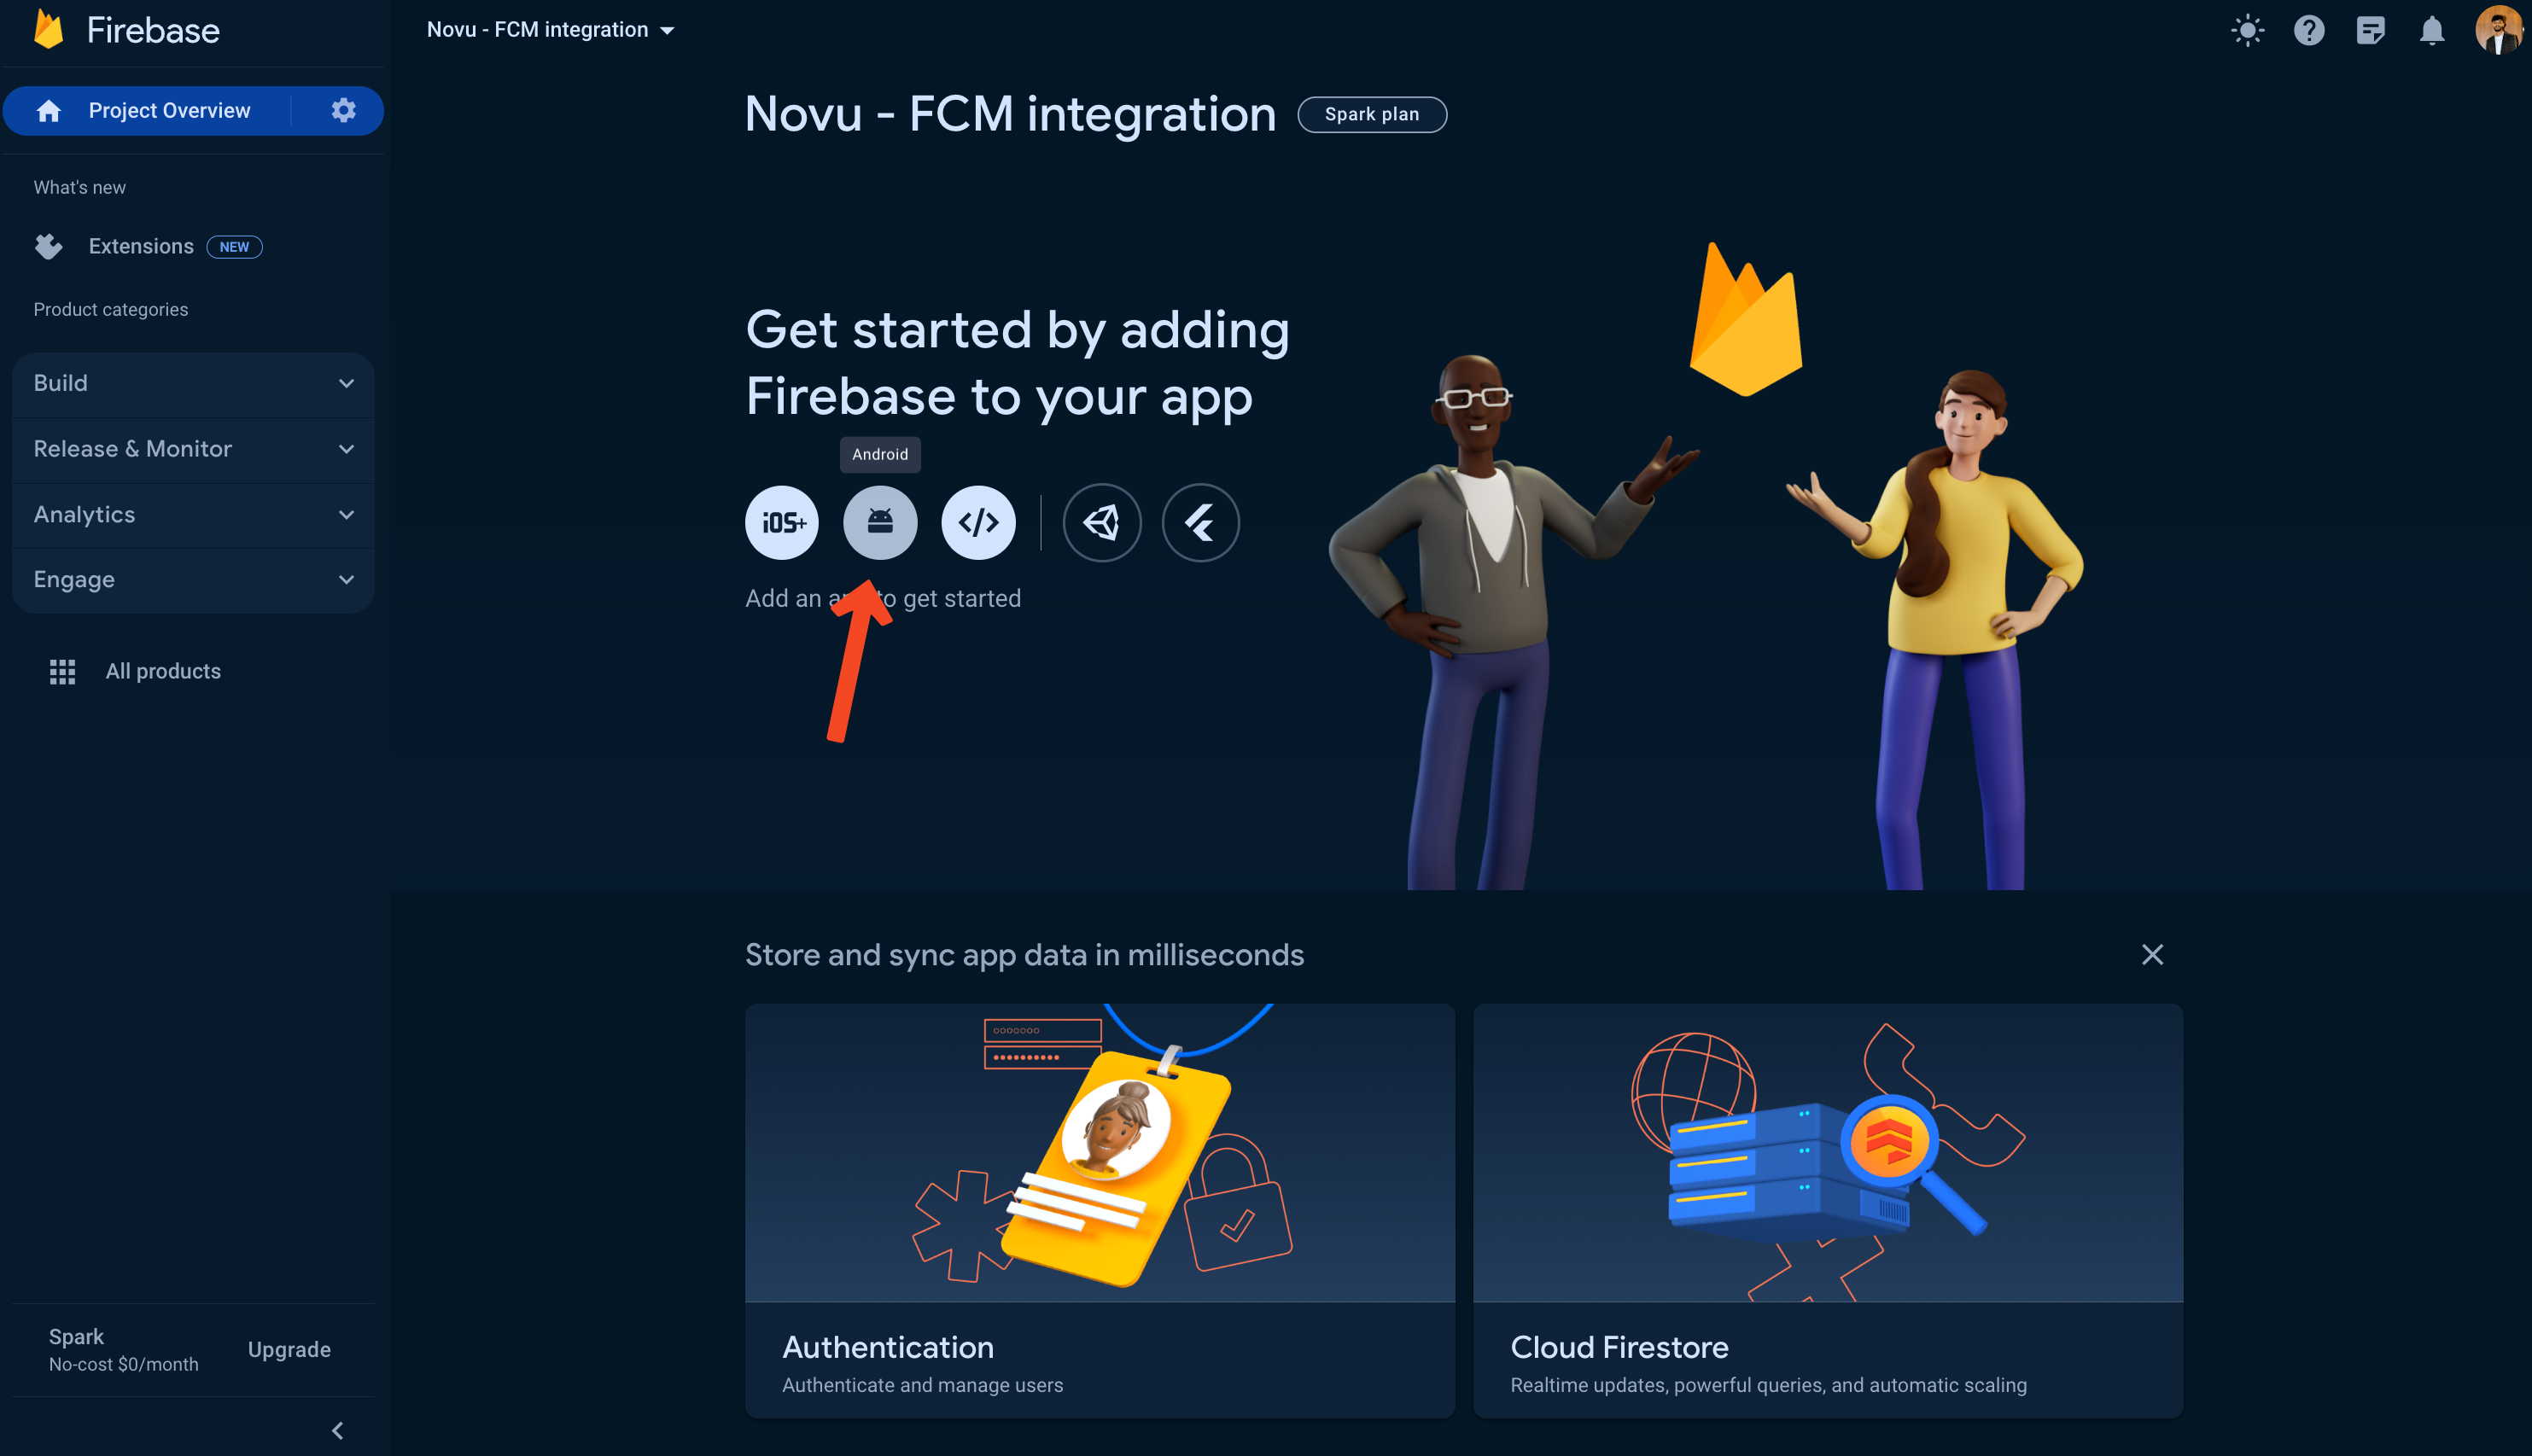
 3. We'll choose the 'Android' option because we're creating an Android app.
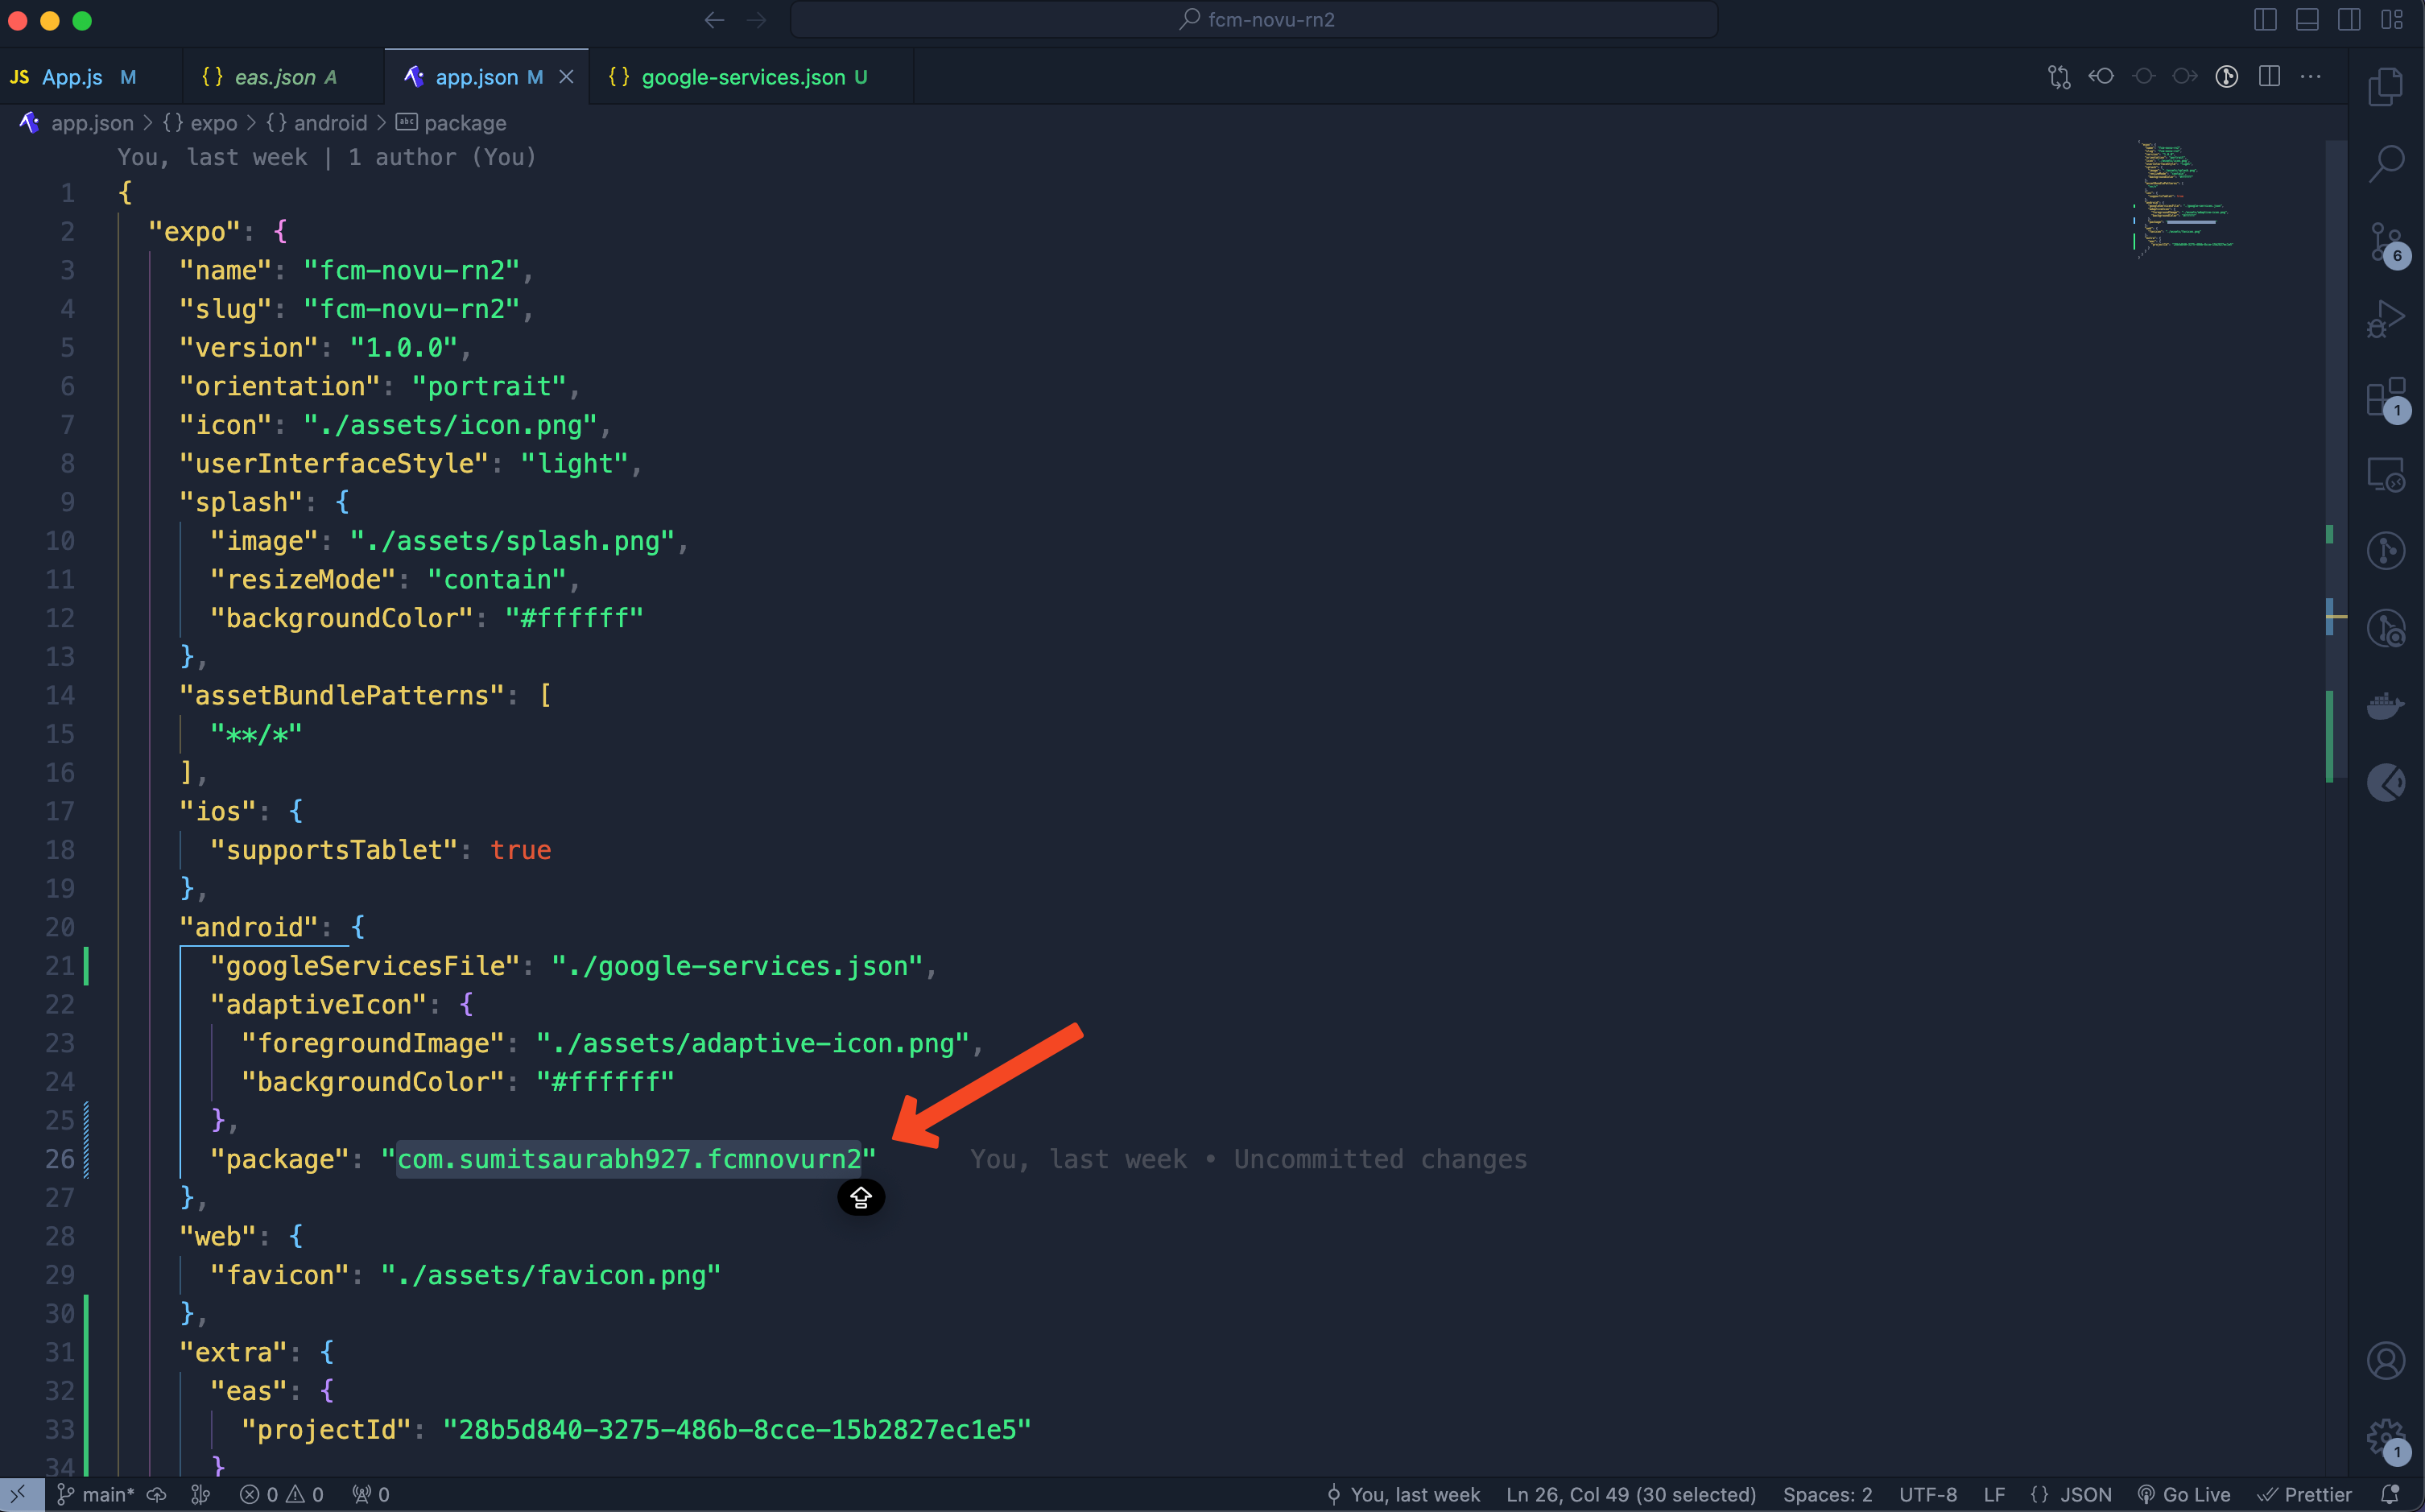
 4. Find the package name from the `app.json` file of the project:
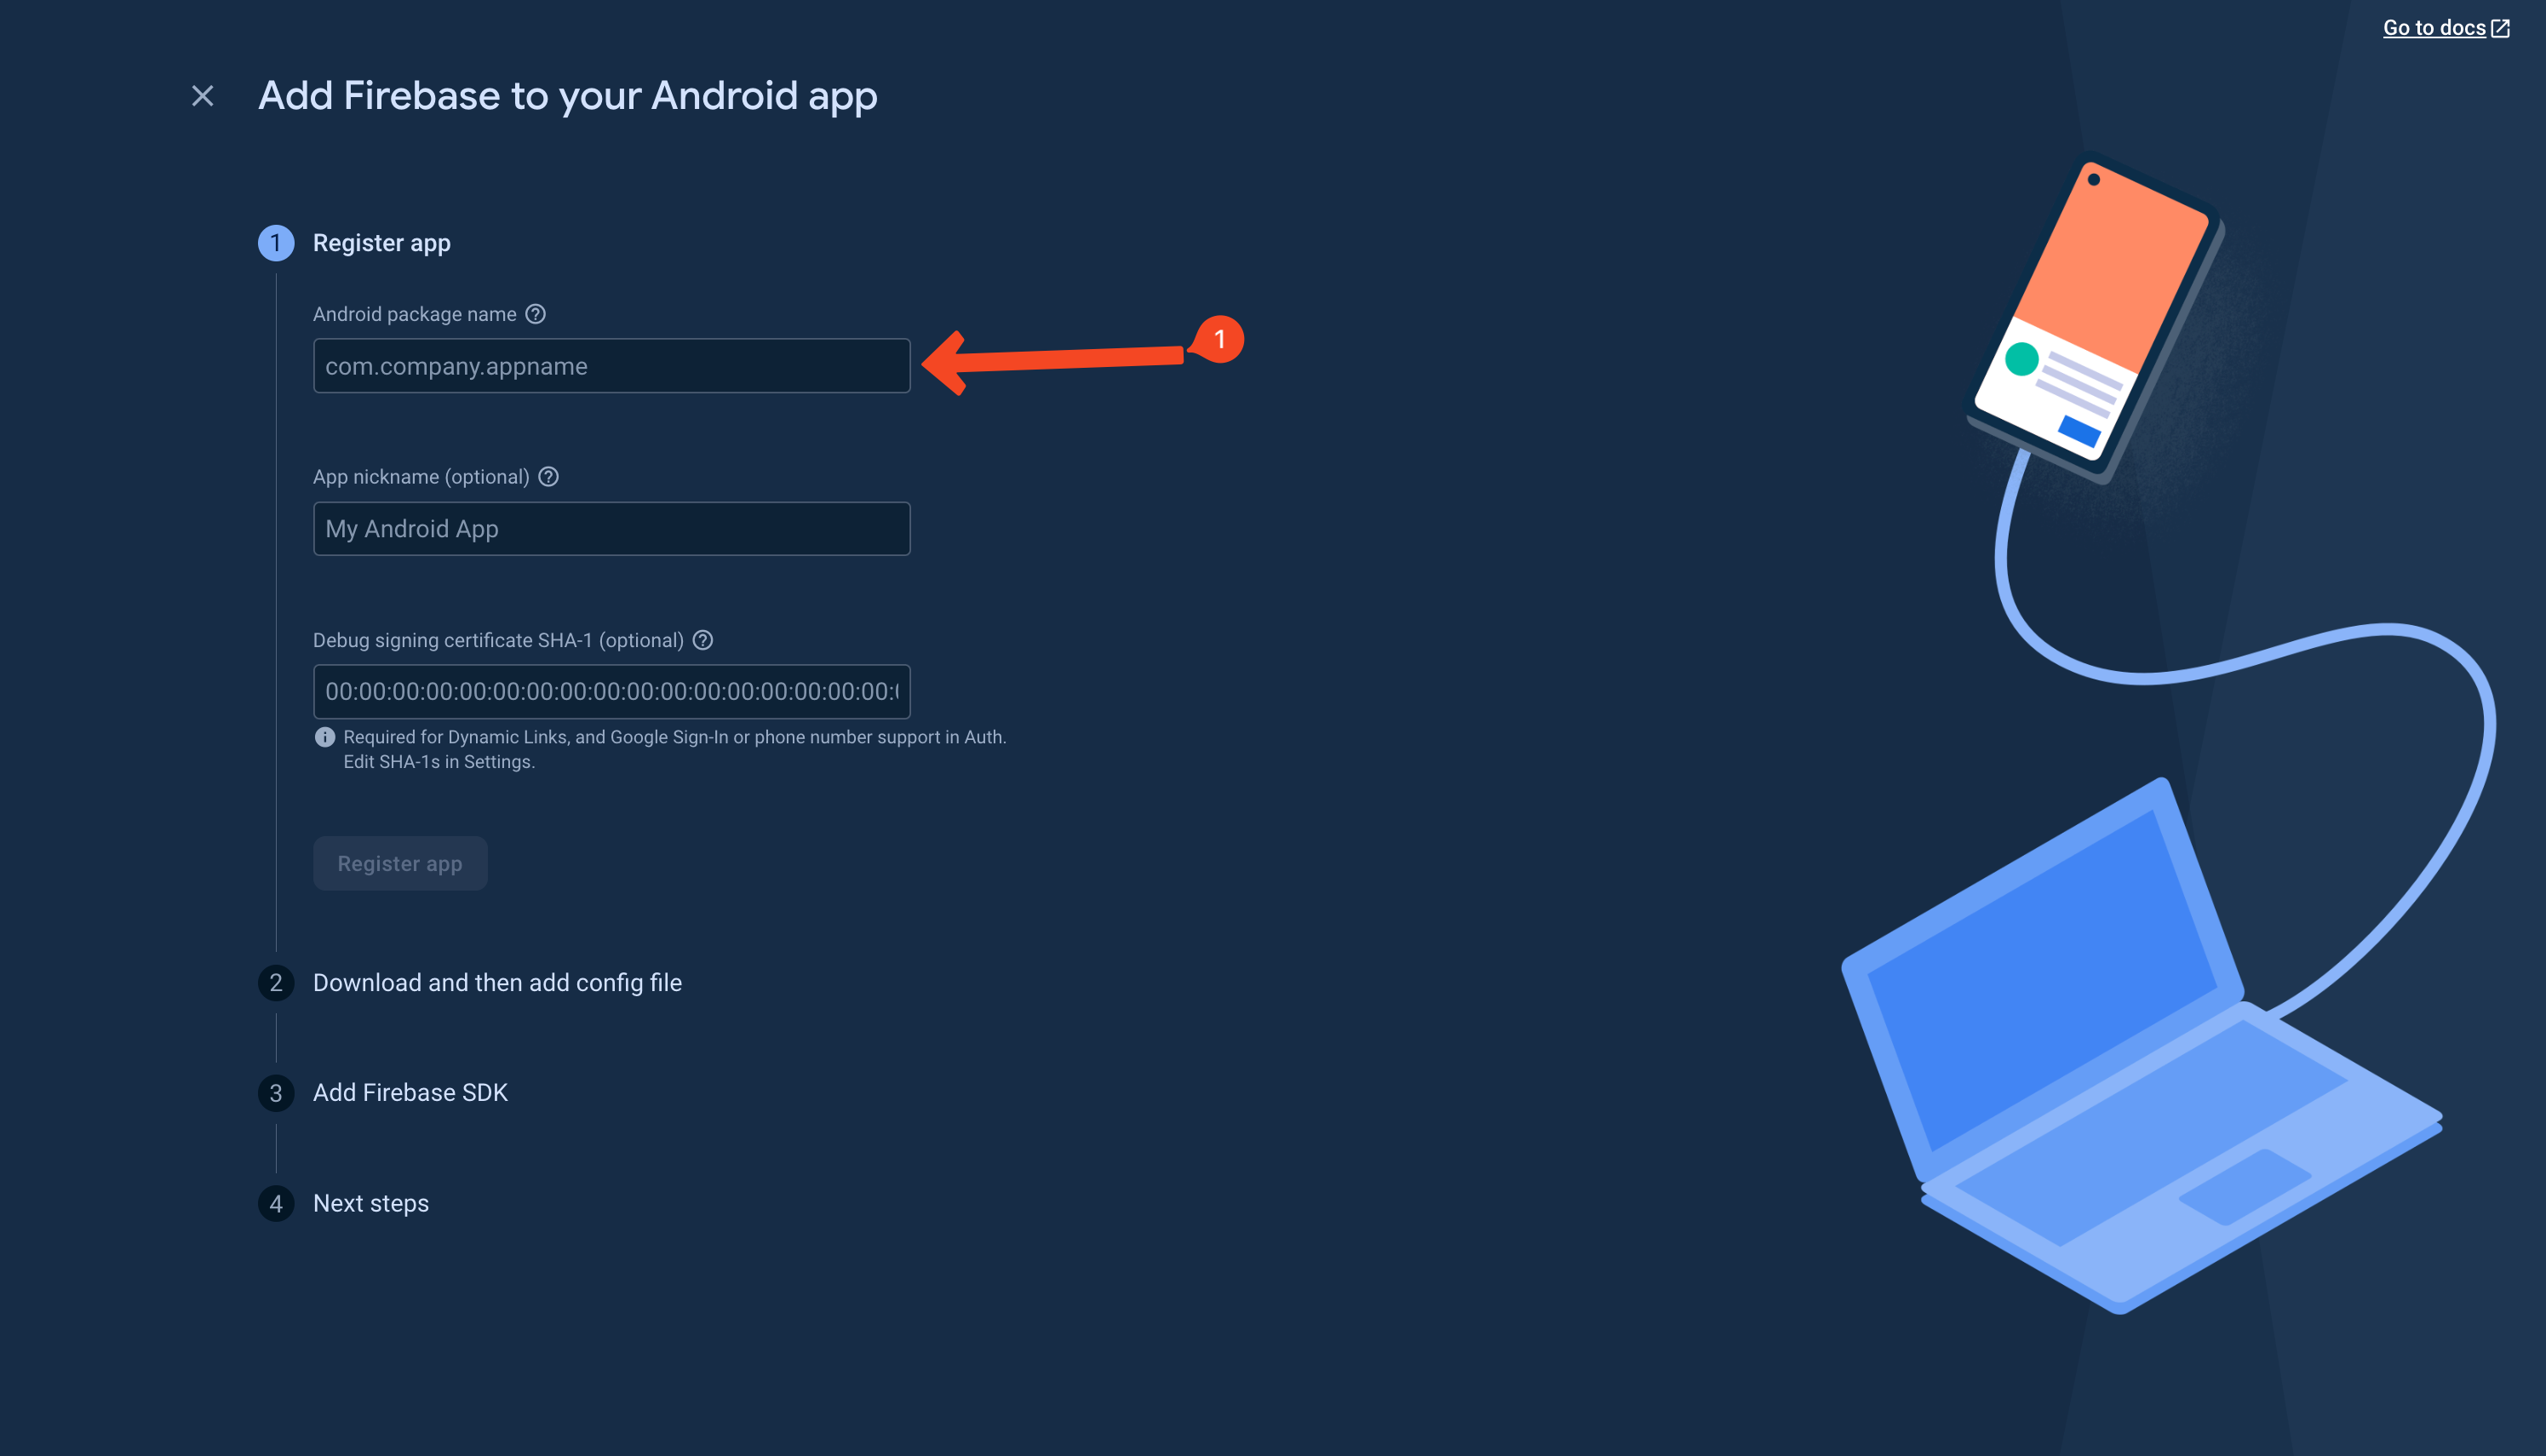
 5. Add this package name to Firebase:
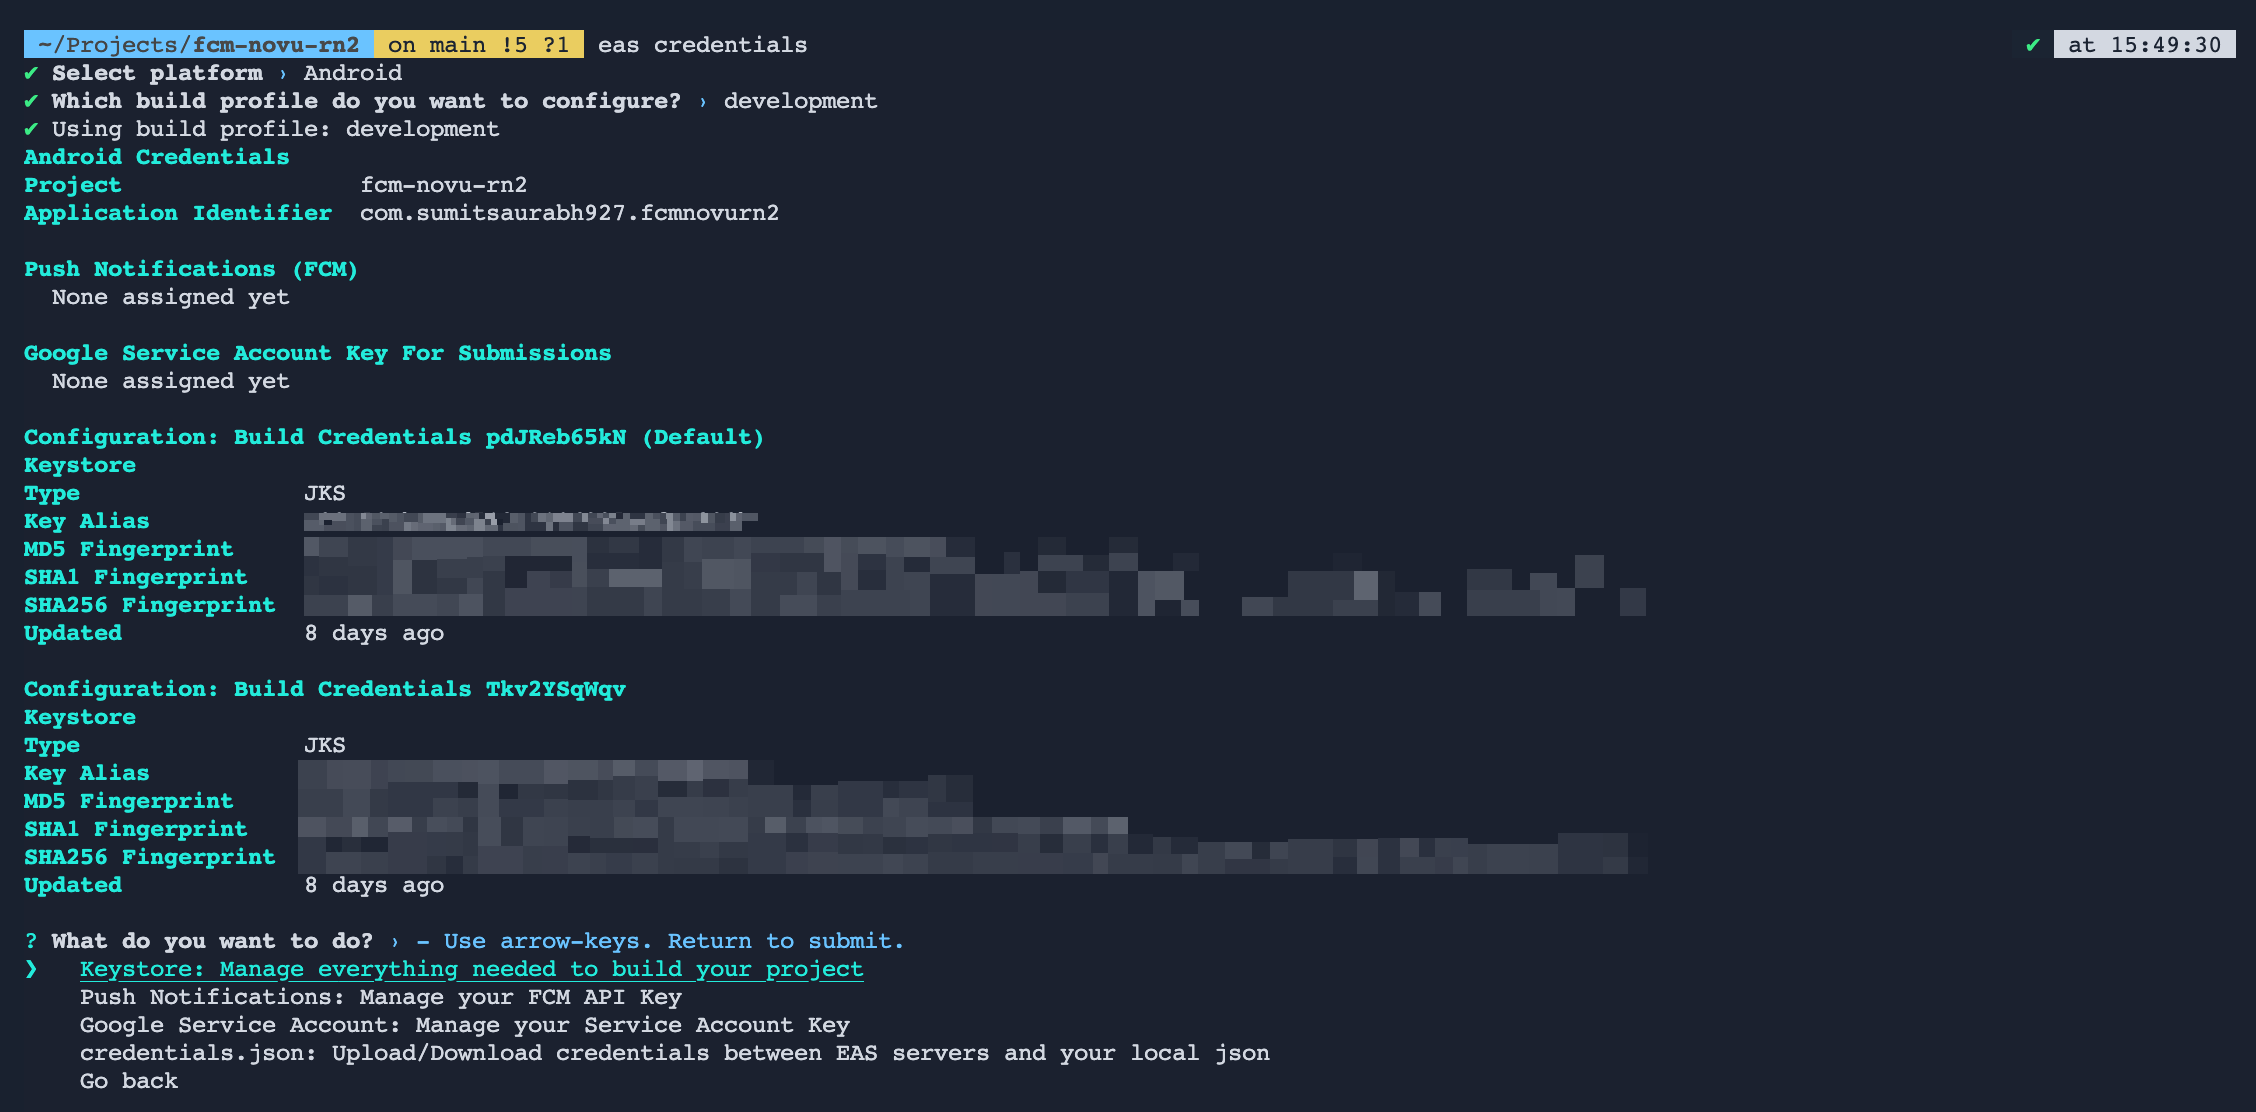
 6. Now, we need to add `SHA1` keys from our project to the Firebase app. Run the following command to obtain `SHA1` key. We'll get two `SHA1` keys, one of which we'll add to Firebase right now and the other one, later on.
```bash theme={null}
eas credentials
```
If it asks you to, choose the 'Android' platform then 'Development' build then 'Keystore' then 'Set up a new keystore' then 'Select Build Credentials' and then 'Create a new build credential configuration'.
6. Now, we need to add `SHA1` keys from our project to the Firebase app. Run the following command to obtain `SHA1` key. We'll get two `SHA1` keys, one of which we'll add to Firebase right now and the other one, later on.
```bash theme={null}
eas credentials
```
If it asks you to, choose the 'Android' platform then 'Development' build then 'Keystore' then 'Set up a new keystore' then 'Select Build Credentials' and then 'Create a new build credential configuration'.
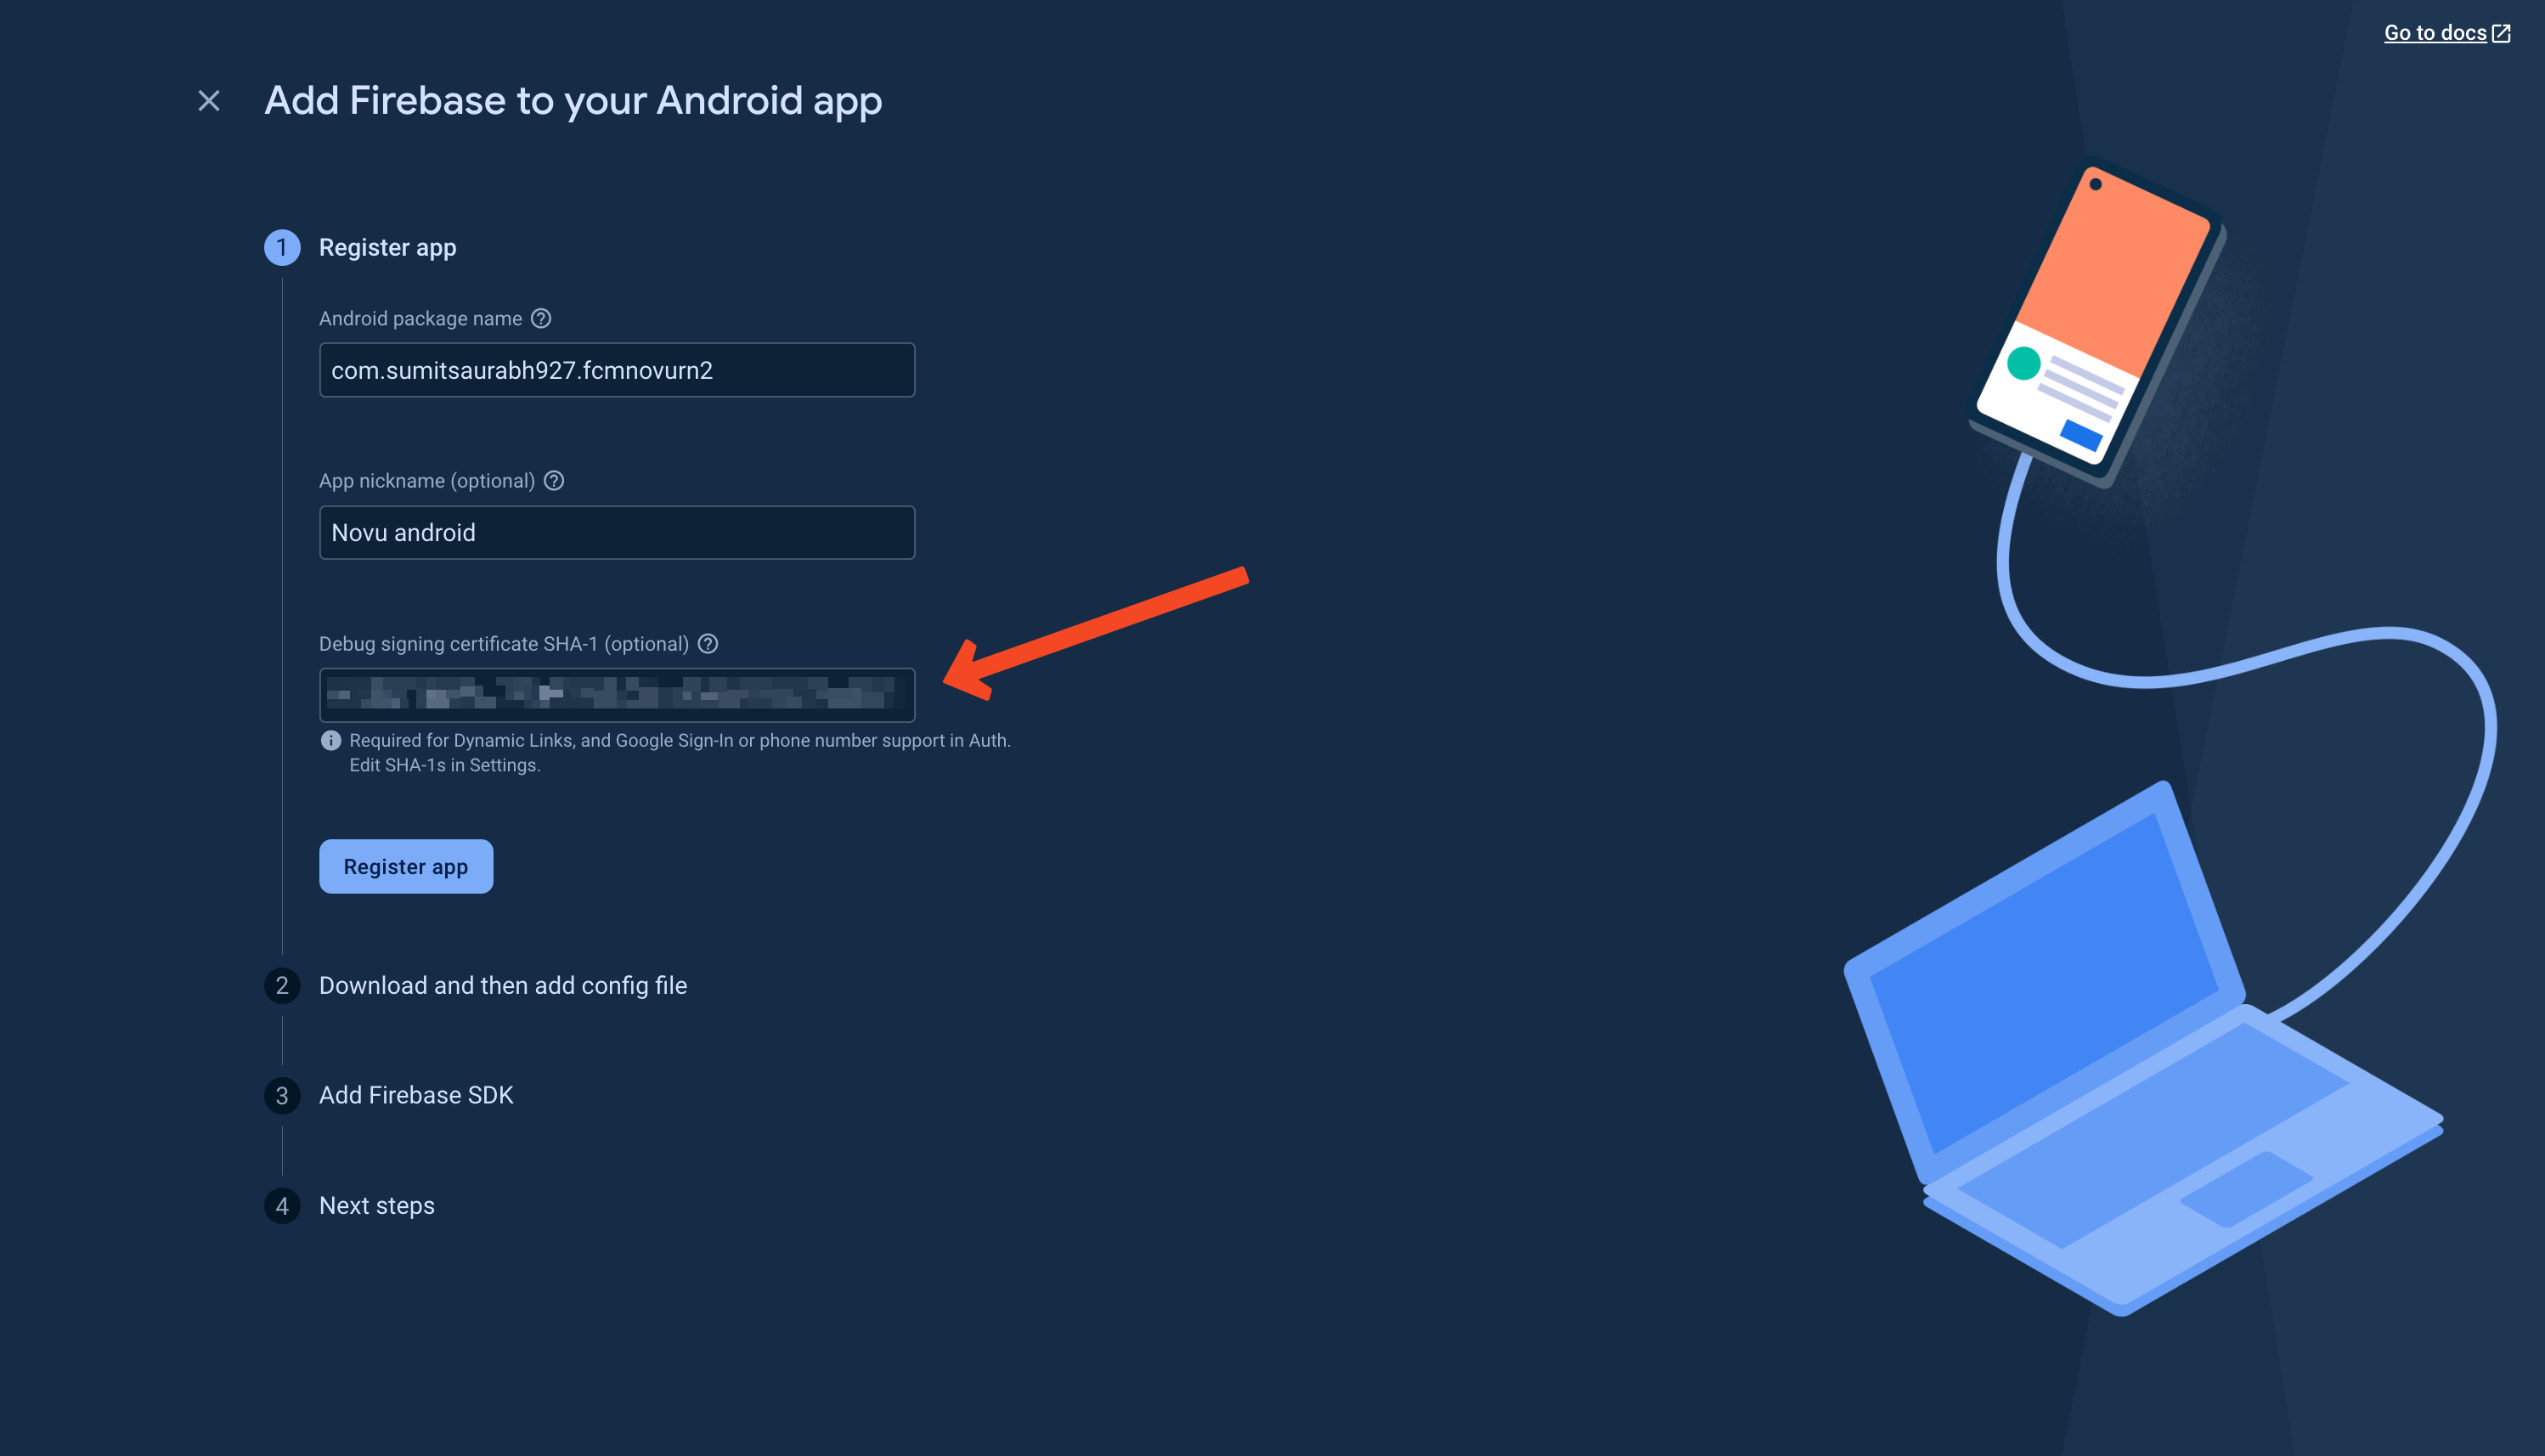
 7. Now copy the `SHA1` key and add it to Firebase and register the app:
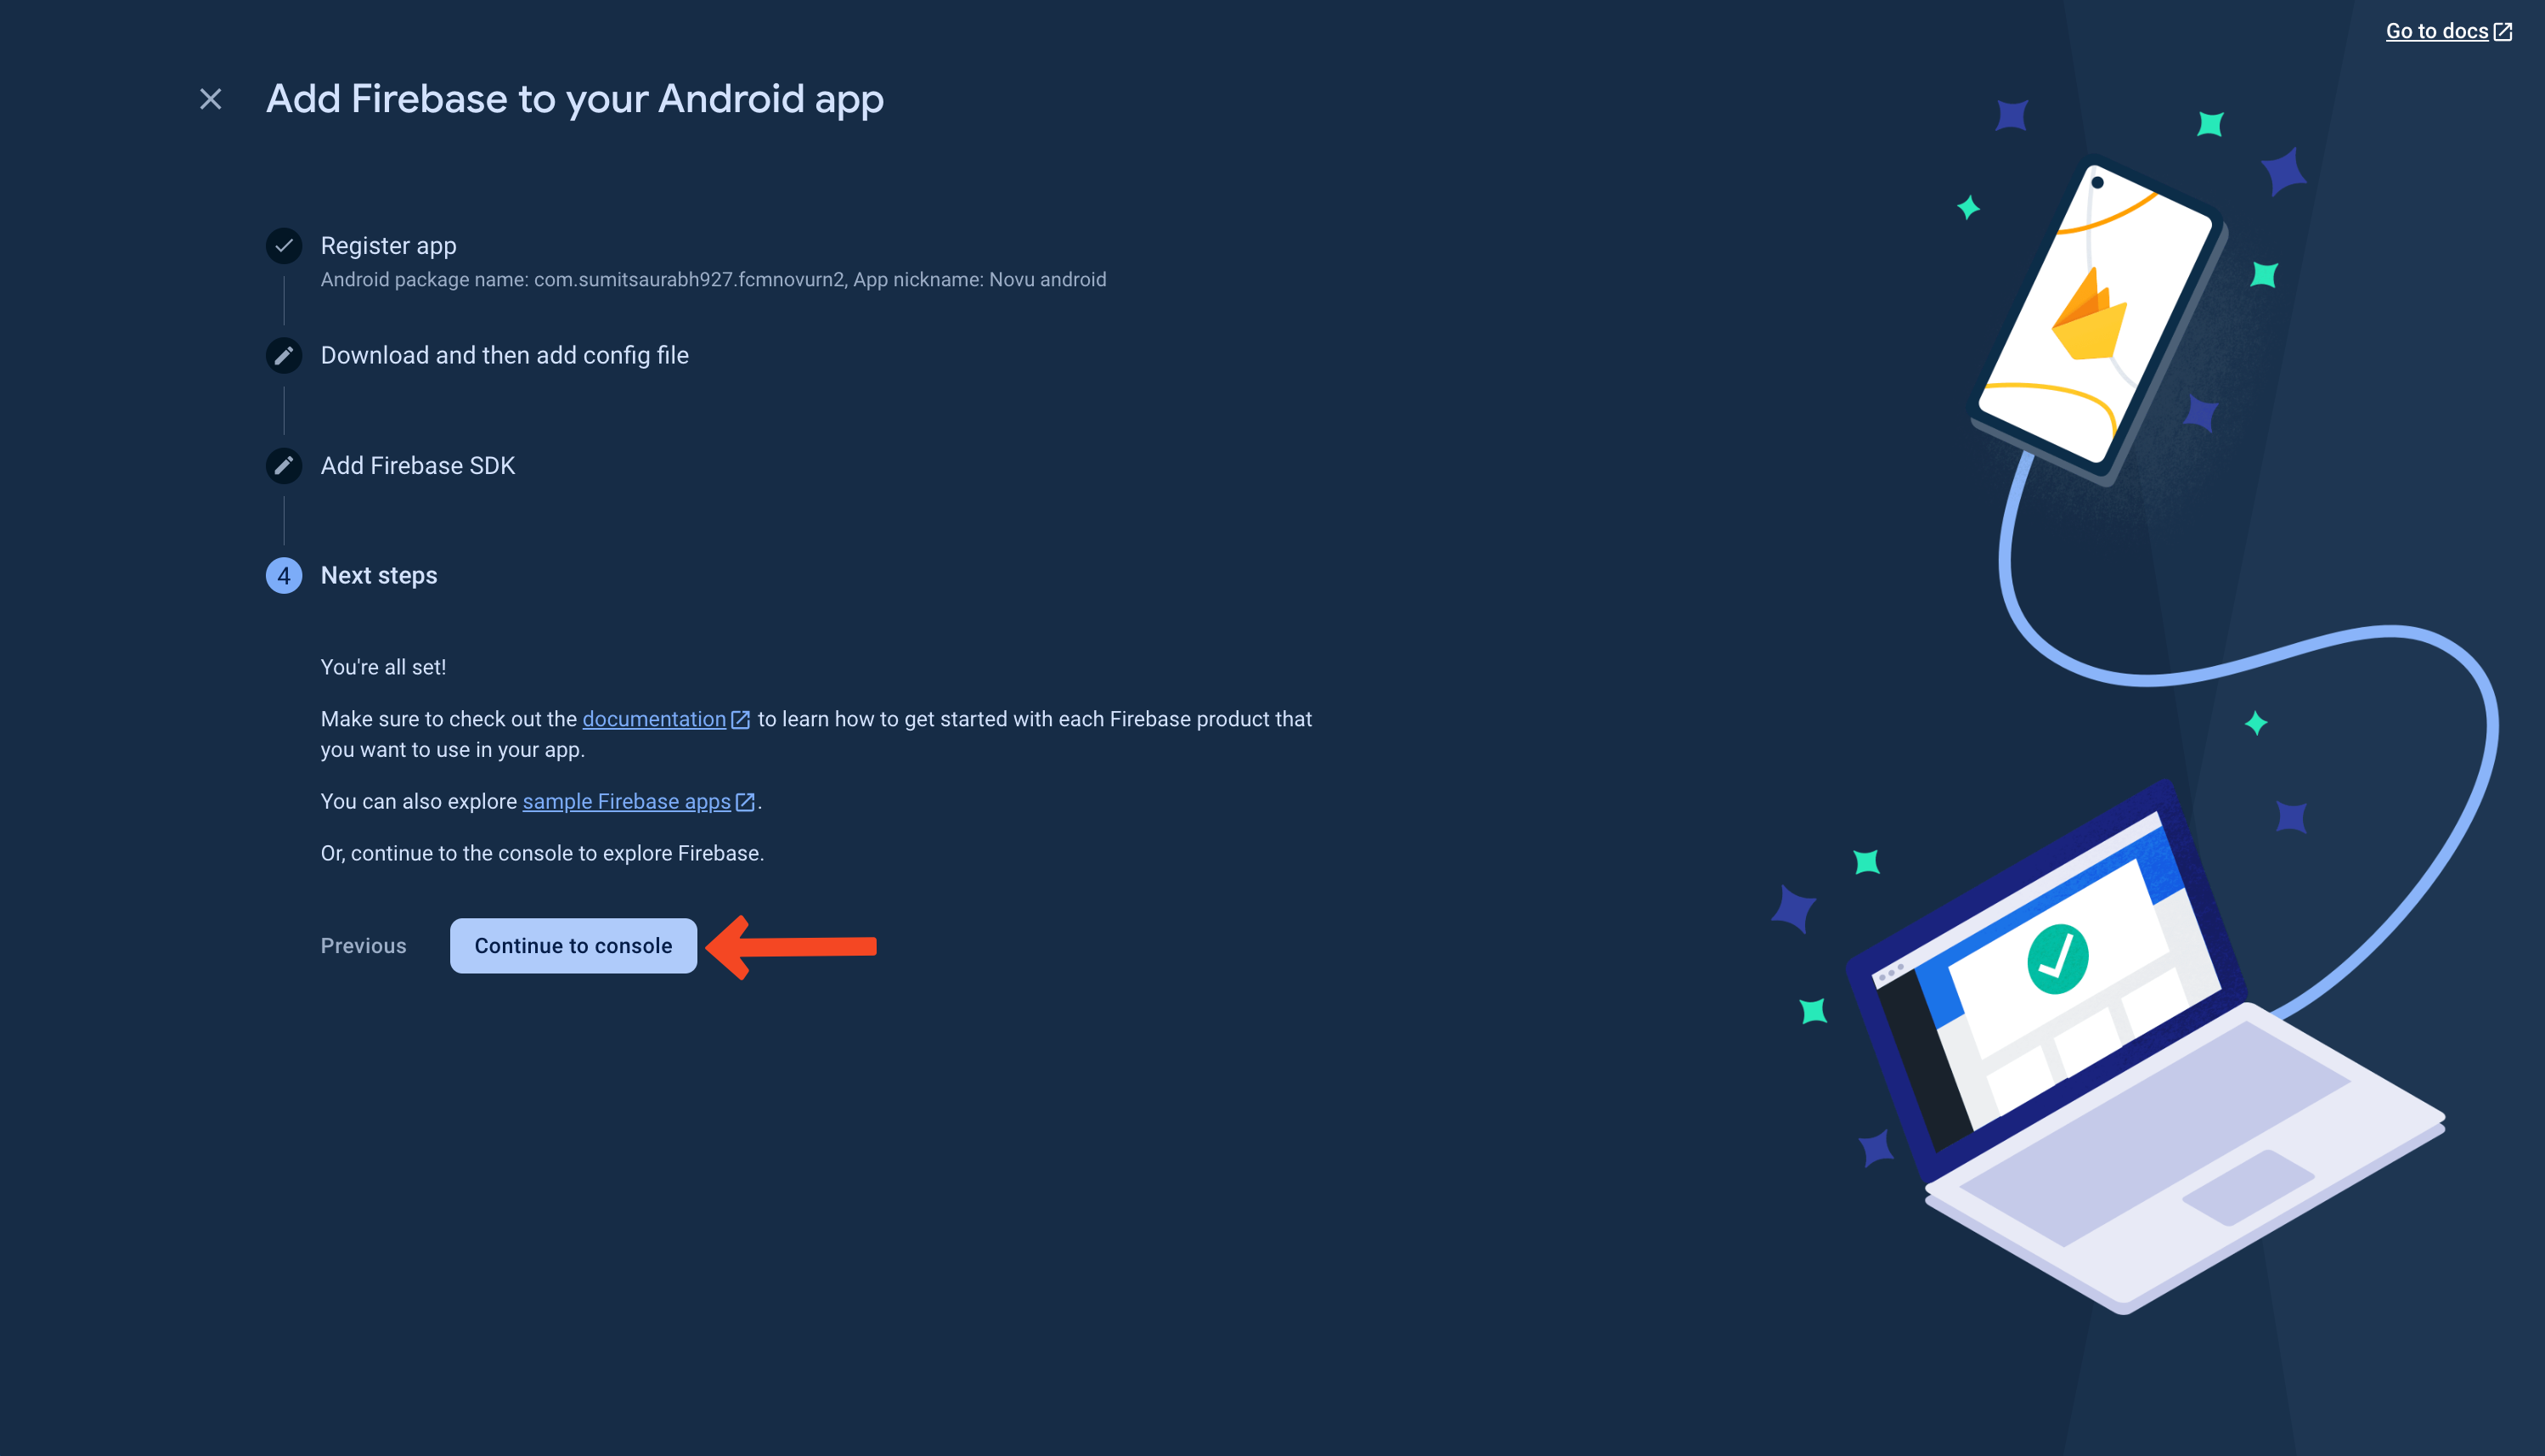
 8. Click 'next' on all the other options and finally click 'continue to console' as follows:
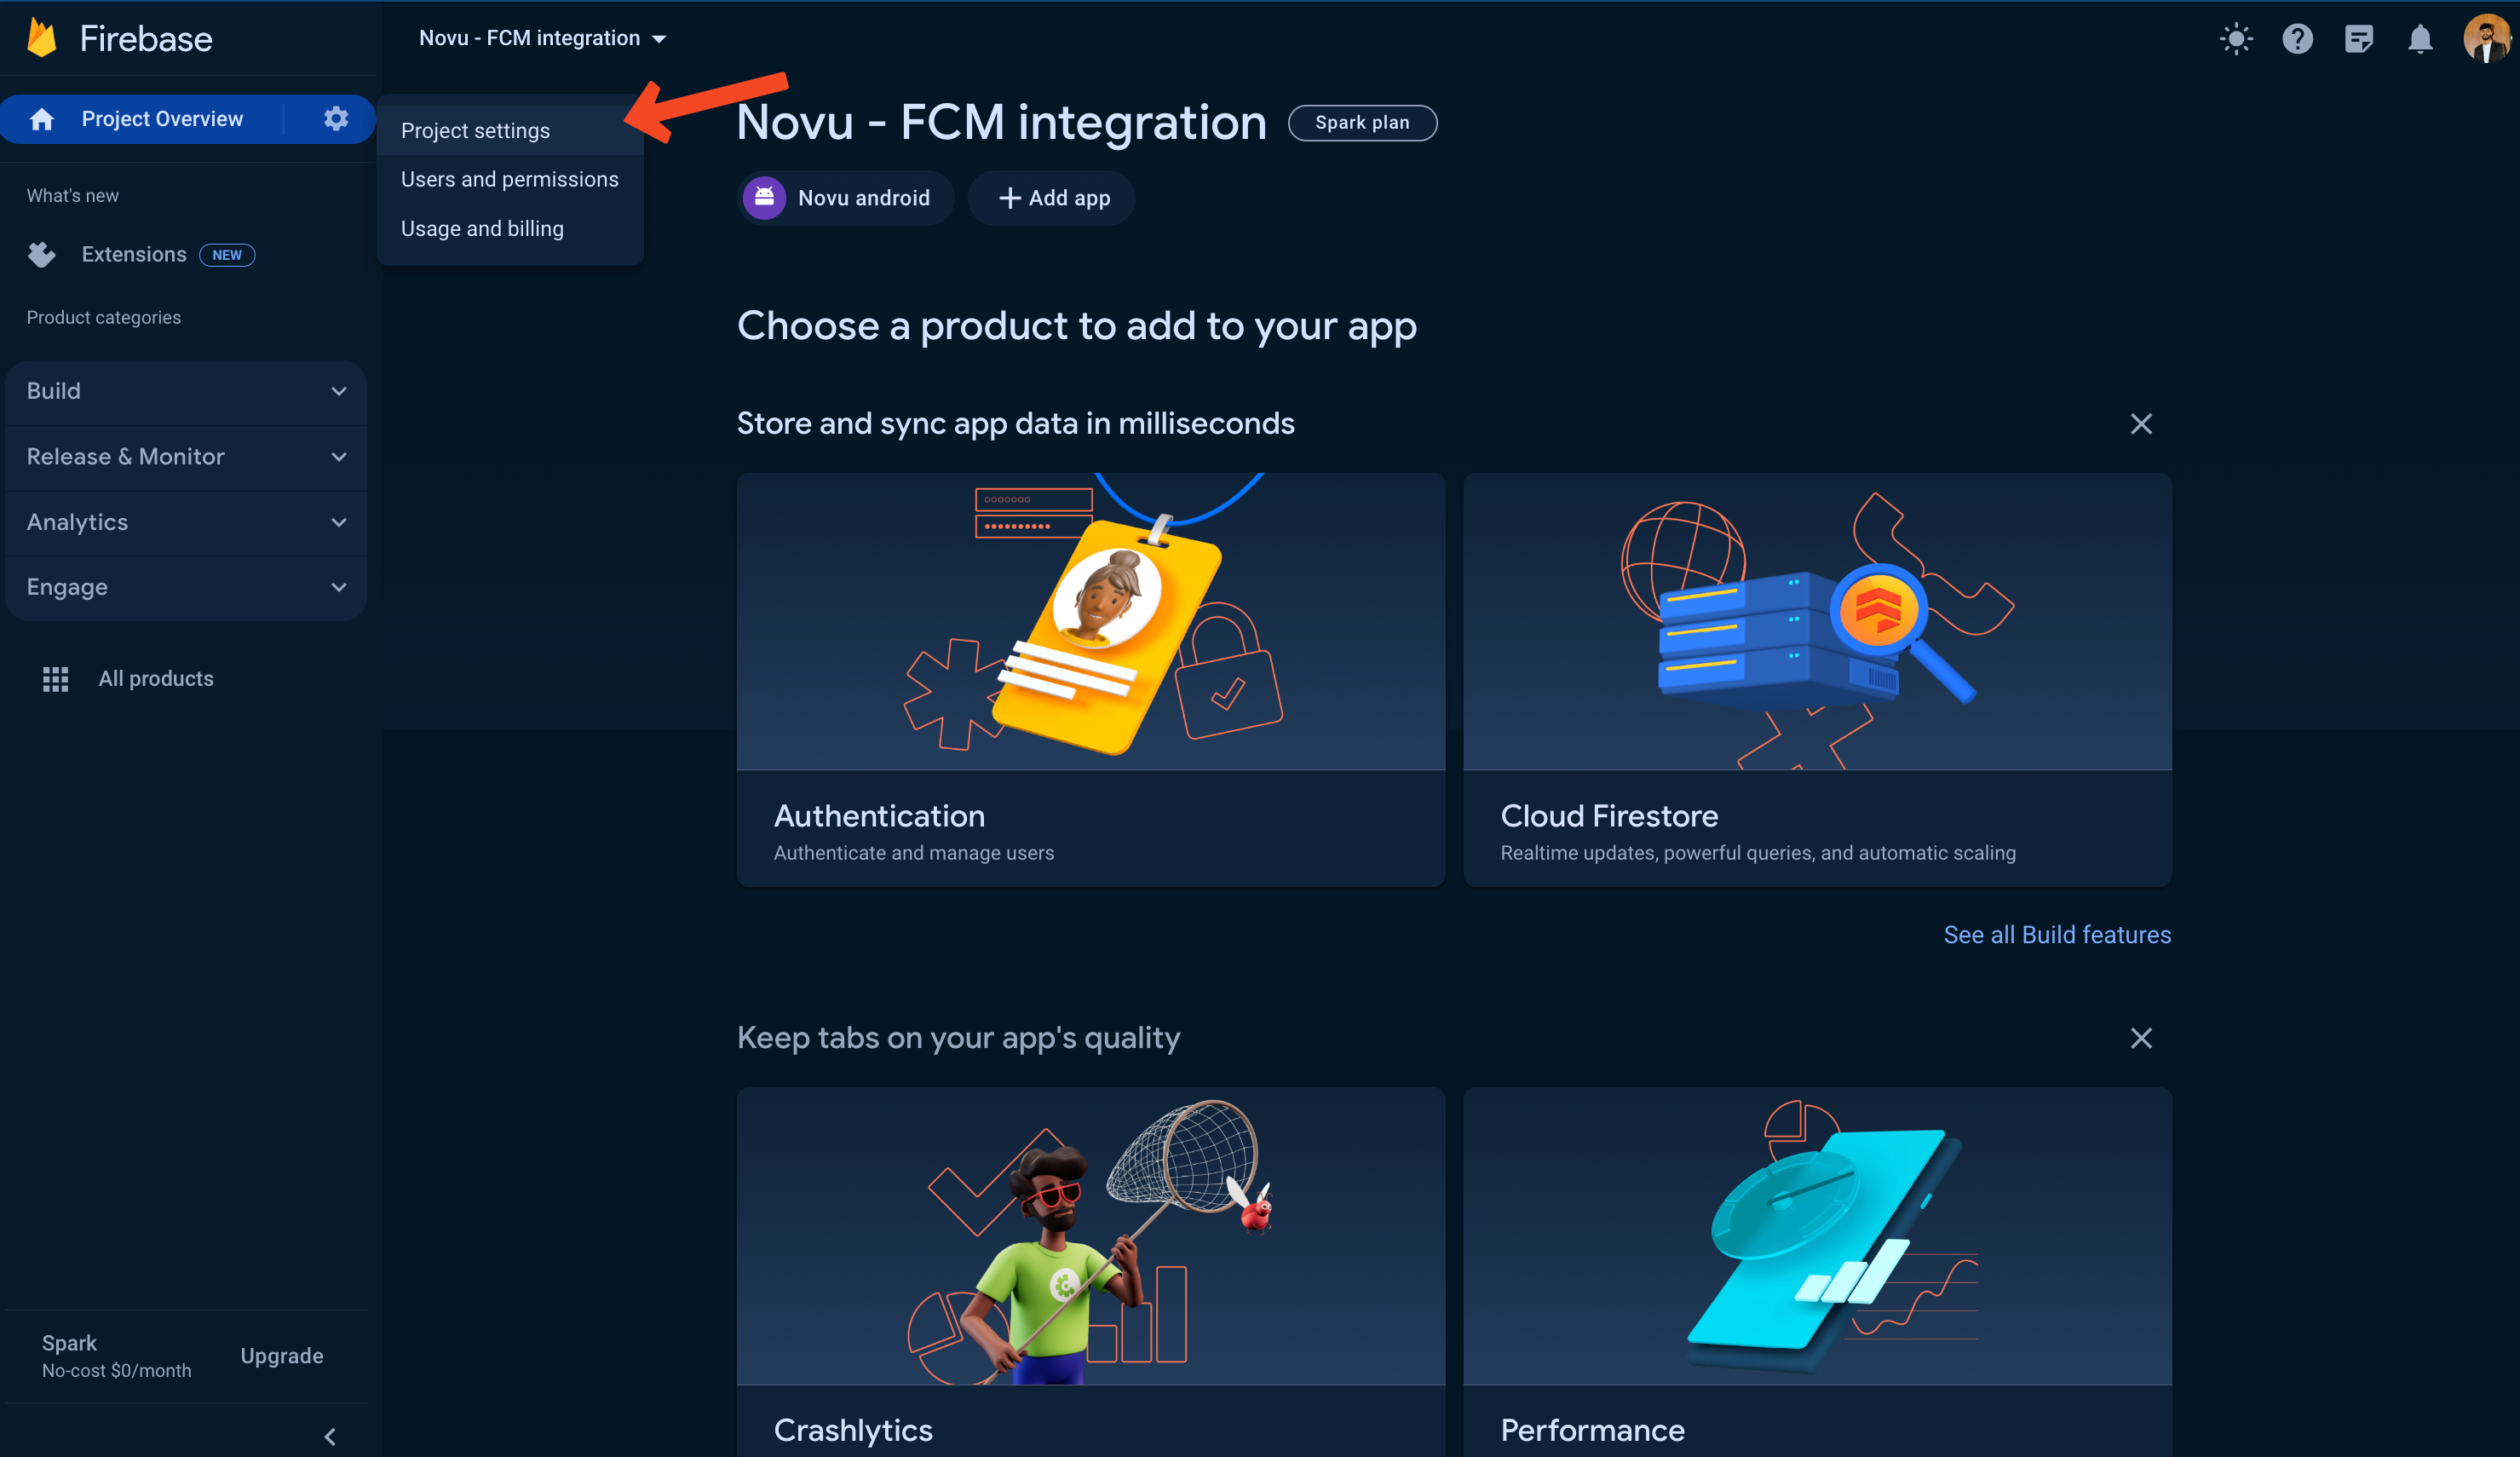
 9. Go to 'project settings' and scroll all the way down
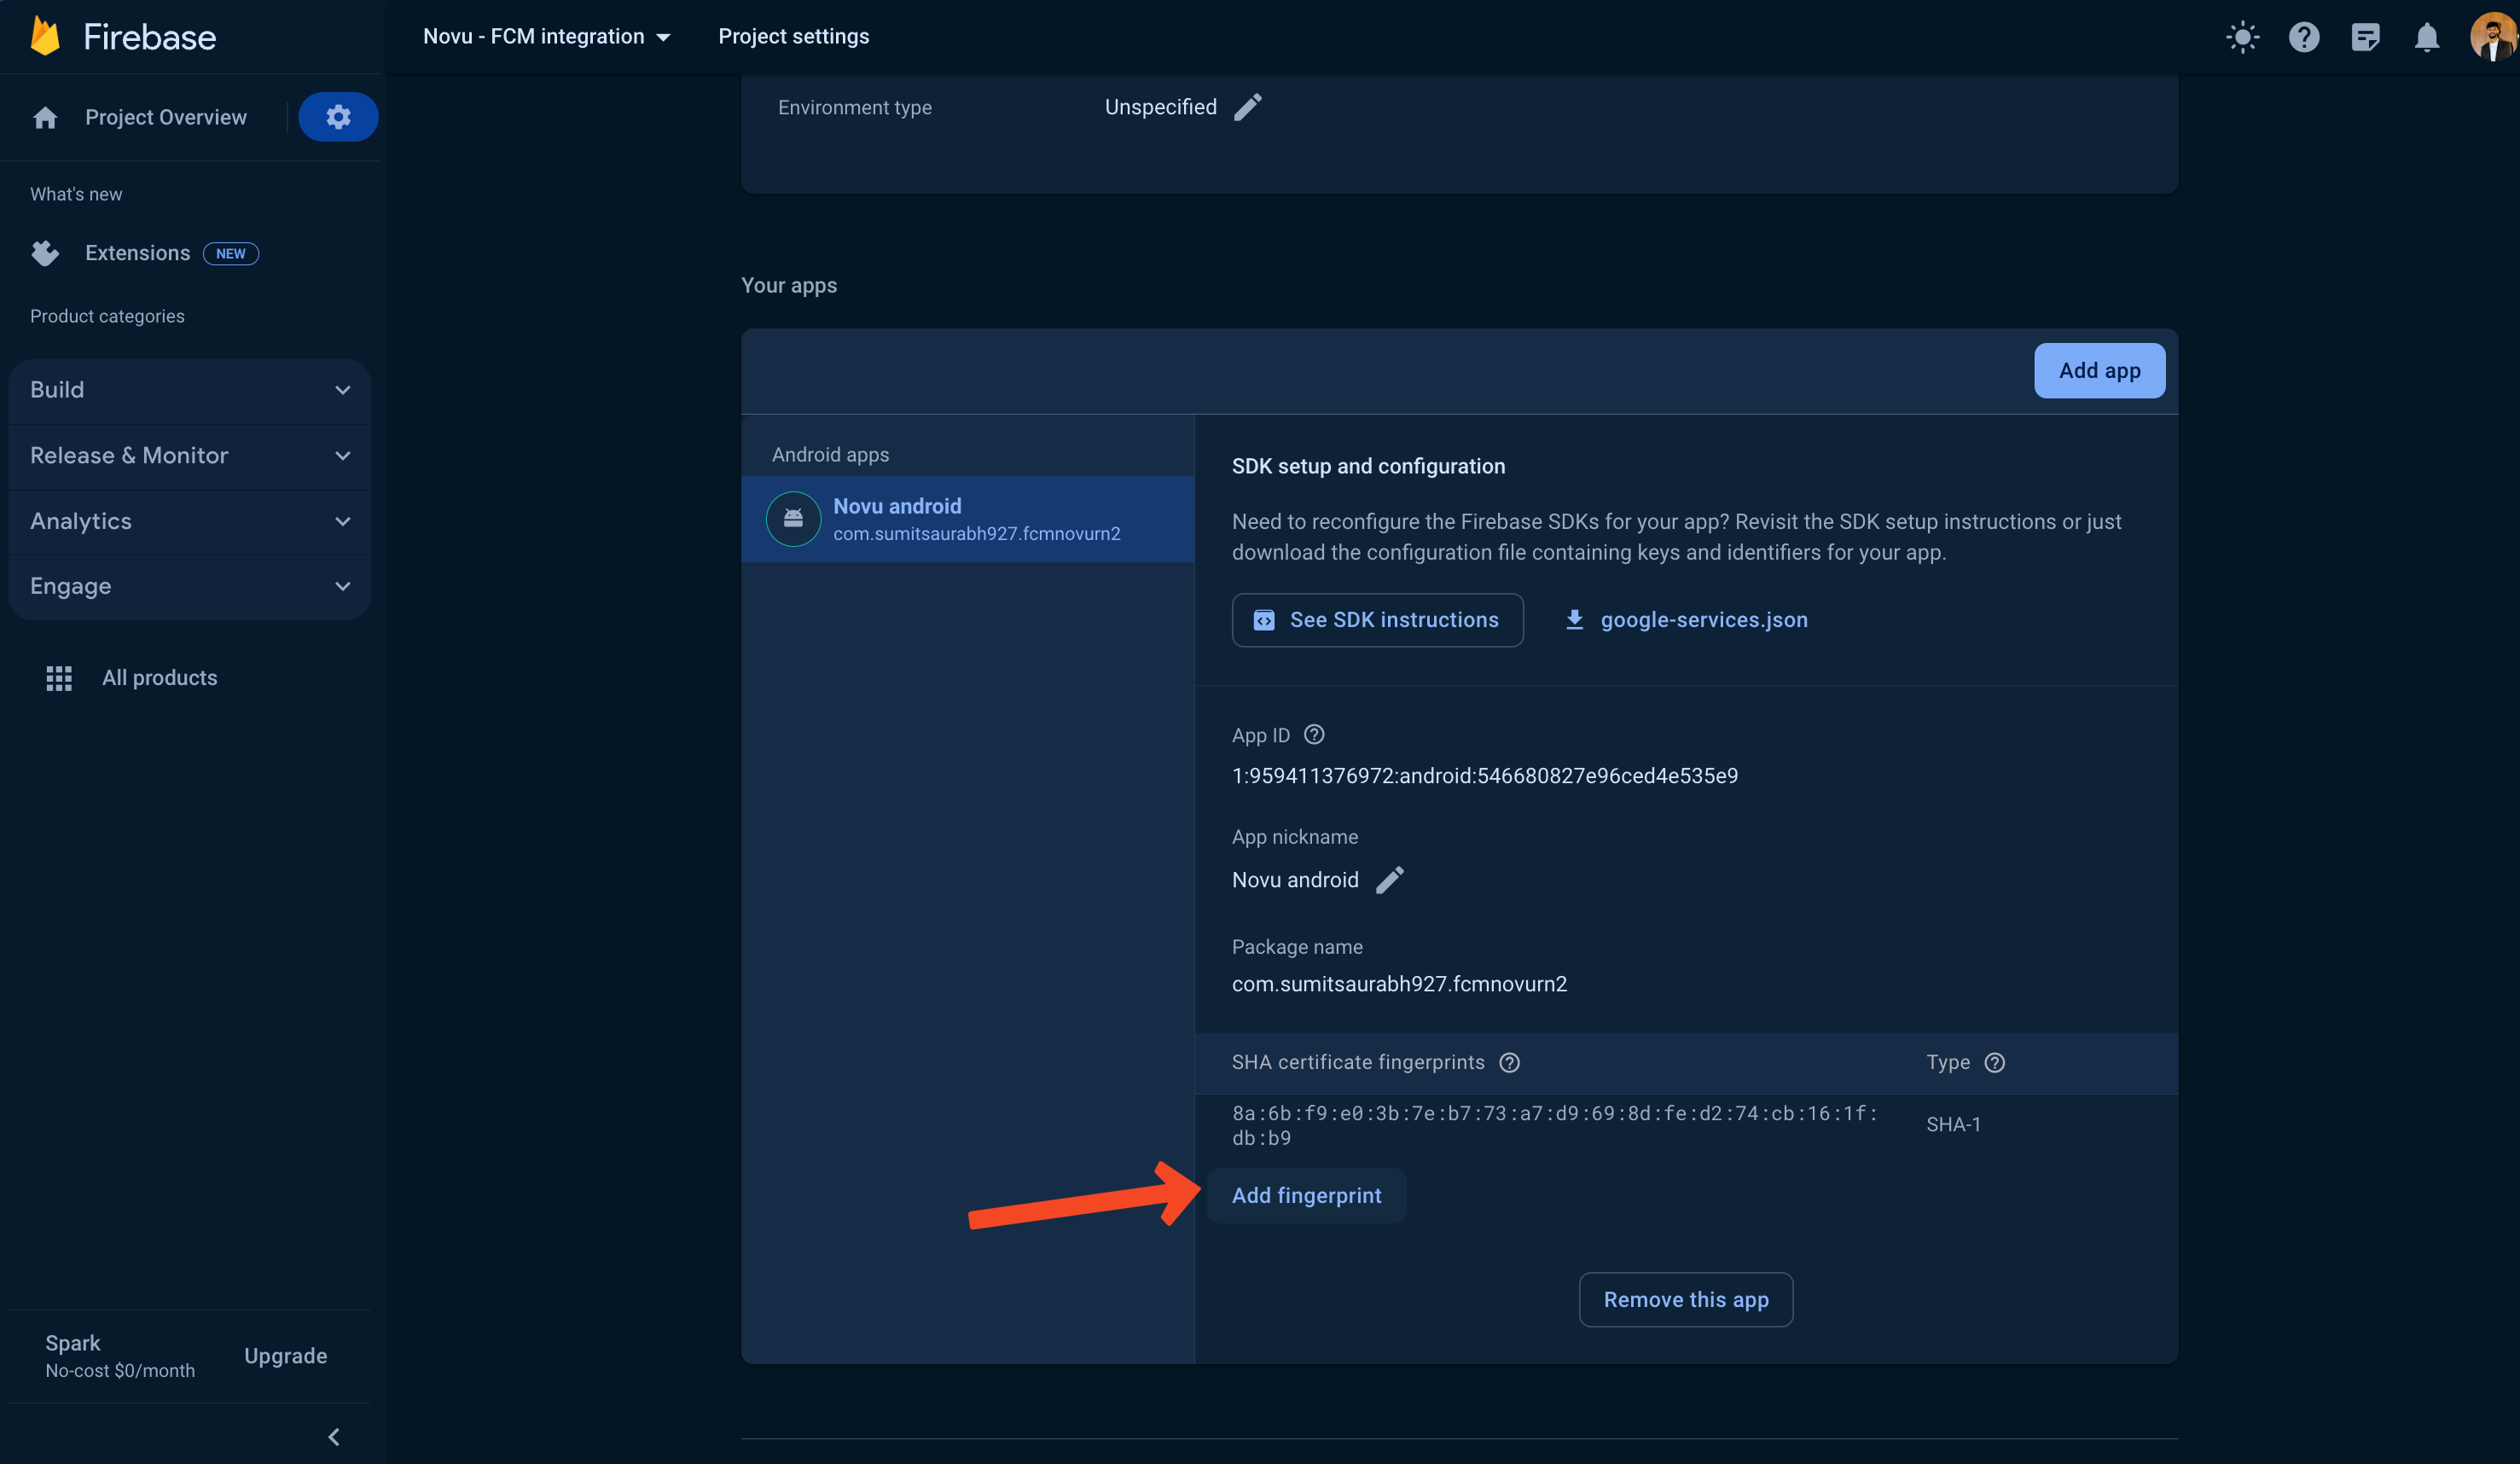
 10. Click on the 'Add fingerprint' button and add the second `SHA1` key here.
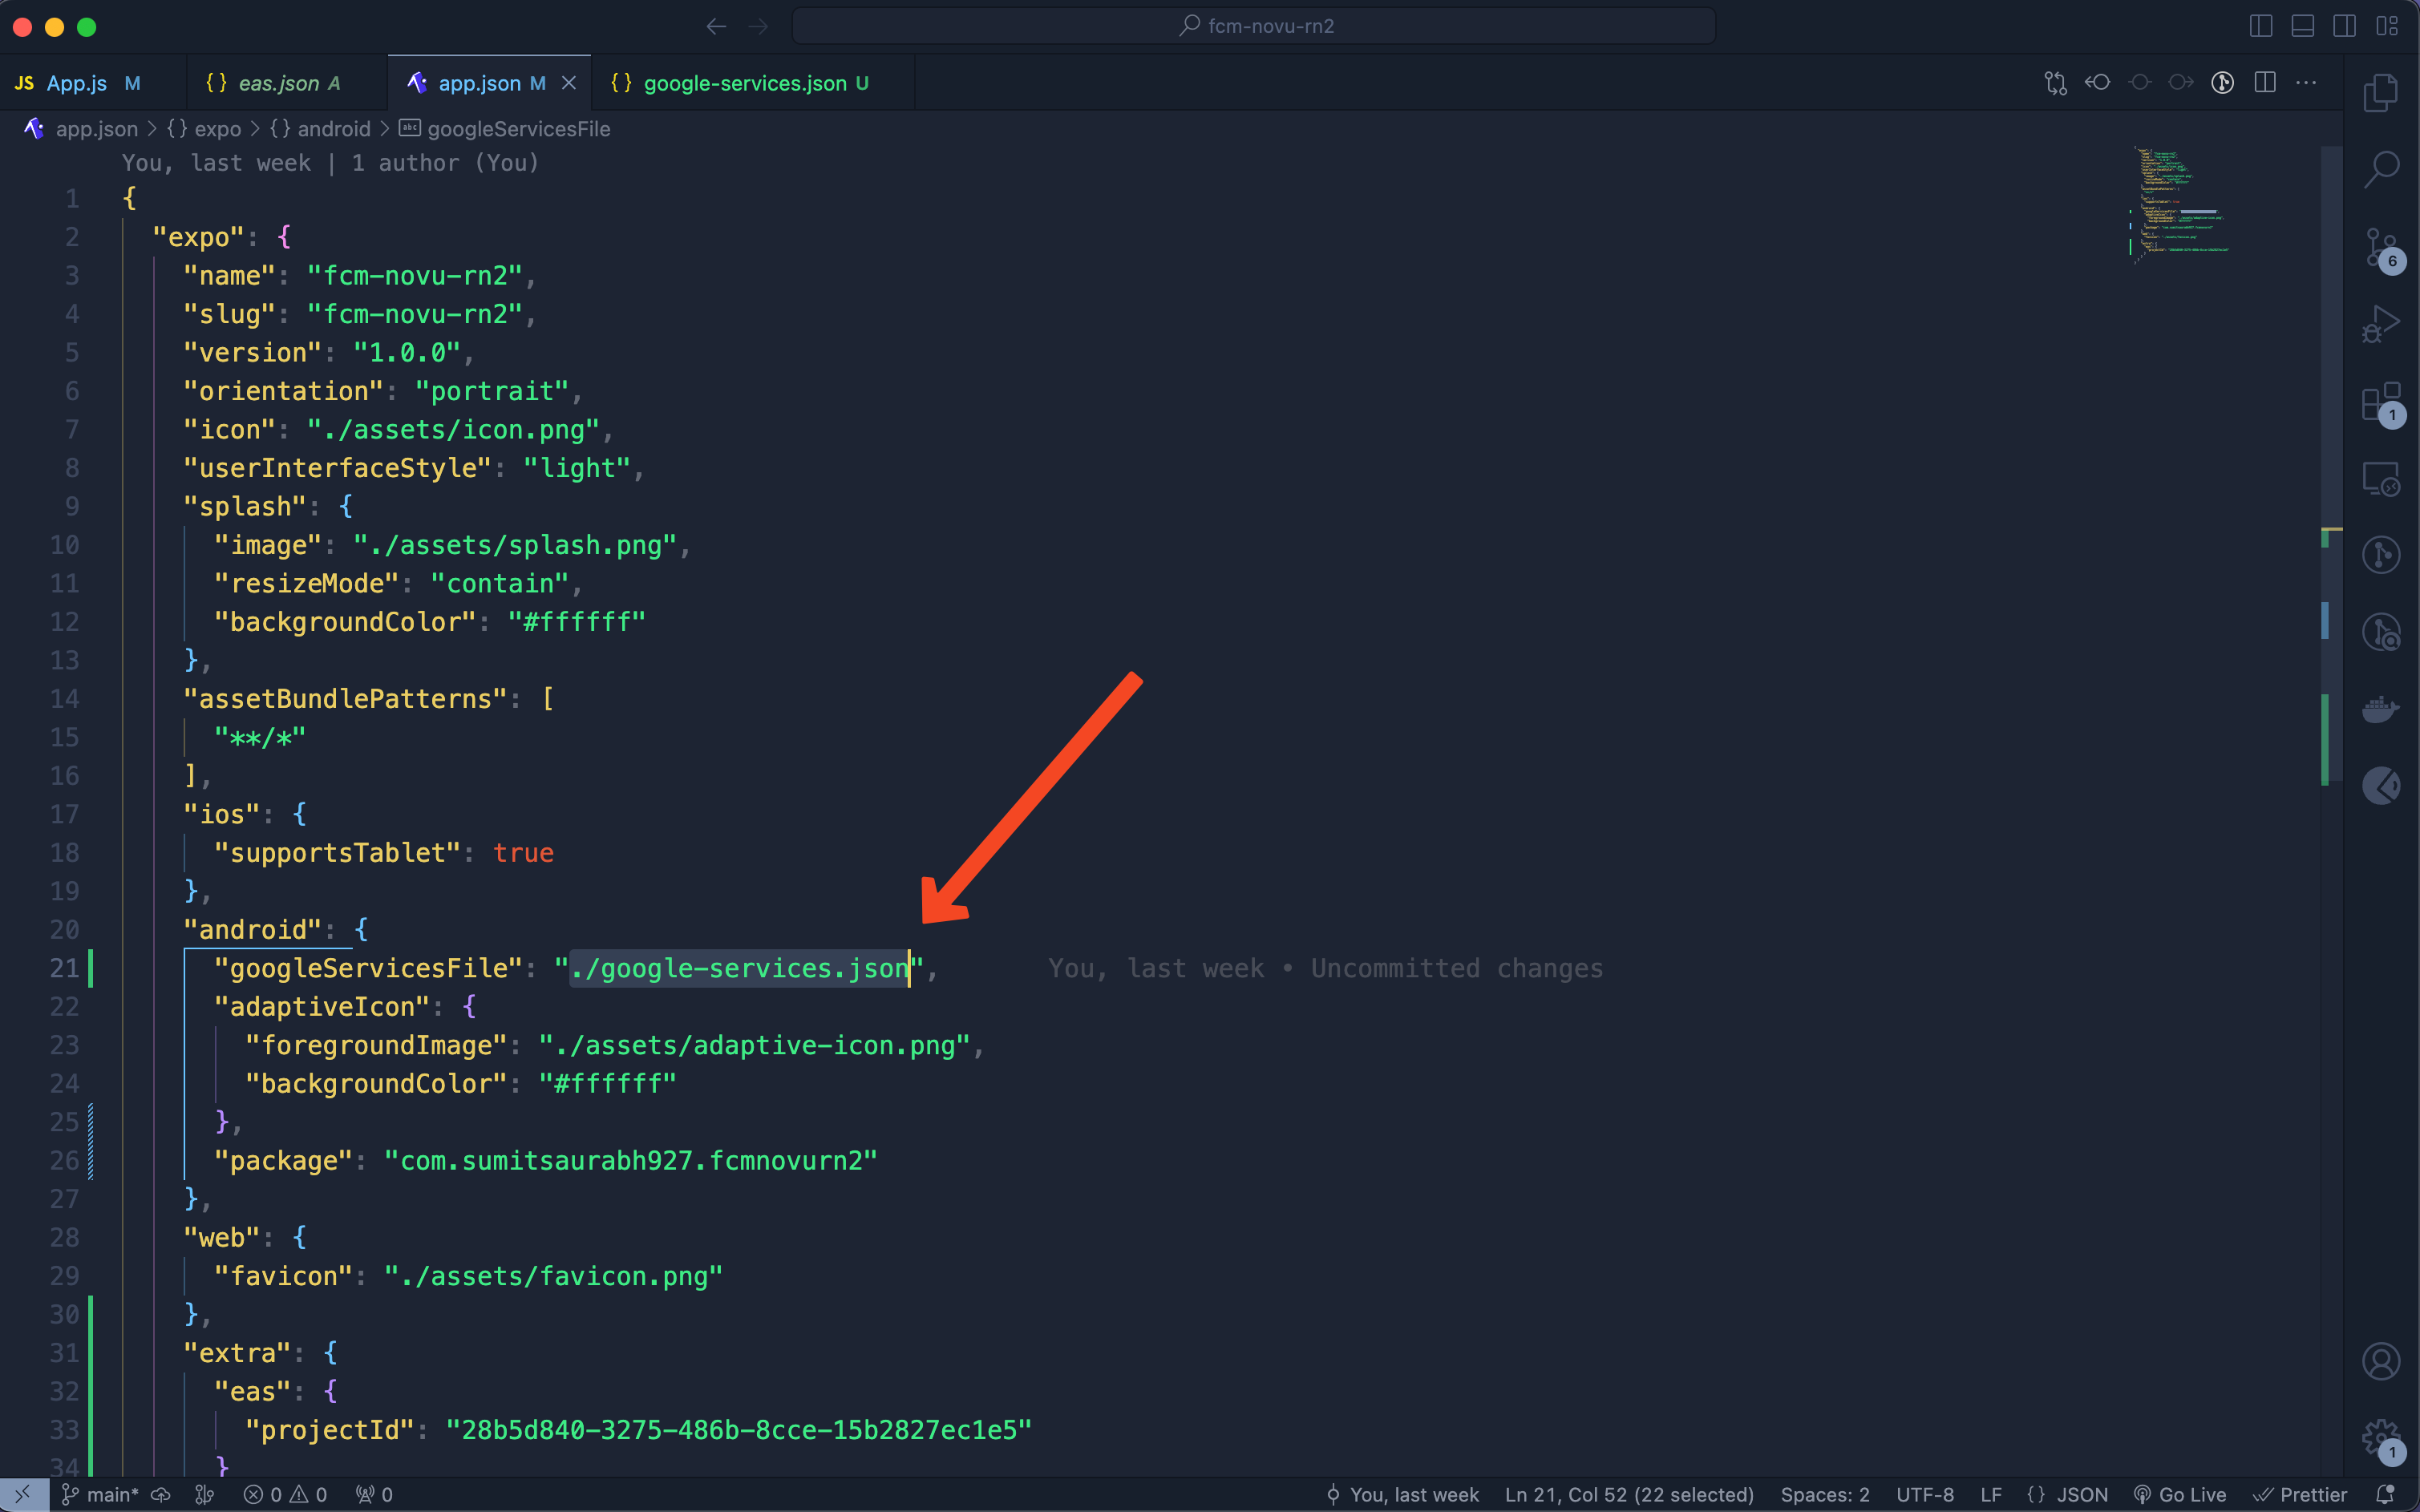
 11. Now, download the Google services file and add it to the project's root directory. We also need to specify its location in the `app.json` file:
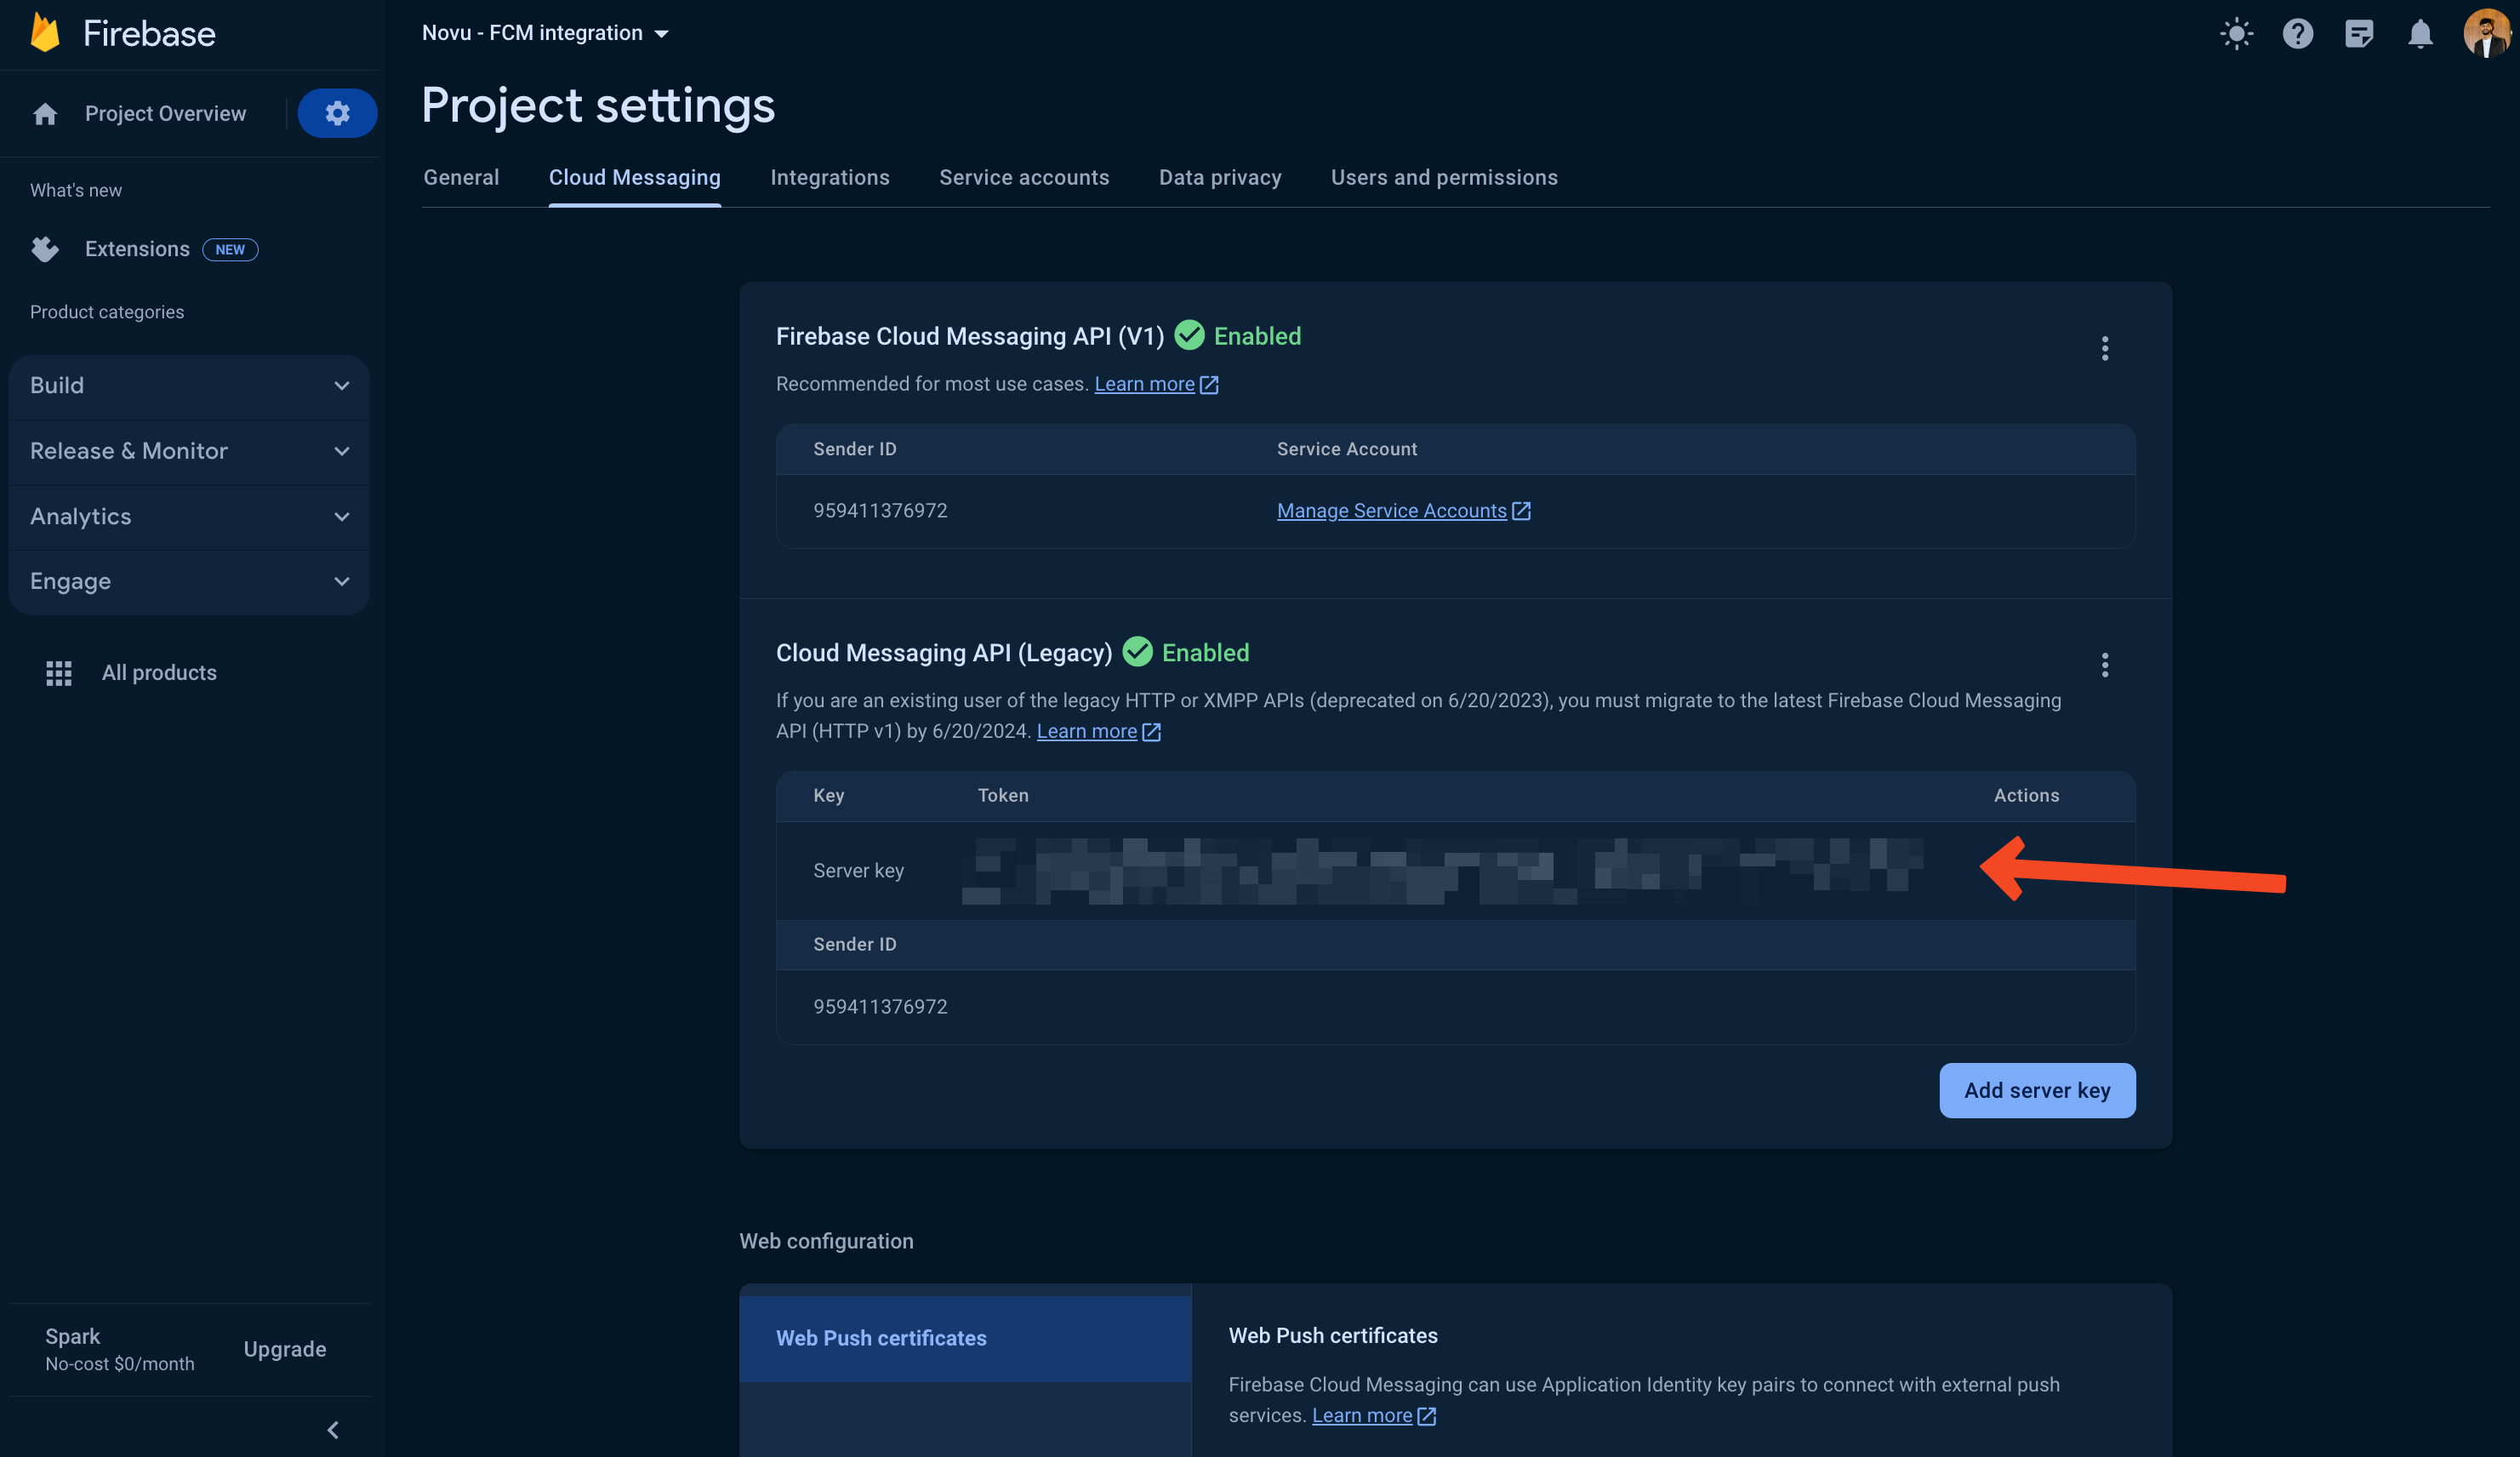
 12. Now we need to upload the Firebase server key to expo. Go to project settings and find it under the 'Cloud Messaging' tab.
 13. Now, upload that key to expo using the following command:
```bash theme={null}
expo push:android:upload --api-key
```
14. Rebuild the app using the following command and we're good to go!
```bash theme={null}
eas build --profile development --platform android
```
15. If you have an Android device with you, simply scan and install the app. Otherwise, if you want to run it on an emulator, simply copy the link given alongside the QR code and open it on the emulator and then install the app.
16. Start the server to run the app, using the following command:
```bash theme={null}
npx expo start --dev-client
```
Again, you can either scan the QR code or copy and paste the link.
13. Now, upload that key to expo using the following command:
```bash theme={null}
expo push:android:upload --api-key
```
14. Rebuild the app using the following command and we're good to go!
```bash theme={null}
eas build --profile development --platform android
```
15. If you have an Android device with you, simply scan and install the app. Otherwise, if you want to run it on an emulator, simply copy the link given alongside the QR code and open it on the emulator and then install the app.
16. Start the server to run the app, using the following command:
```bash theme={null}
npx expo start --dev-client
```
Again, you can either scan the QR code or copy and paste the link.
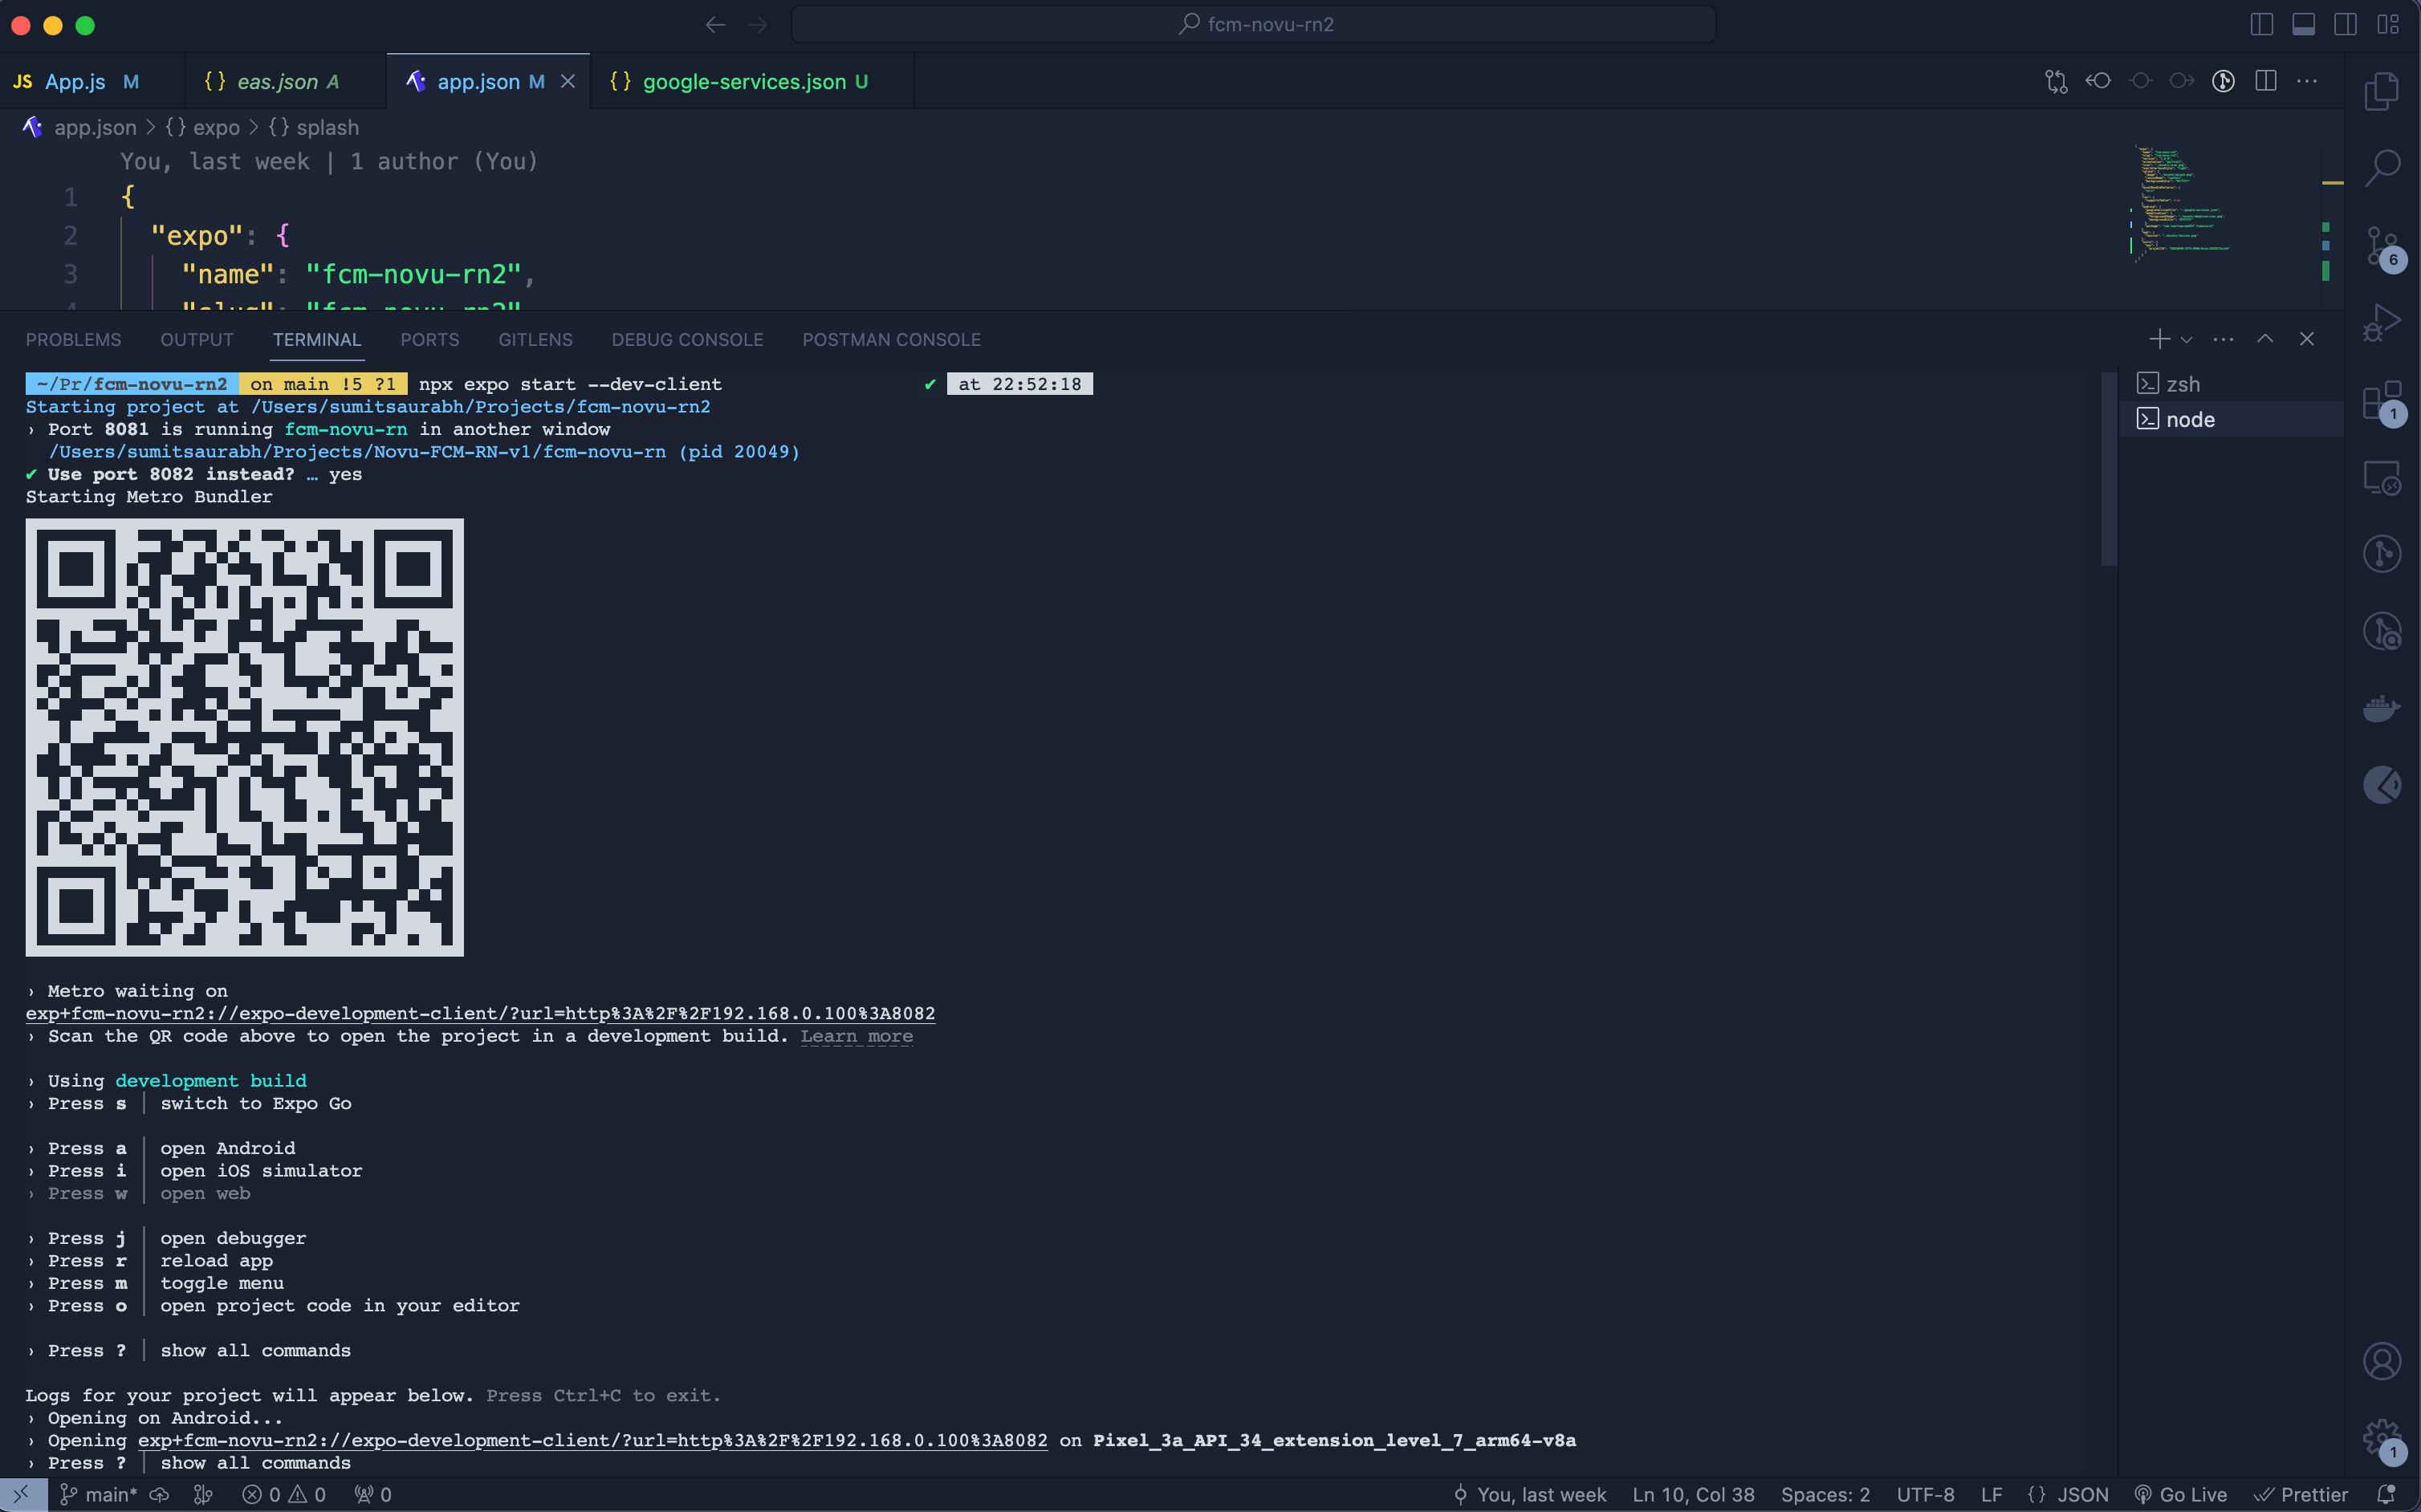 Sometimes it doesn't fire up the emulator even when you have it installed. In that case, start the emulator manually and run the server again!
## Setting up Novu
We'll need a workflow to trigger notifications to our user's devices. Follow the steps below to create one to ensure we are on the path to making FCM work as expected:
1. Head over to the [Integrations Store](https://web.novu.co/integrations?utm_campaign=docs-guides-fcm-android) on the Novu Web Dashboard and make sure that you've turned on the 'Firebase Cloud Messaging' integration.
Sometimes it doesn't fire up the emulator even when you have it installed. In that case, start the emulator manually and run the server again!
## Setting up Novu
We'll need a workflow to trigger notifications to our user's devices. Follow the steps below to create one to ensure we are on the path to making FCM work as expected:
1. Head over to the [Integrations Store](https://web.novu.co/integrations?utm_campaign=docs-guides-fcm-android) on the Novu Web Dashboard and make sure that you've turned on the 'Firebase Cloud Messaging' integration.
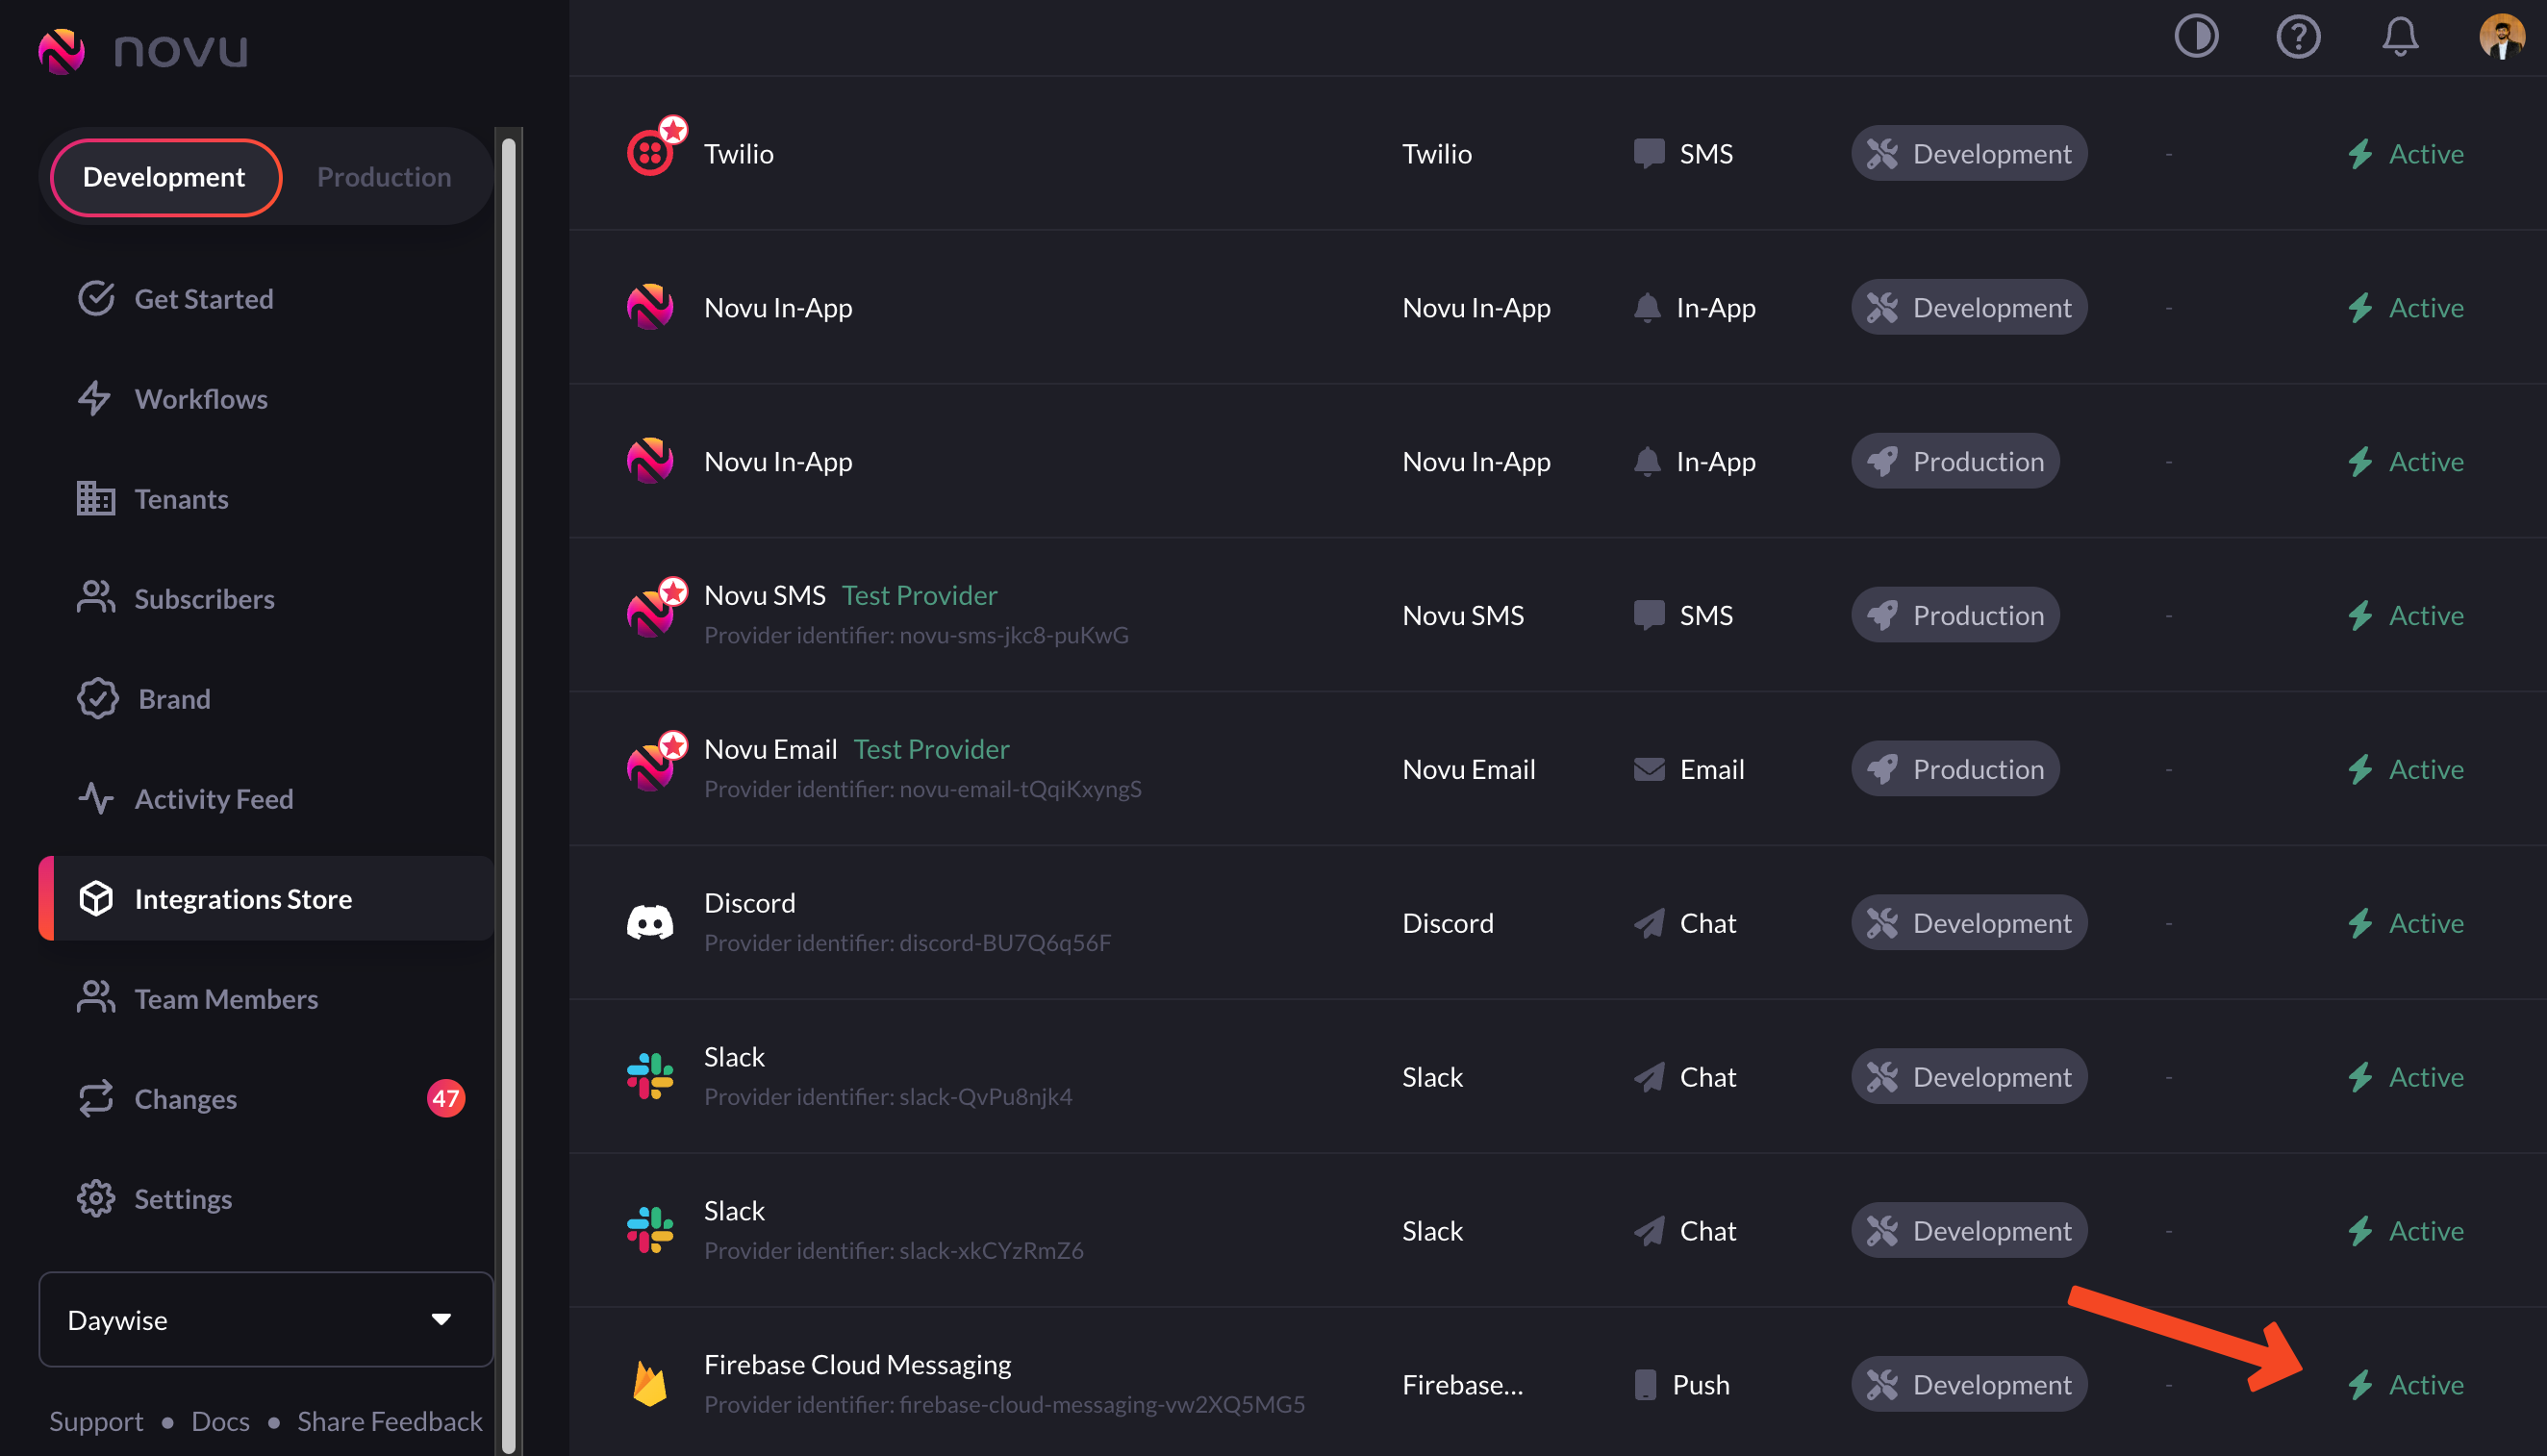 If you're doing this for the first time, you'll need to get your service account key from the [Firebase Console](https://console.firebase.google.com/). Read more about it in our [FCM provider docs.](https://docs.novu.co/channels-and-providers/push/fcm)
2\. Now, we need to create a workflow that we'll trigger from our app to send notifications. Head over to [workflows in the Novu Web Dashboard](https://web.novu.co/workflows?utm_campaign=docs-guides-fcm-android) and click on the 'Add a workflow' button.
If you're doing this for the first time, you'll need to get your service account key from the [Firebase Console](https://console.firebase.google.com/). Read more about it in our [FCM provider docs.](https://docs.novu.co/channels-and-providers/push/fcm)
2\. Now, we need to create a workflow that we'll trigger from our app to send notifications. Head over to [workflows in the Novu Web Dashboard](https://web.novu.co/workflows?utm_campaign=docs-guides-fcm-android) and click on the 'Add a workflow' button.
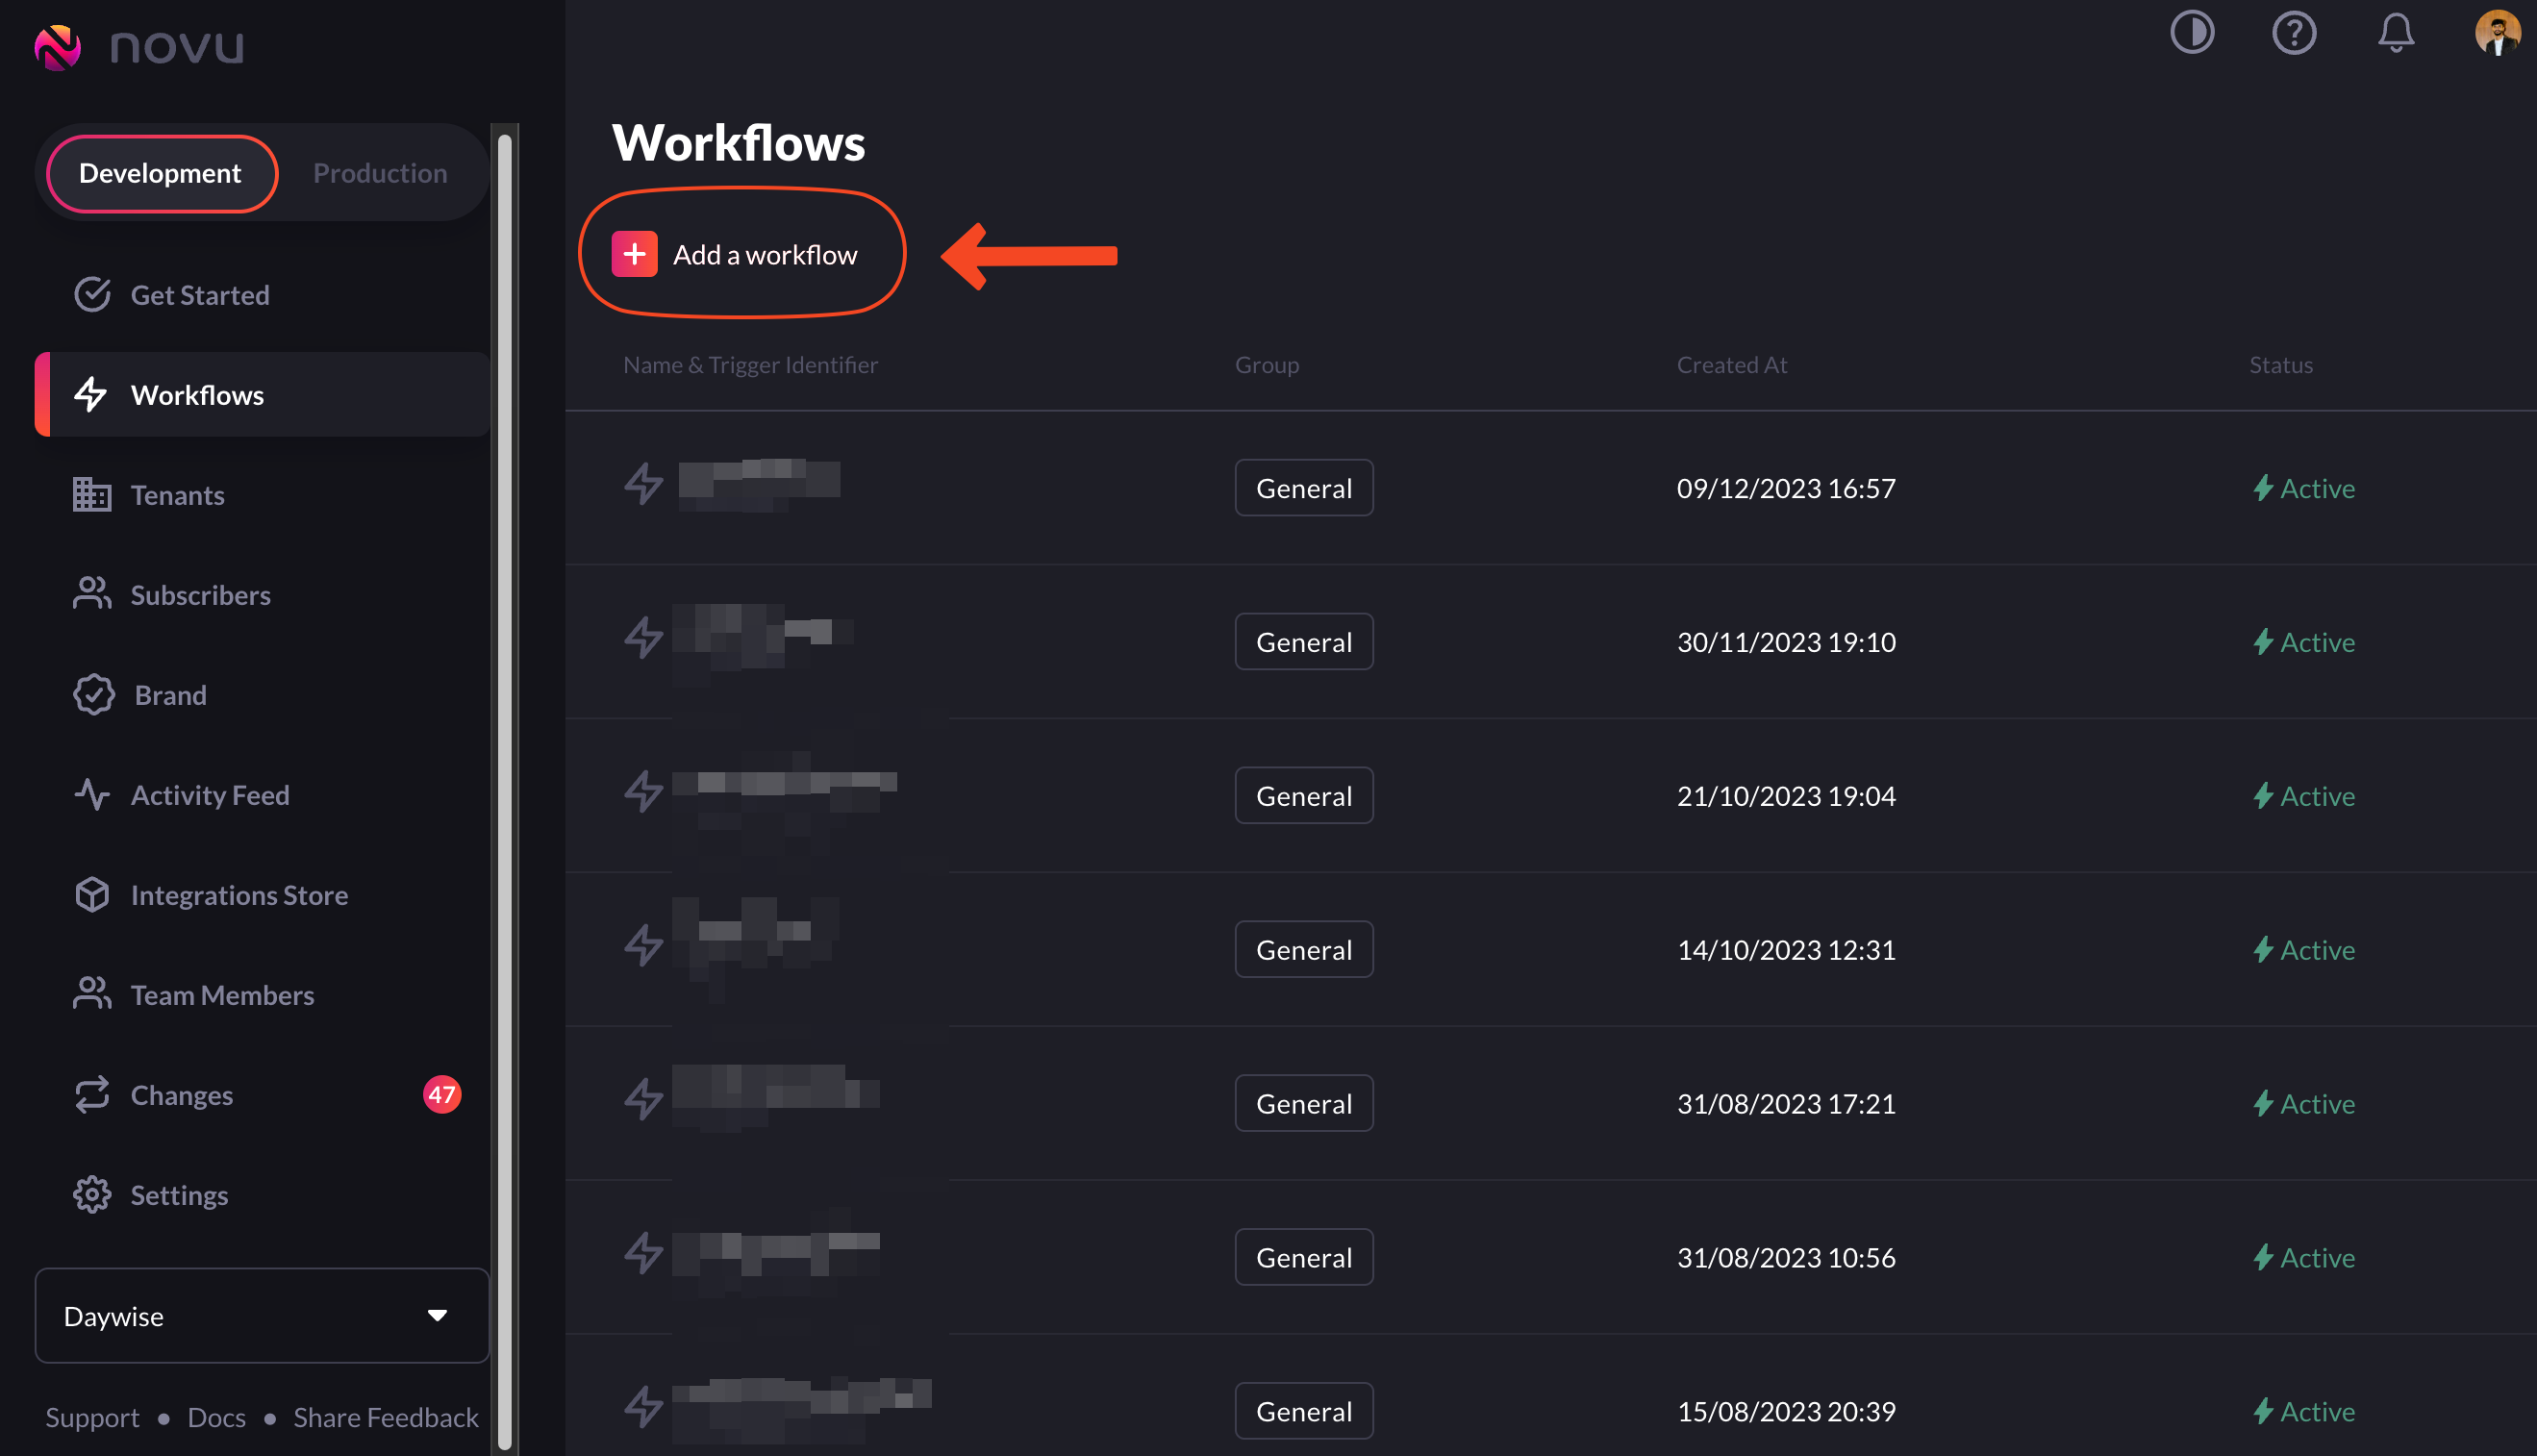 3. Choose the 'blank workflow' option from the dropdown menu.
 3. Drag and drop the 'Push' node below the Workflow Trigger node.
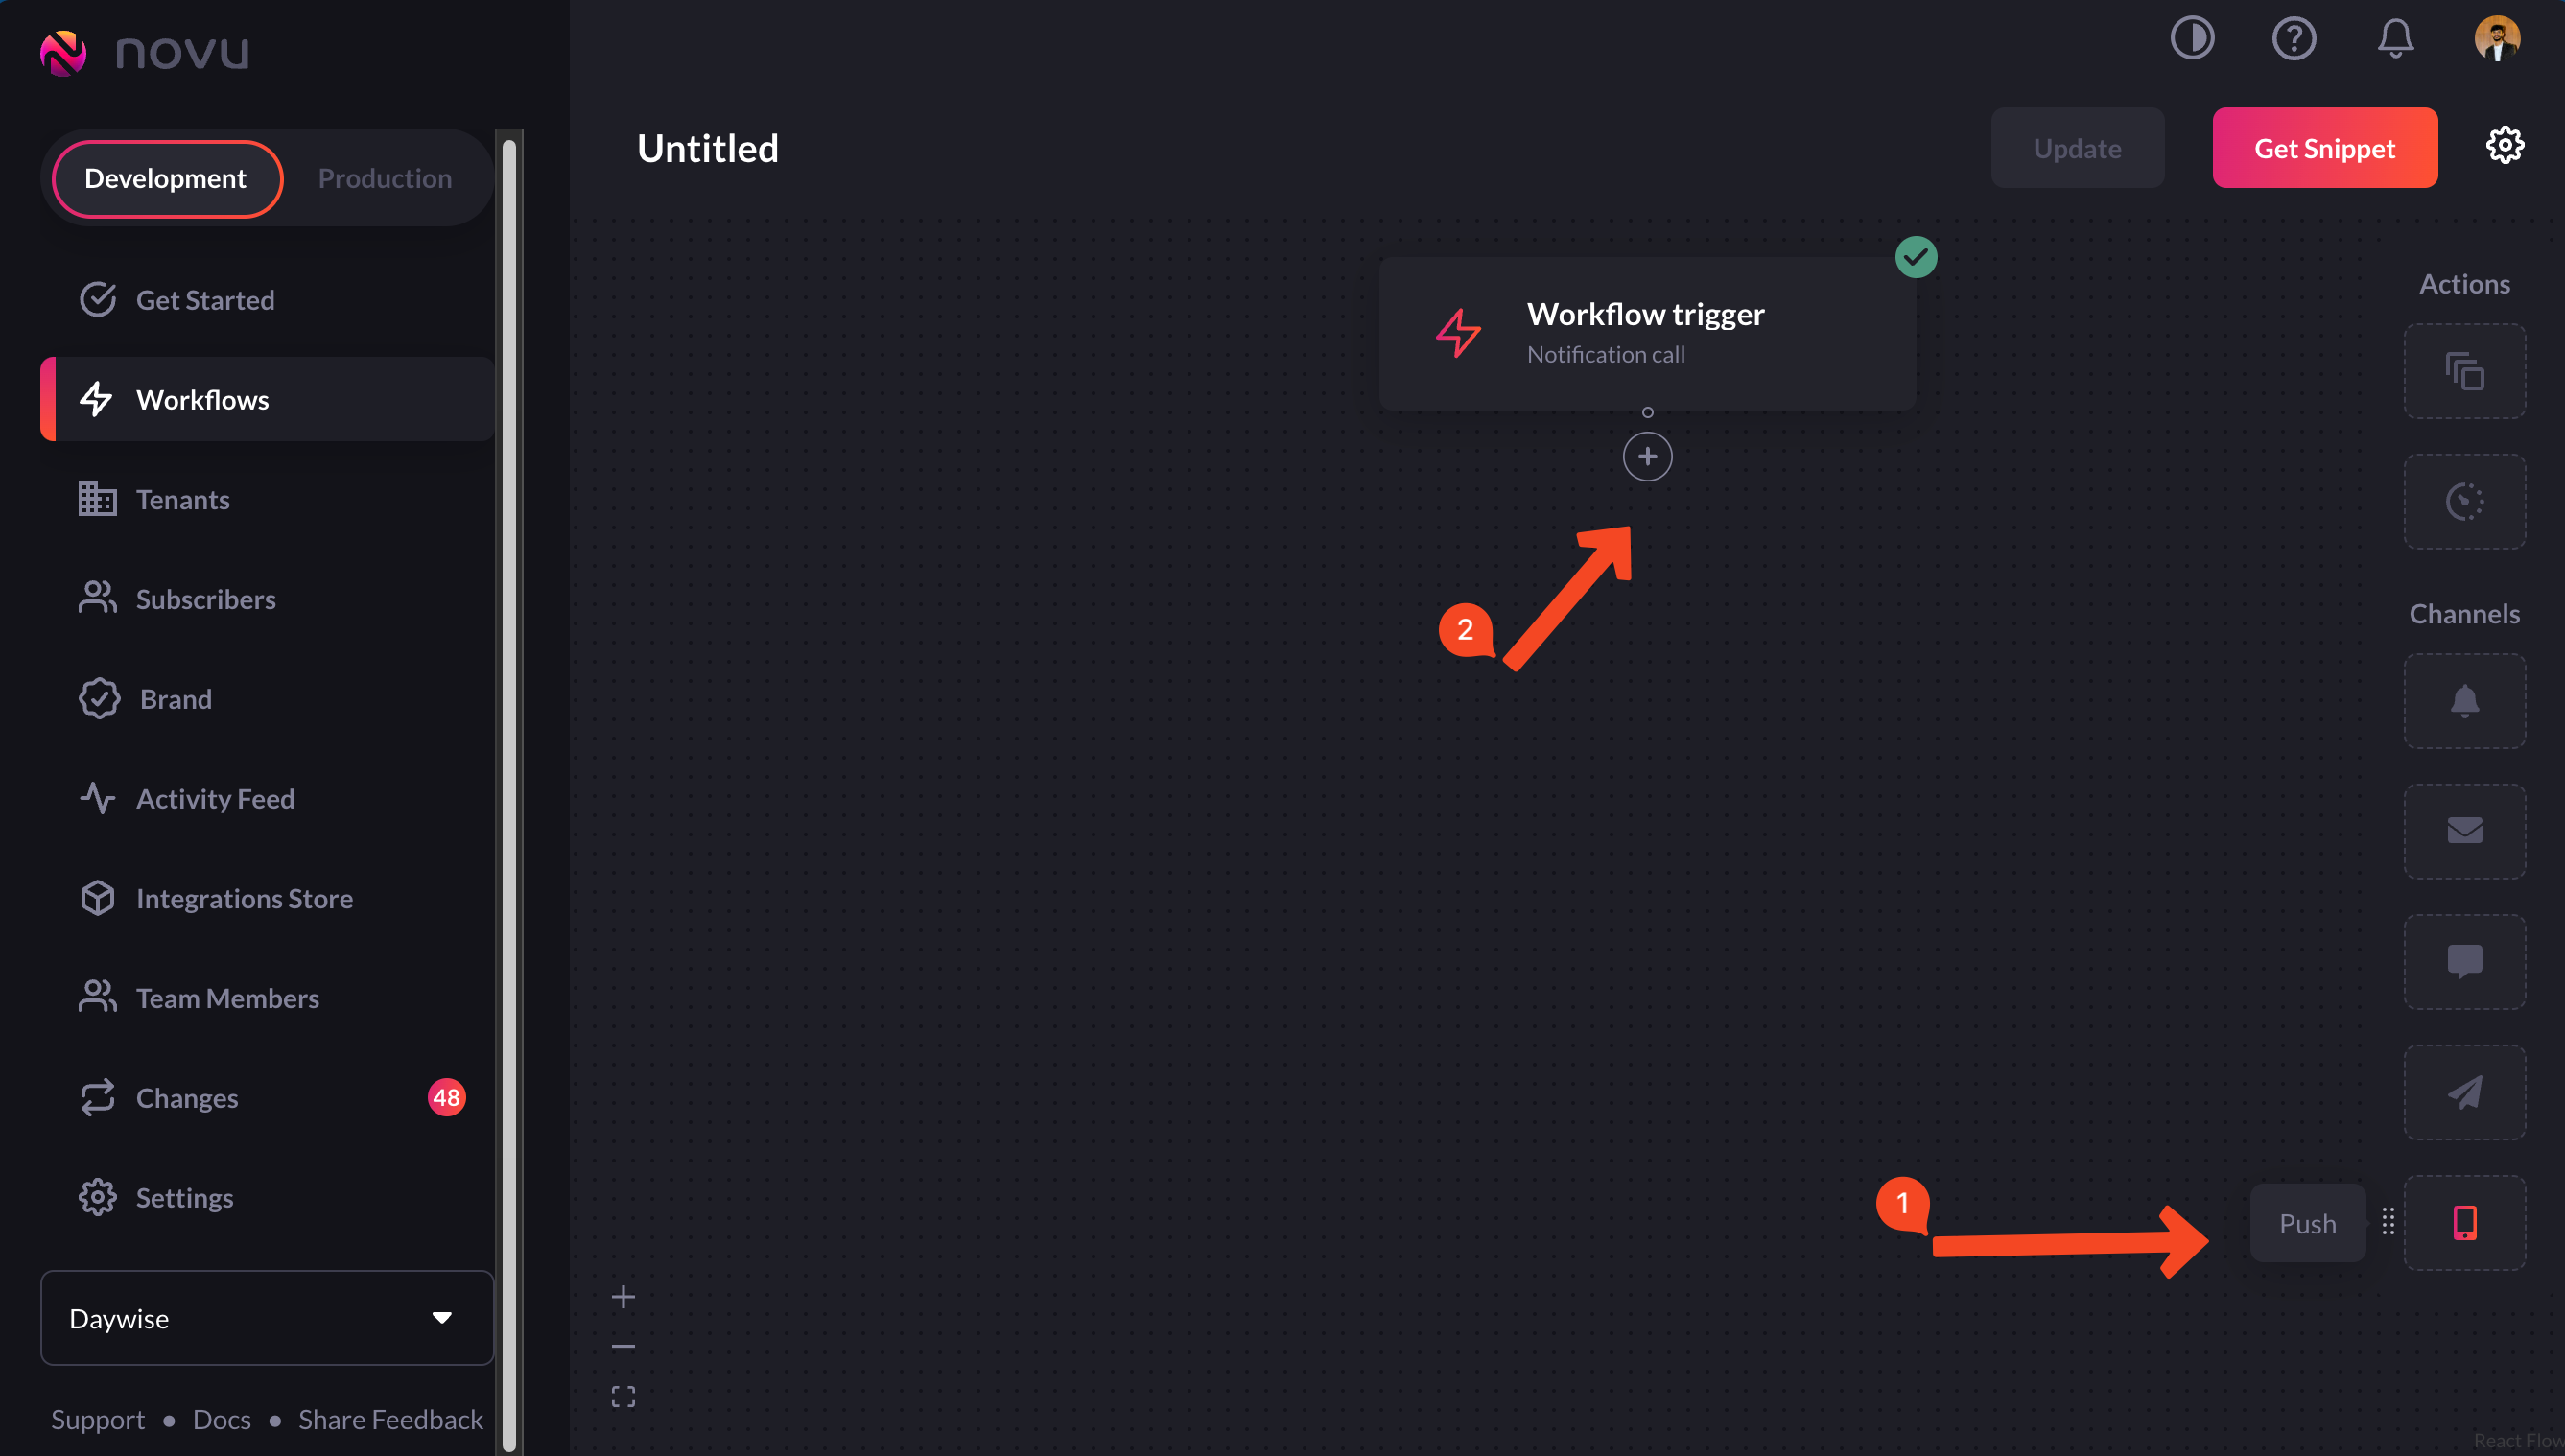 4. If you hover over the newly added 'Push' node, you'll see an error saying 'Message content and title are missing'.
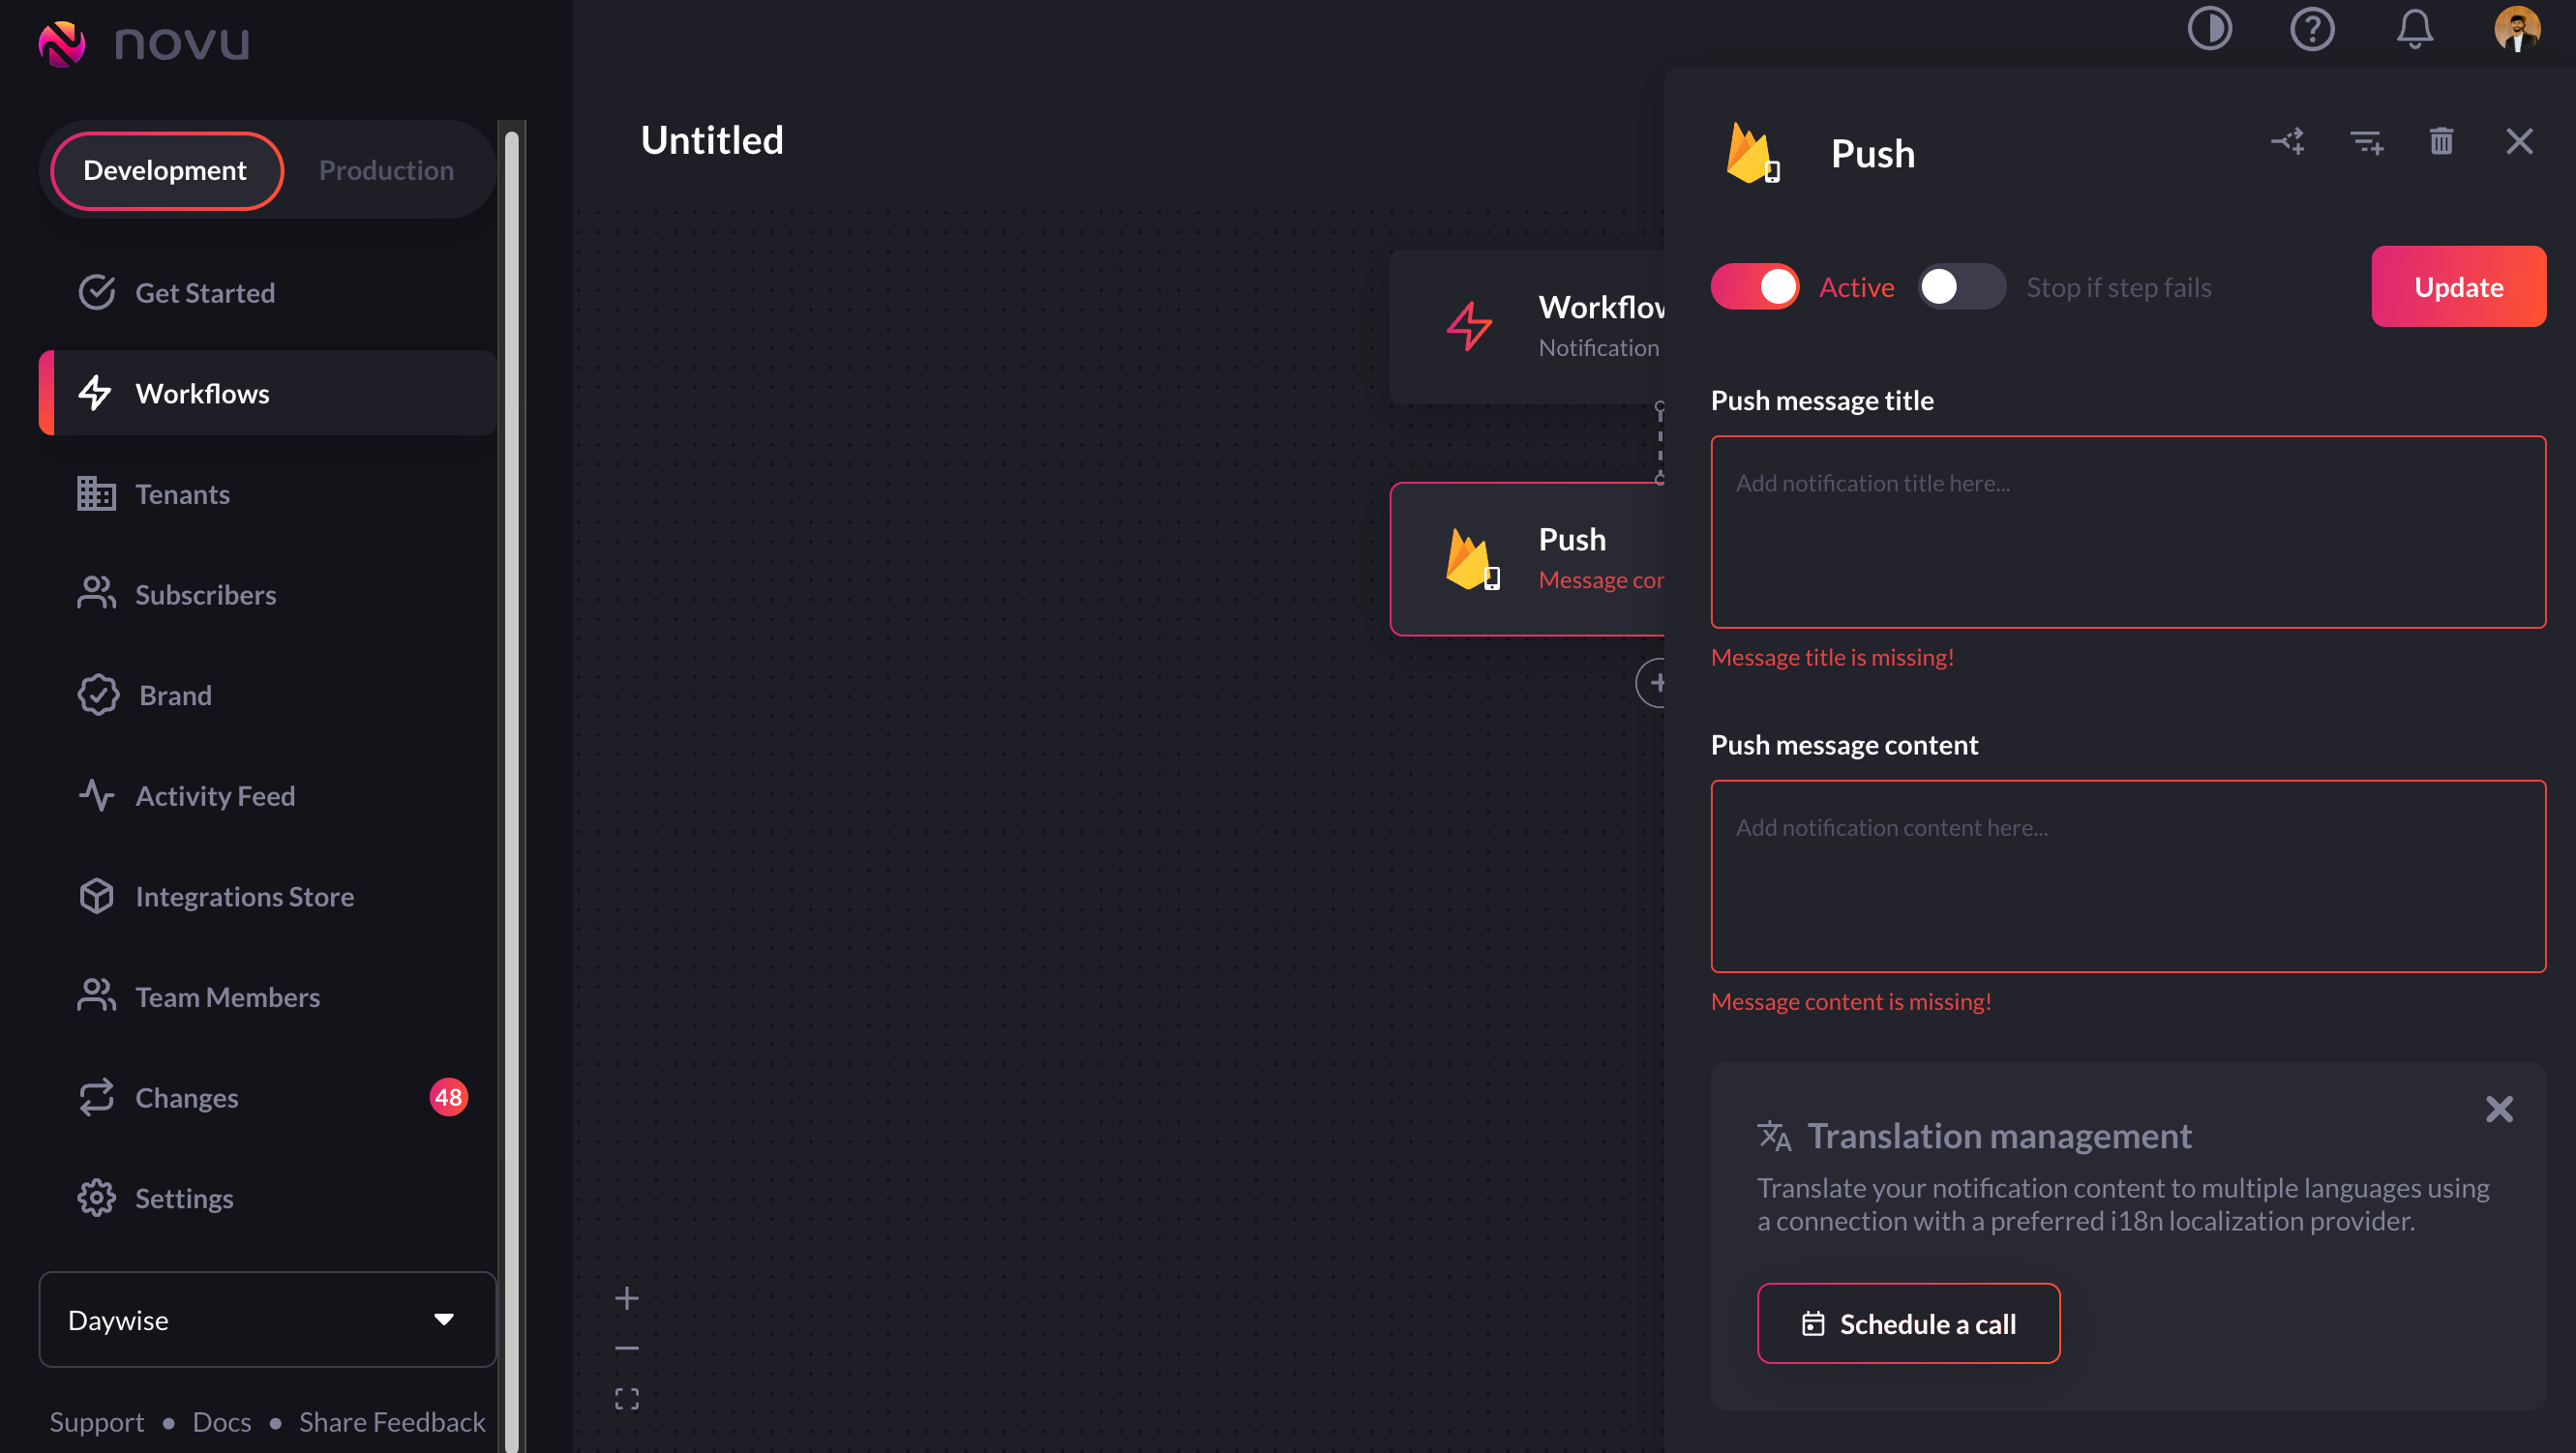 5. We're going to add a title and body for notifications. So, add them and give your workflow a suitable name.
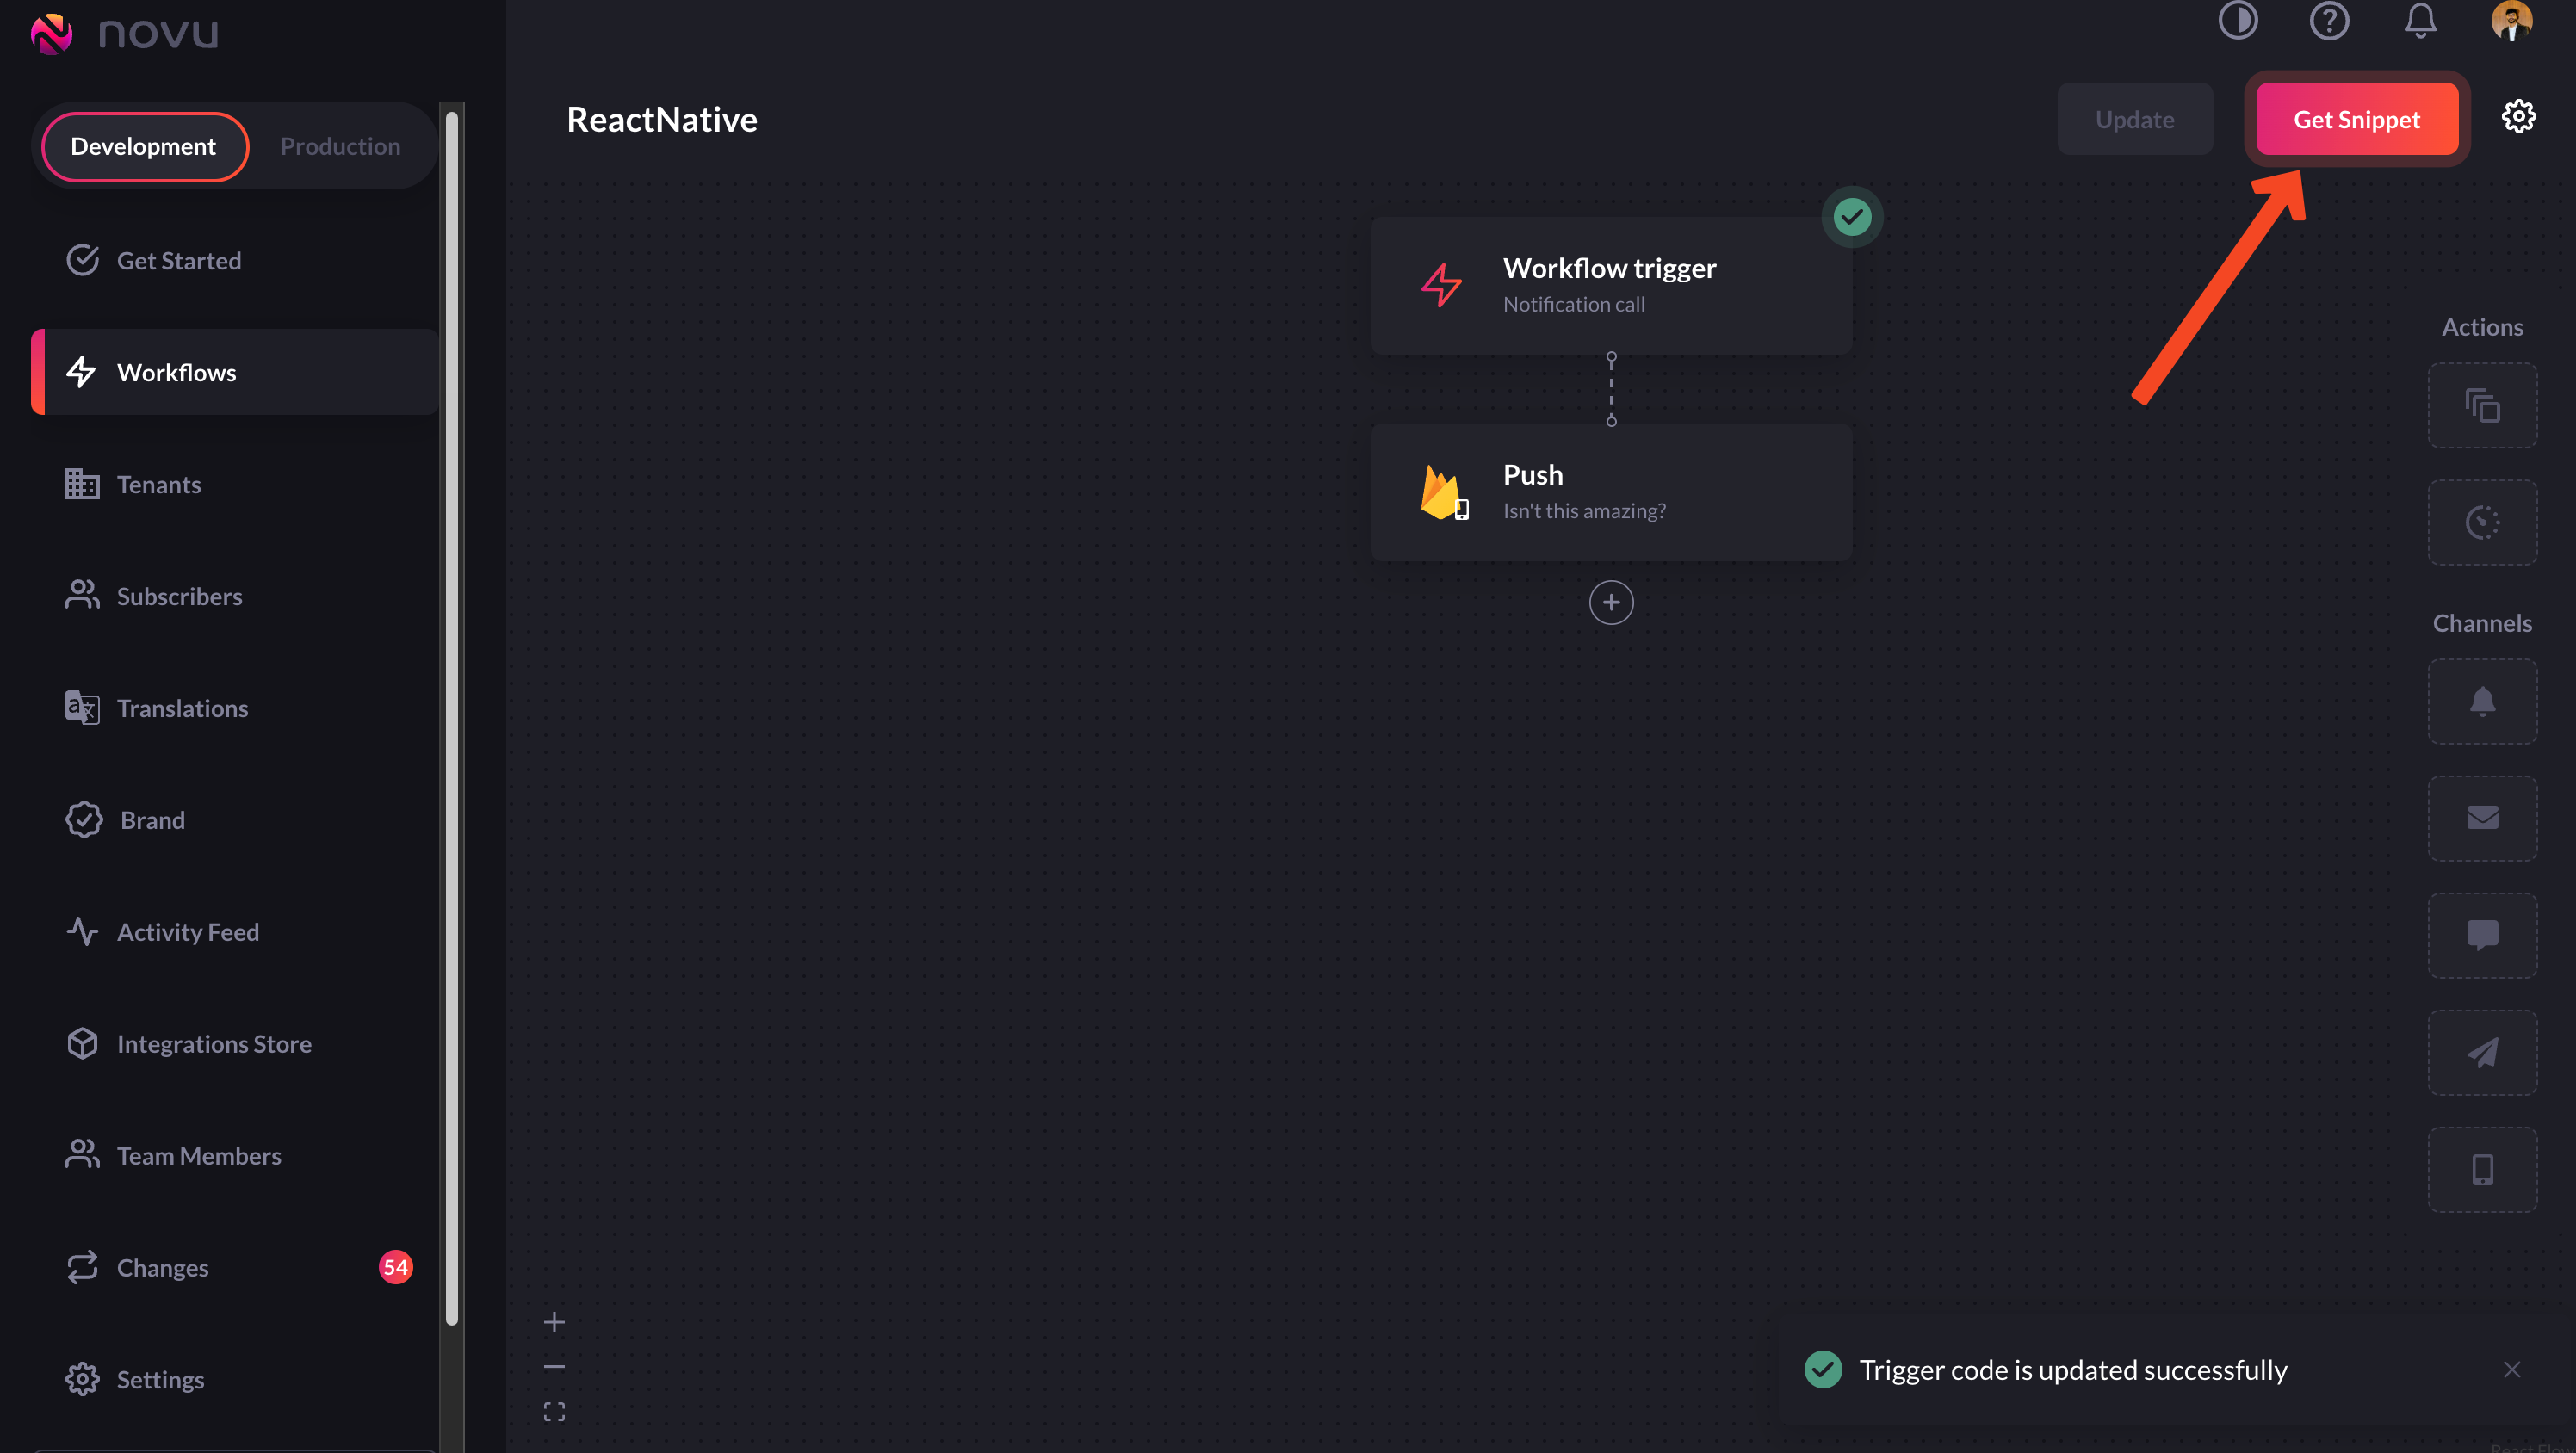
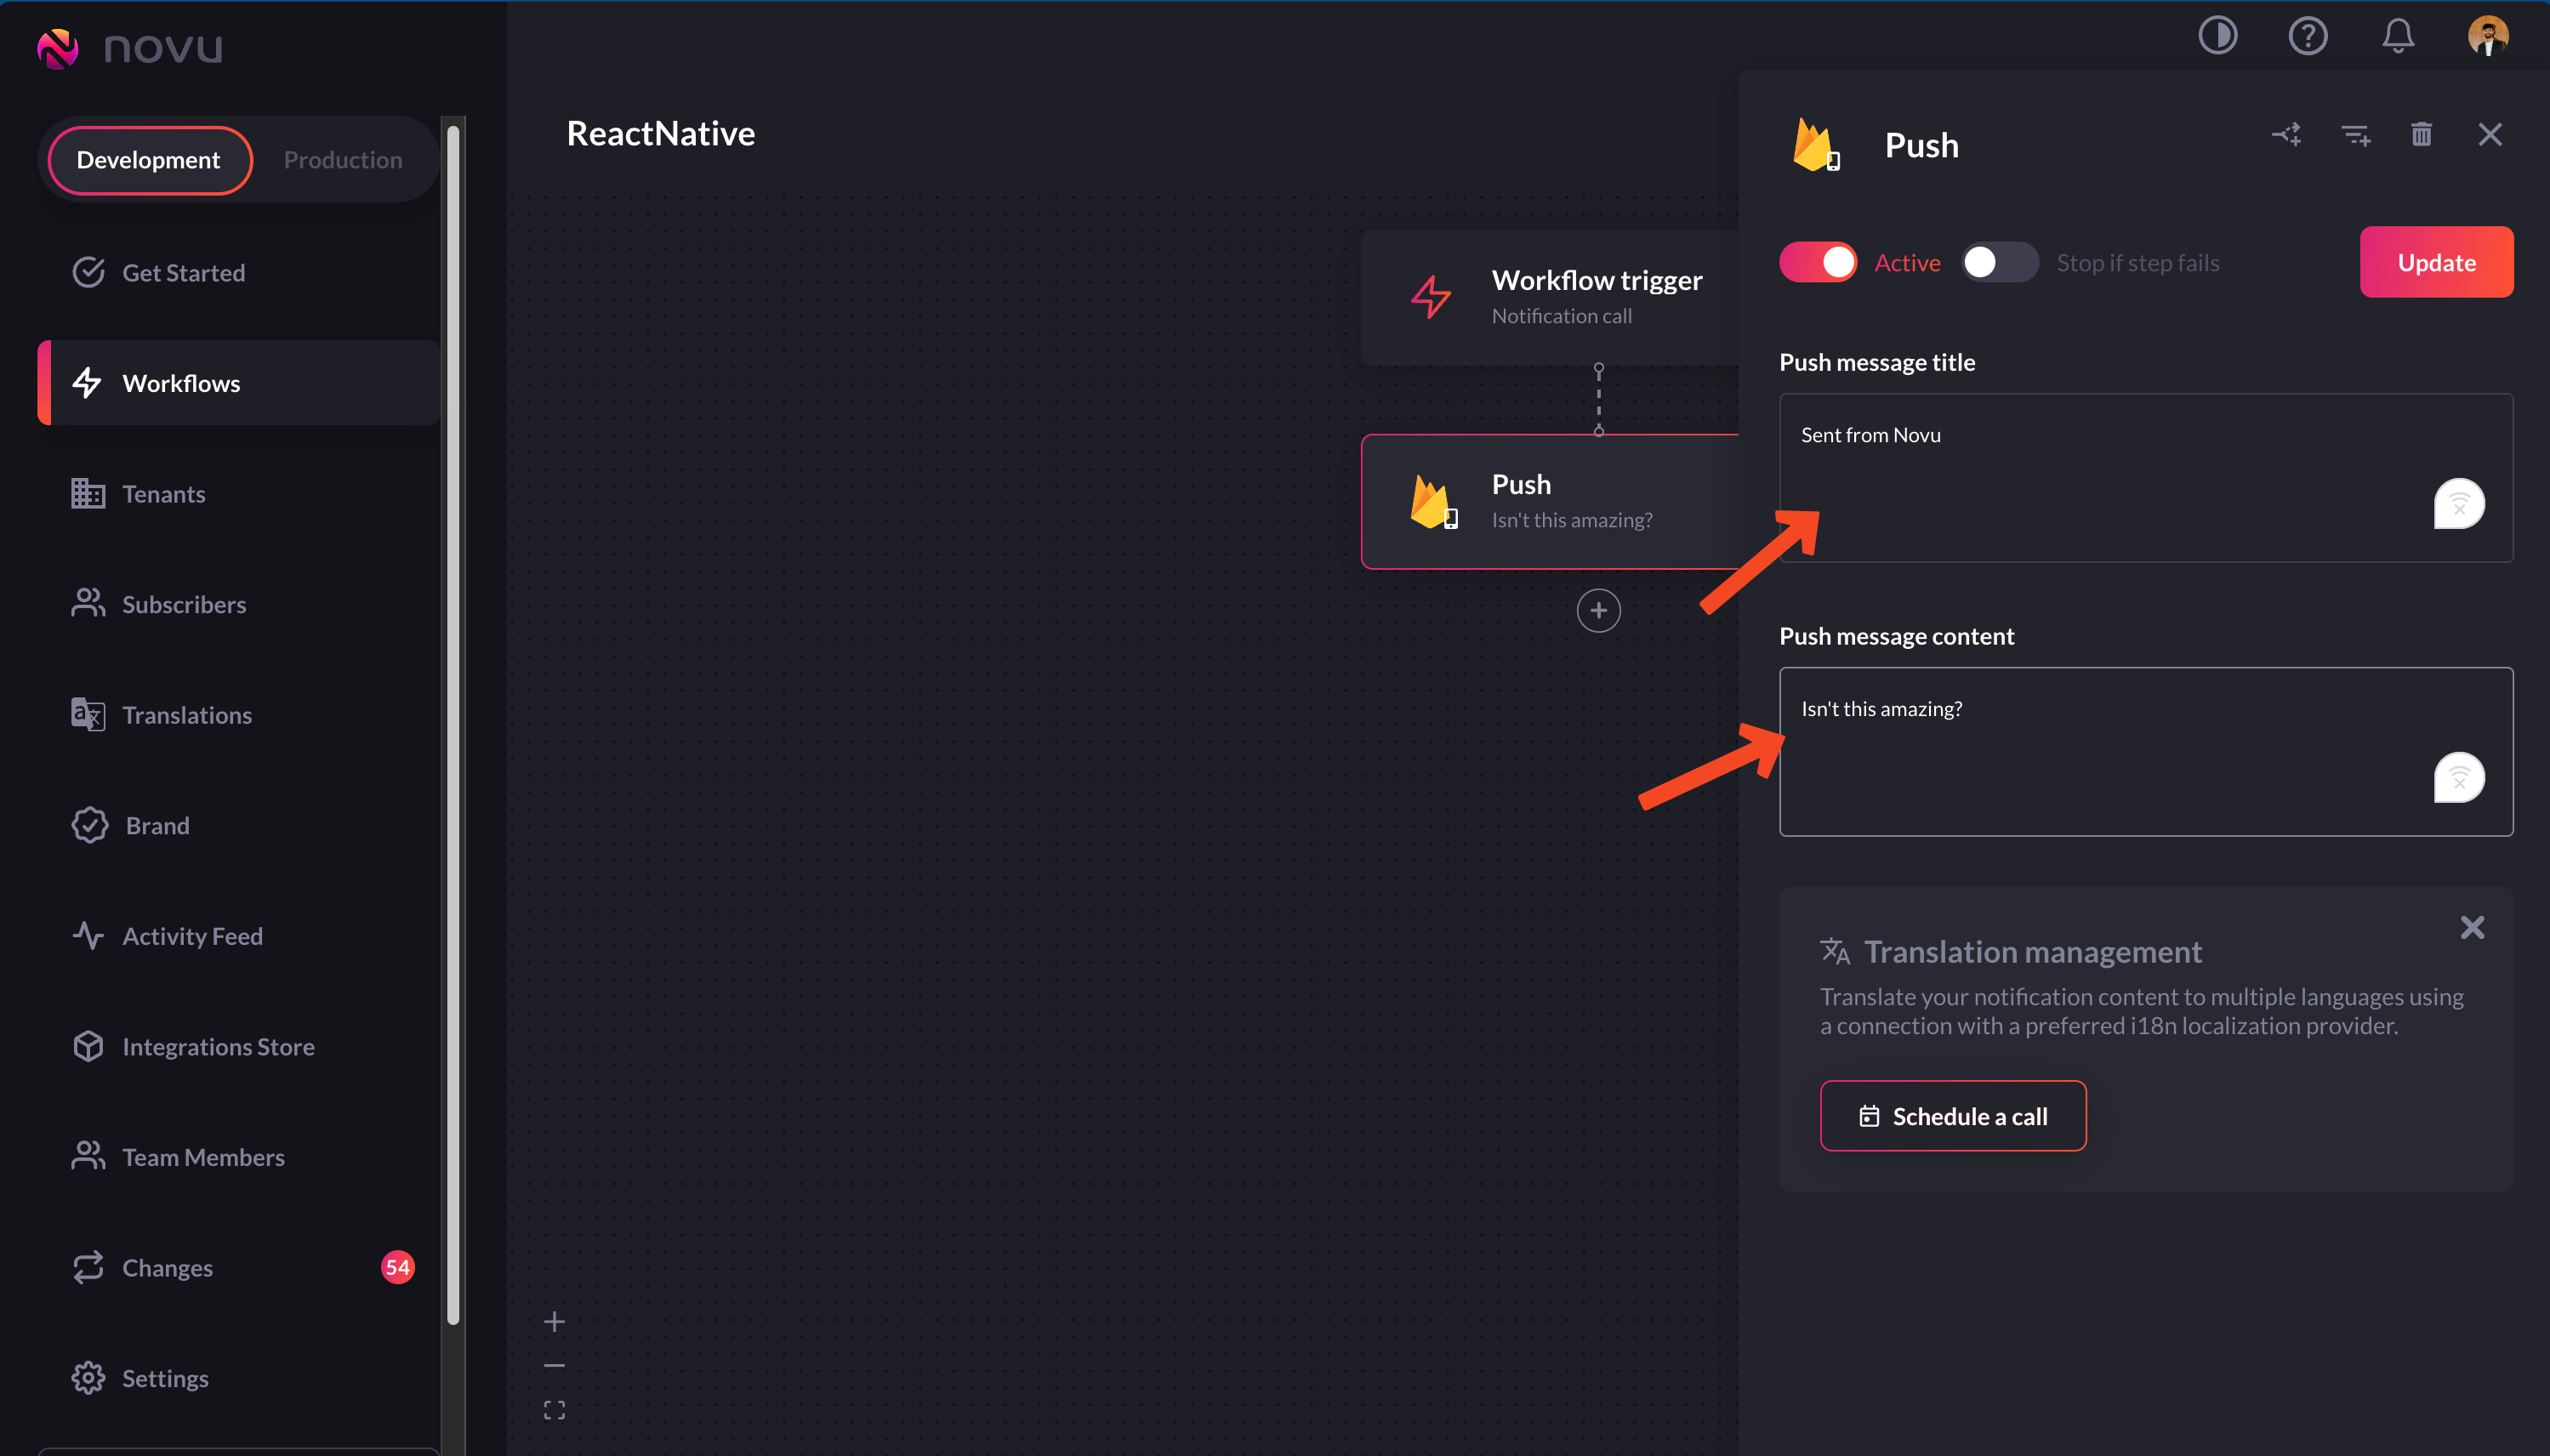 6. Now, click on the 'Update' and then the 'get snippet' button to get the trigger code.
 ## Create a subscriber and update credentials
A subscriber is essentially the recipient of the notifications sent through Novu’s system. When you create a subscriber, you’re setting up the necessary information for Novu to send targeted notifications to. You can find more about subscribers in [our docs.](https://docs.novu.co/subscribers/subscribers)
To create a subscriber, we'll use the `identify` method:
```jsx theme={null}
// creating new instance of Novu
const novu = new Novu("");
// creating subscriber
await novu.subscribers.identify('newSubForRNA', {
firstName: "RNA"
});
```
Now, we'll add the FCM token that we'd received [earlier](#getting-the-fcm-token) to this subscriber using the `setCredentials` method:
```jsx theme={null}
await novu.subscribers.setCredentials('newSubForRNA', PushProviderIdEnum.FCM, {
deviceTokens: [''],
});
// notice the use of 'newSubForRNA' here. This identifies the subscriber to which we're adding the FCM token
```
## Sending a push notification using Novu
To send a notification with Novu, we are actually triggering a notification workflow. Here's how to do it using Node:
```jsx theme={null}
novu.trigger('rna-2', {
to: {
subscriberId: 'newSubForRNA'
},
payload: {},
})
```
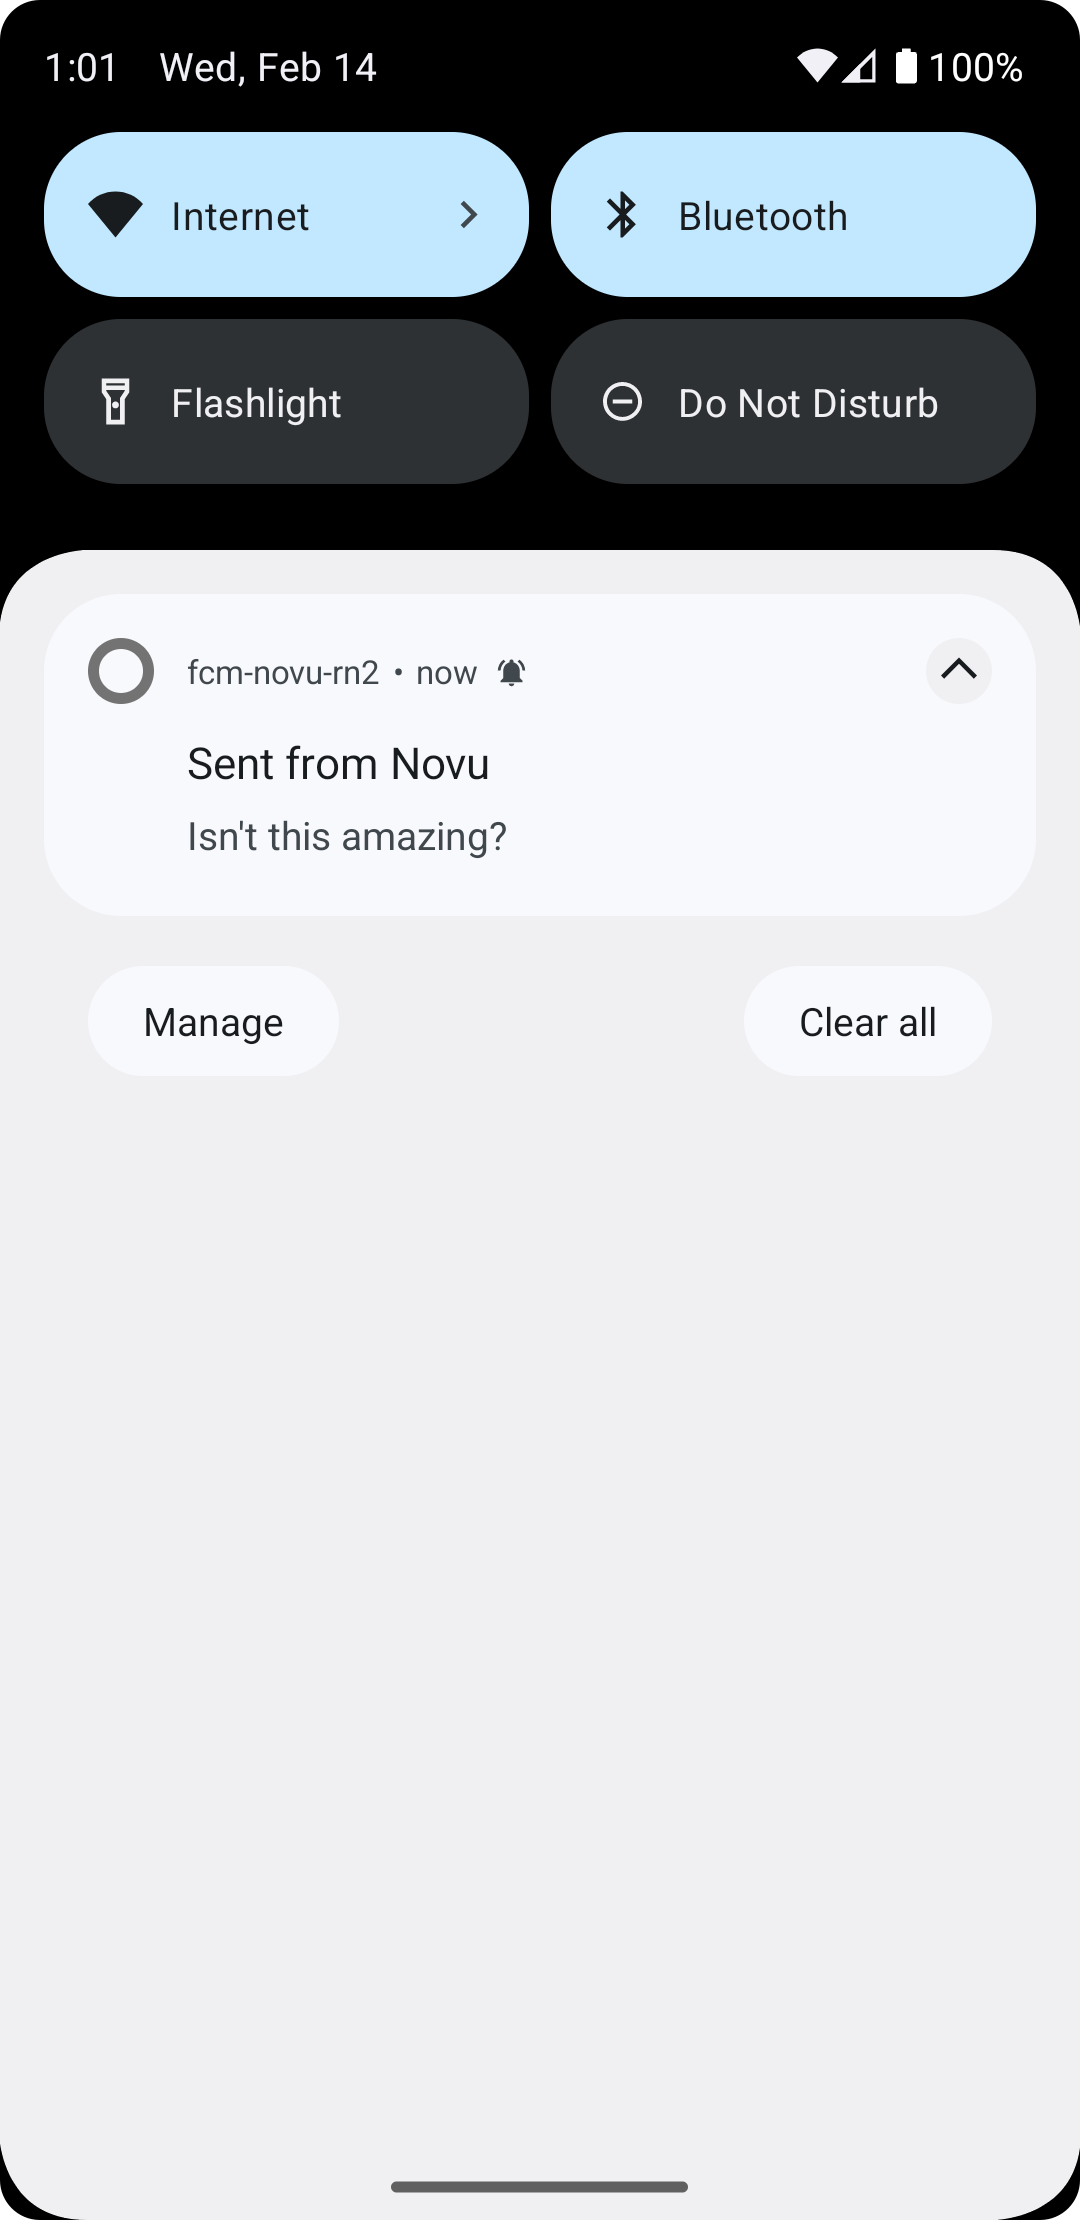
When triggered using the trigger code from above, this is the notification received on the device:
## Create a subscriber and update credentials
A subscriber is essentially the recipient of the notifications sent through Novu’s system. When you create a subscriber, you’re setting up the necessary information for Novu to send targeted notifications to. You can find more about subscribers in [our docs.](https://docs.novu.co/subscribers/subscribers)
To create a subscriber, we'll use the `identify` method:
```jsx theme={null}
// creating new instance of Novu
const novu = new Novu("");
// creating subscriber
await novu.subscribers.identify('newSubForRNA', {
firstName: "RNA"
});
```
Now, we'll add the FCM token that we'd received [earlier](#getting-the-fcm-token) to this subscriber using the `setCredentials` method:
```jsx theme={null}
await novu.subscribers.setCredentials('newSubForRNA', PushProviderIdEnum.FCM, {
deviceTokens: [''],
});
// notice the use of 'newSubForRNA' here. This identifies the subscriber to which we're adding the FCM token
```
## Sending a push notification using Novu
To send a notification with Novu, we are actually triggering a notification workflow. Here's how to do it using Node:
```jsx theme={null}
novu.trigger('rna-2', {
to: {
subscriberId: 'newSubForRNA'
},
payload: {},
})
```
When triggered using the trigger code from above, this is the notification received on the device:
 ## Dynamic content
So far, we've sent notifications that have had "hard-coded" content. Now we'll send dynamic data when triggering a notification.
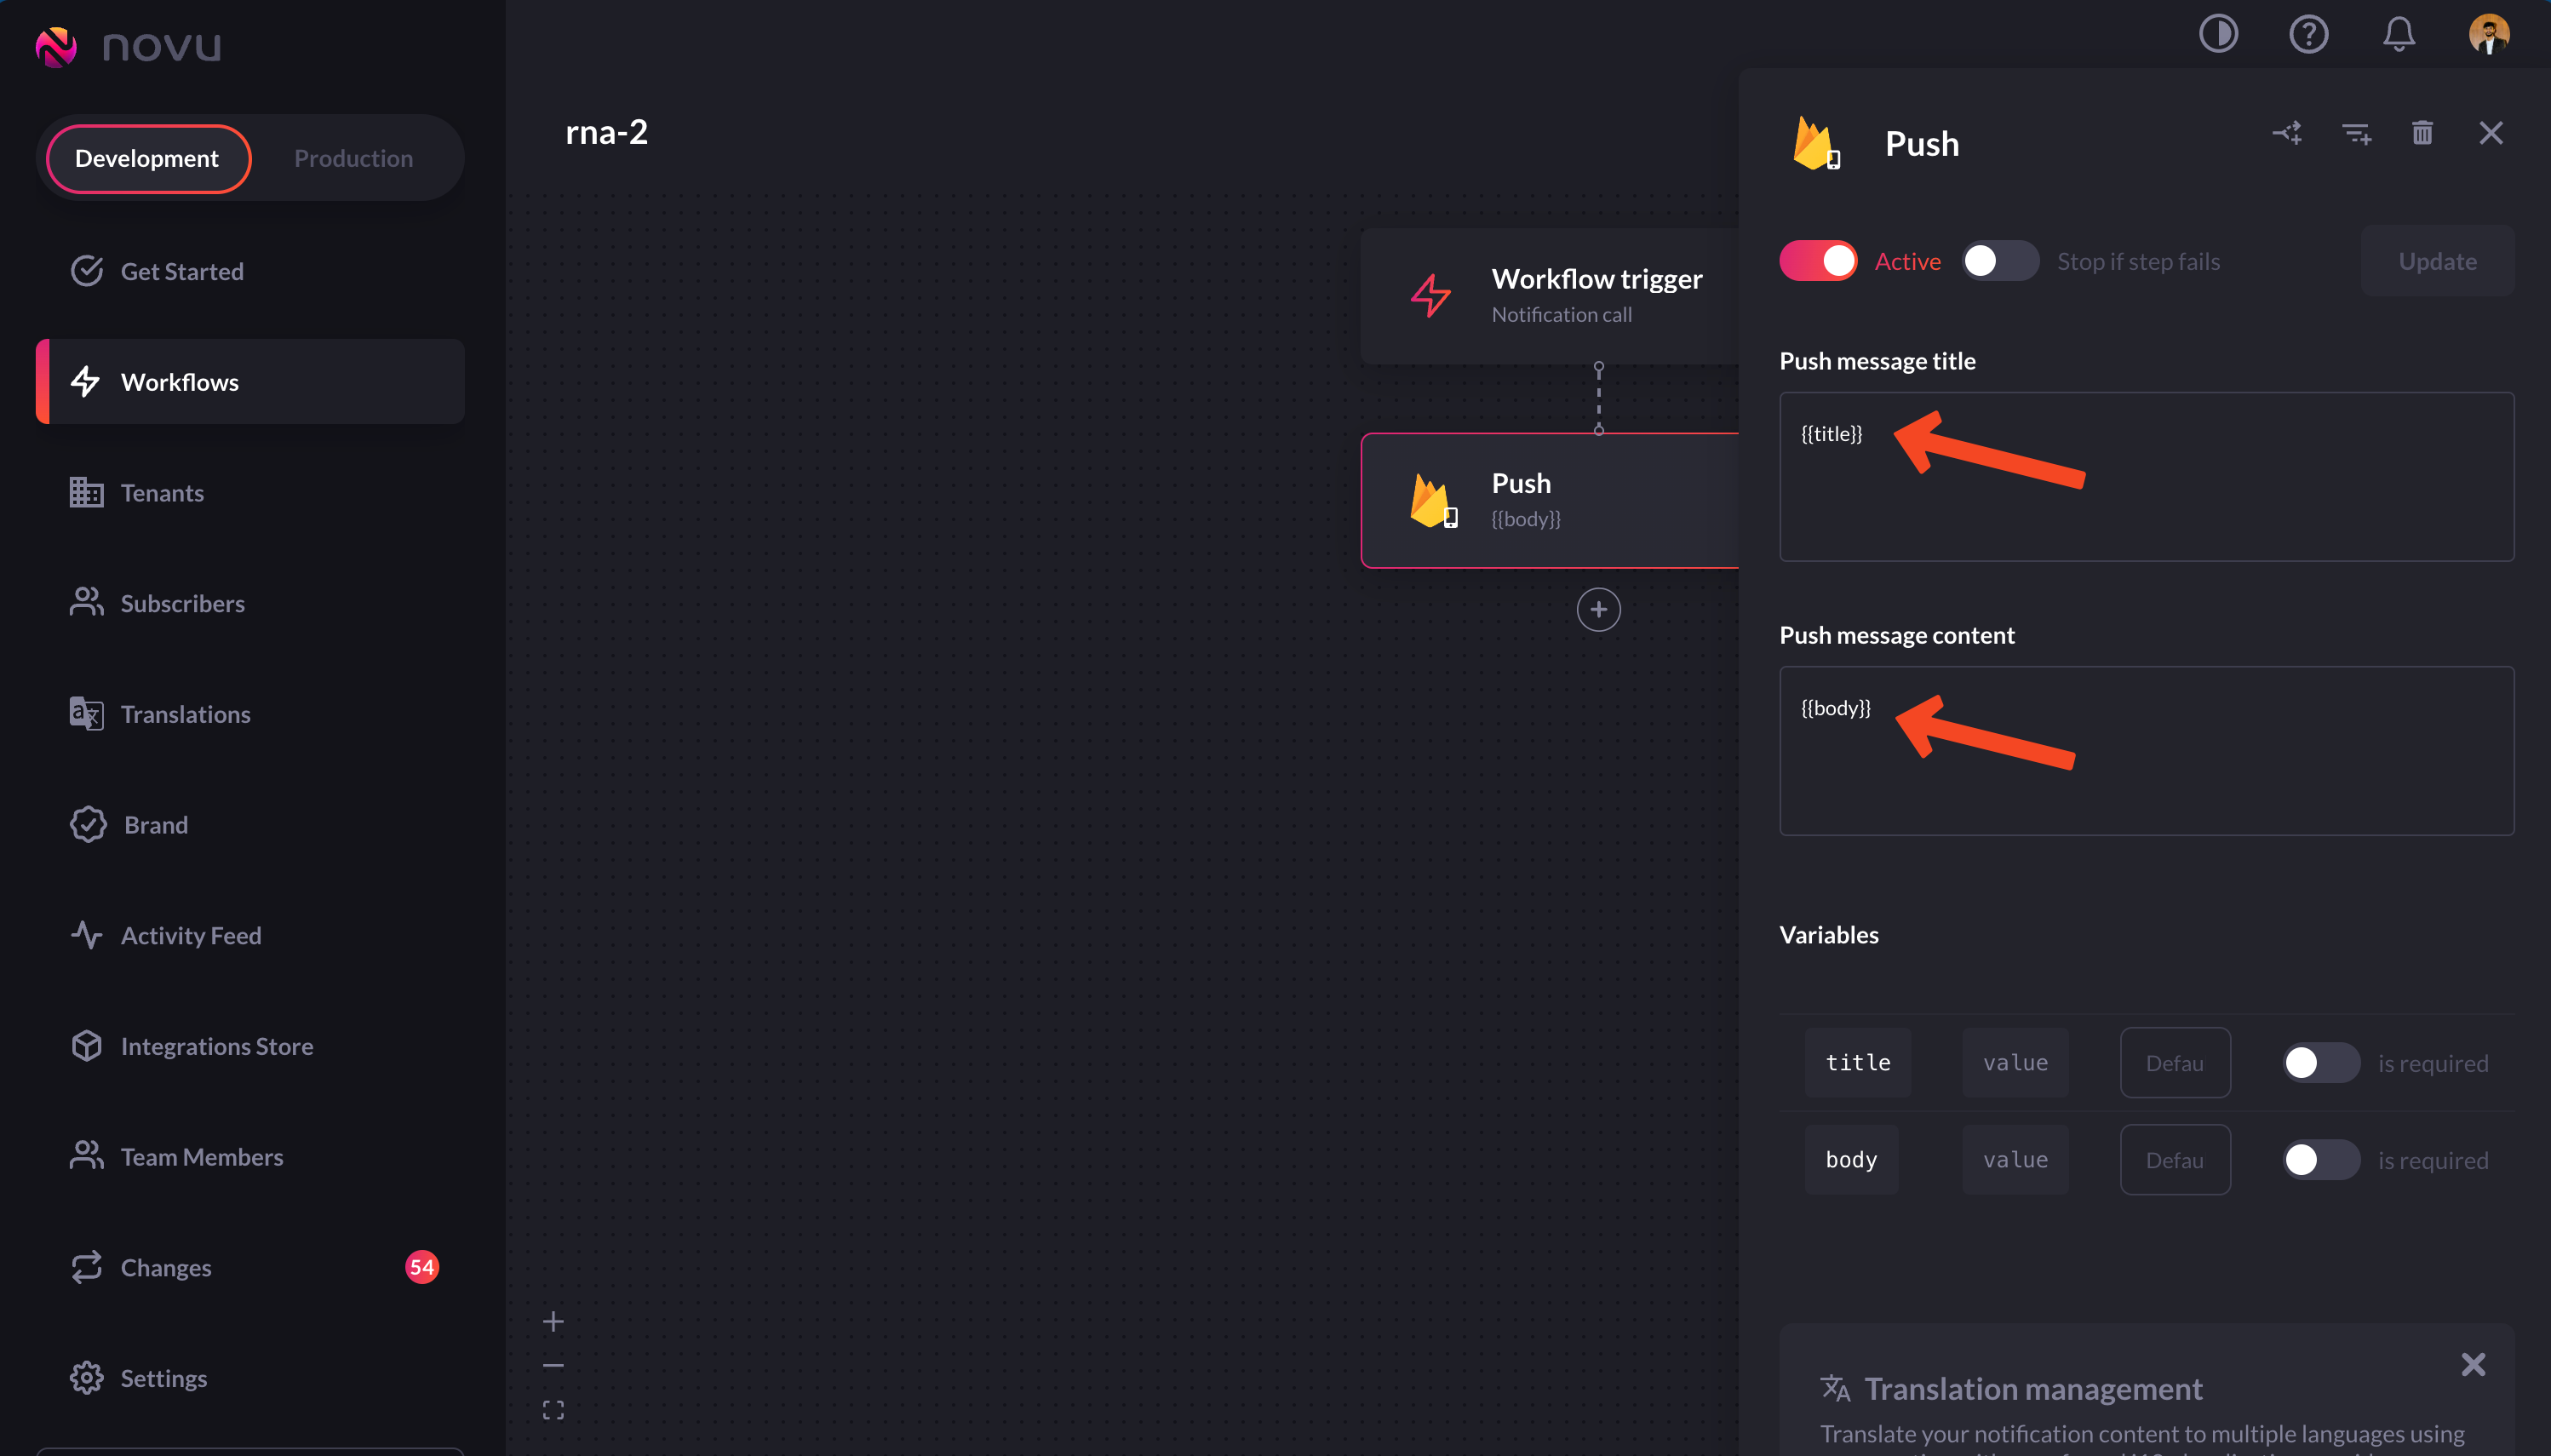
The way to do so is by changing the values of the title and the body to `{{title}}` and `{{body}}` in our workflow.
1. Go to the workflow we'd created earlier and change the values of the title and the body to `{{title}}` and `{{body}}` respectively.
## Dynamic content
So far, we've sent notifications that have had "hard-coded" content. Now we'll send dynamic data when triggering a notification.
The way to do so is by changing the values of the title and the body to `{{title}}` and `{{body}}` in our workflow.
1. Go to the workflow we'd created earlier and change the values of the title and the body to `{{title}}` and `{{body}}` respectively.
 2. Simply add these identifiers to the payload by changing the trigger code:
```jsx theme={null}
novu.trigger('rna-2', {
to: {
subscriberId: 'newSubForRNA'
},
payload: {
title: payloadTitle,
body: payloadBody
},
});
```
We're extracting `payloadTitle` and `payloadBody` from the request body
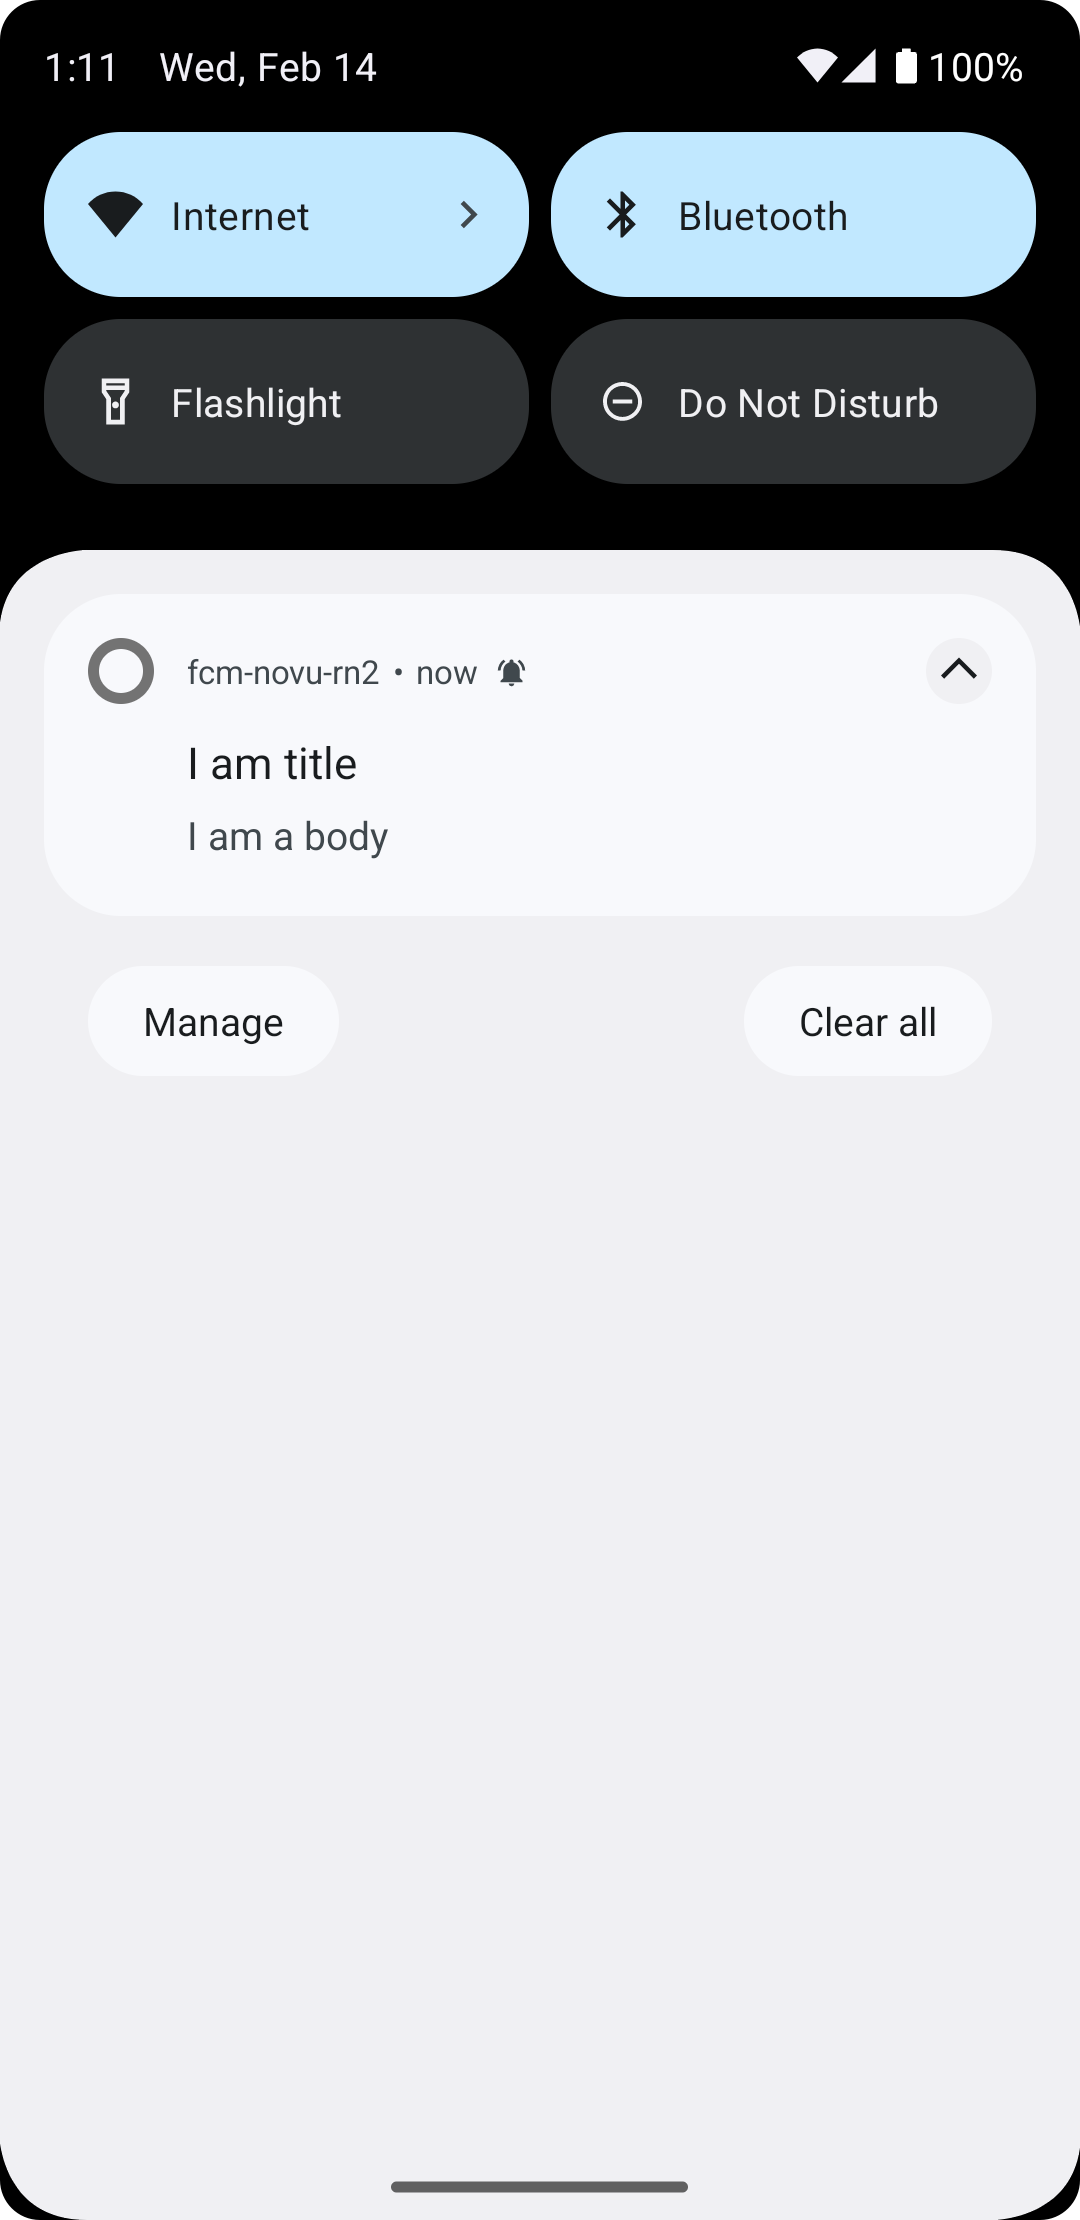
Now, the notification delivered to the subscriber will contain dynamic data as shown below:
2. Simply add these identifiers to the payload by changing the trigger code:
```jsx theme={null}
novu.trigger('rna-2', {
to: {
subscriberId: 'newSubForRNA'
},
payload: {
title: payloadTitle,
body: payloadBody
},
});
```
We're extracting `payloadTitle` and `payloadBody` from the request body
Now, the notification delivered to the subscriber will contain dynamic data as shown below:
 ## Sending images
Up to this point, your notifications have all contained only text. But if you’ve received many notifications, you know that notifications can have rich content, such as images. It’d be great if your notifications showed users a nice image related to their content. Once again, Firebase makes this super simple.
All you need to do is to specify the `URL` of the image in the override as shown below:
```jsx theme={null}
novu.trigger('rna-2', {
to: {
subscriberId: 'newSubForRNA'
},
payload: {
title: payloadTitle,
body: payloadBody
},
overrides: {
fcm: {
android: {
notification: {
imageUrl: 'URL of the image',
}
}
}
}
});
```
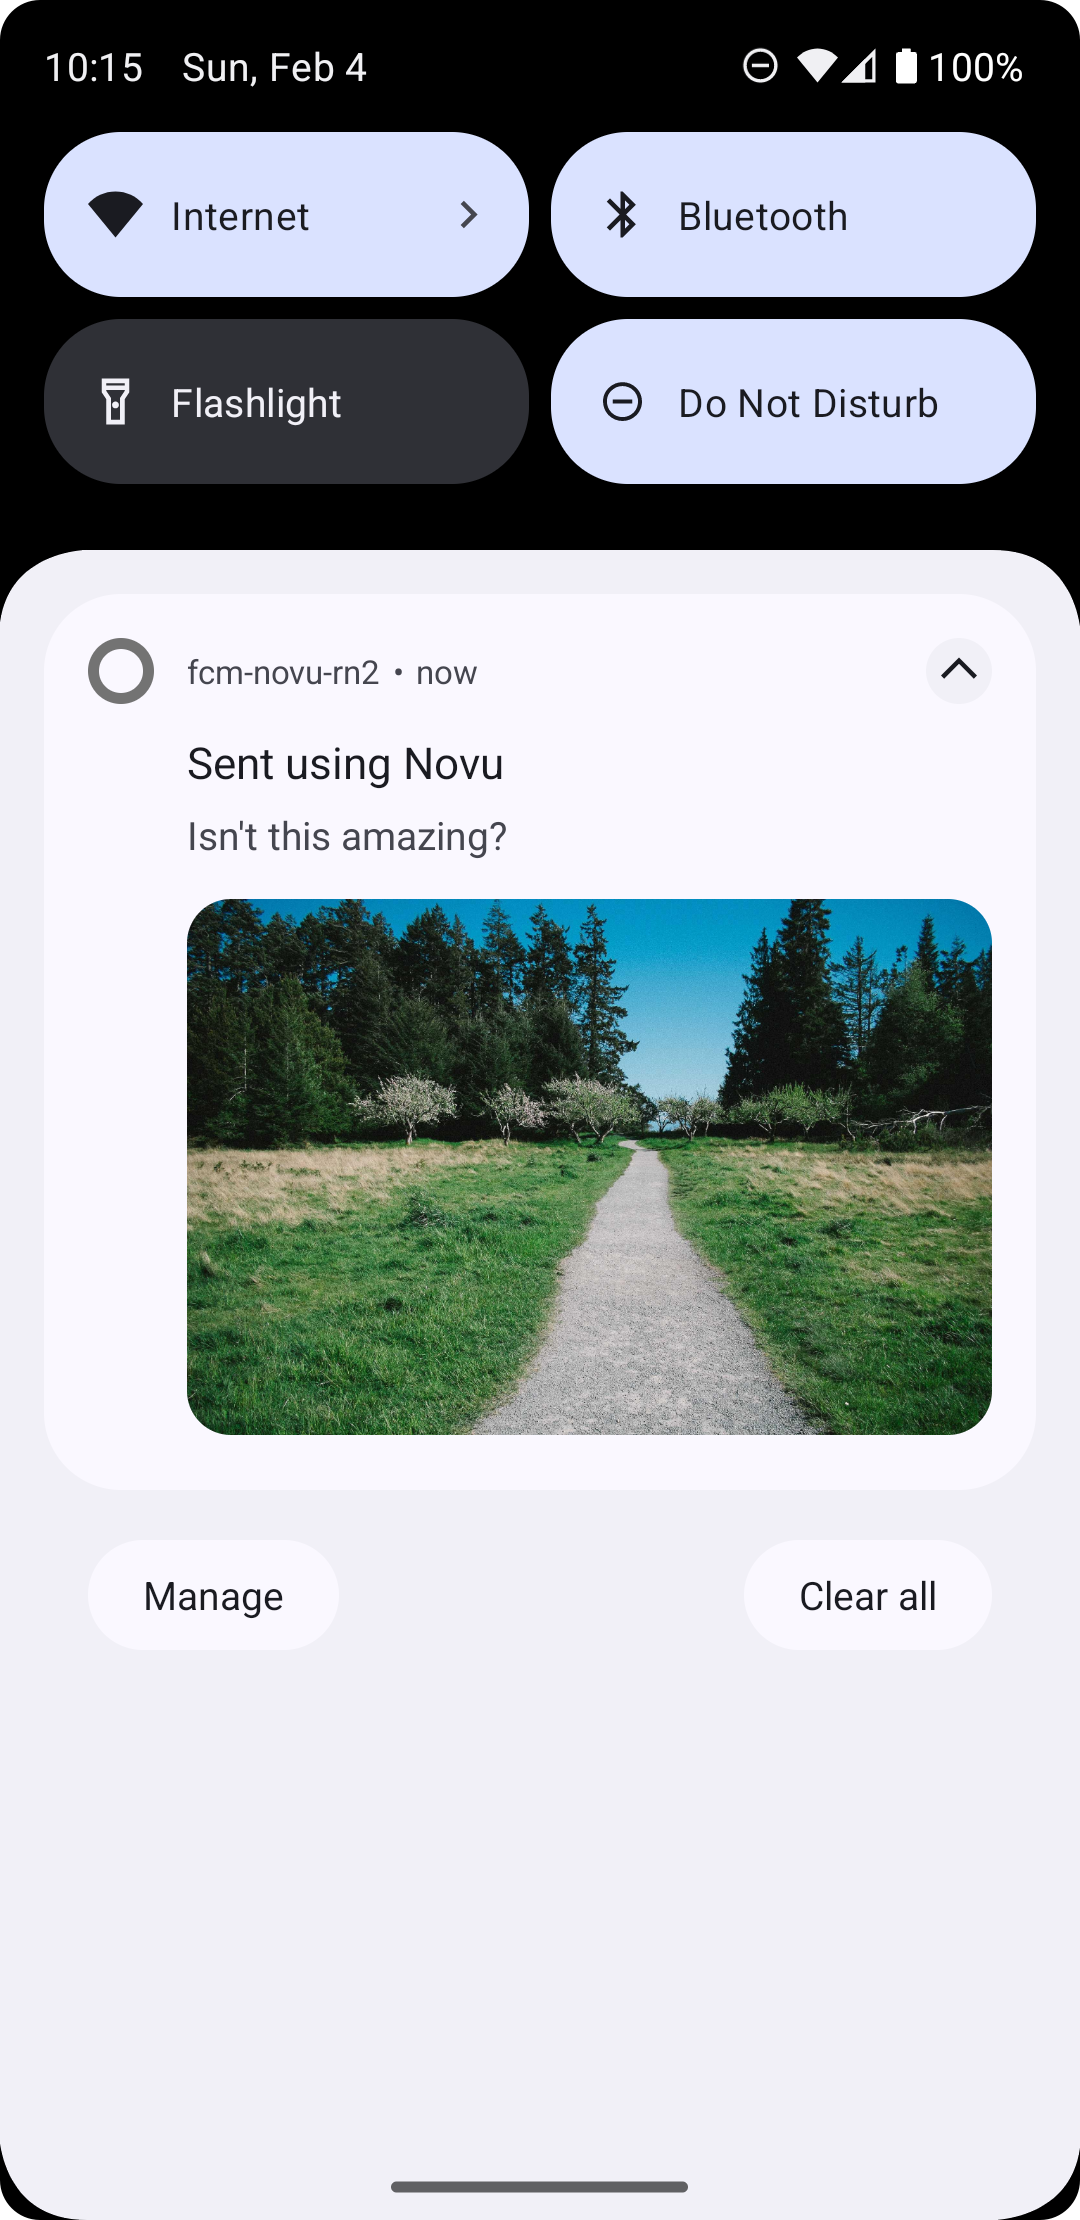
The following notification is what gets delivered to the subscriber:
## Sending images
Up to this point, your notifications have all contained only text. But if you’ve received many notifications, you know that notifications can have rich content, such as images. It’d be great if your notifications showed users a nice image related to their content. Once again, Firebase makes this super simple.
All you need to do is to specify the `URL` of the image in the override as shown below:
```jsx theme={null}
novu.trigger('rna-2', {
to: {
subscriberId: 'newSubForRNA'
},
payload: {
title: payloadTitle,
body: payloadBody
},
overrides: {
fcm: {
android: {
notification: {
imageUrl: 'URL of the image',
}
}
}
}
});
```
The following notification is what gets delivered to the subscriber:
 ## Handling data type messages
With FCM, you can send `Notification` and `Data` messages. We have handled sending notification messages. Let’s handle data messages. Data type messages are useful when, in addition to the usual data, you want to send some custom data. Maybe whether a subscriber has purchased the pro plan of our product or not, maybe which tier of usage they have purchased etc. You can do this easily by modifying the override. Here's an example of sending the subscription status using the identifier `subStatus`:
```jsx theme={null}
novu.trigger('rna-2', {
to: {
subscriberId: 'newSubForRNA'
},
payload: {
title: payloadTitle,
body: payloadBody
},
overrides: {
fcm: {
android: {
data: {
subStatus: "true"
},
}
}
}
});
```
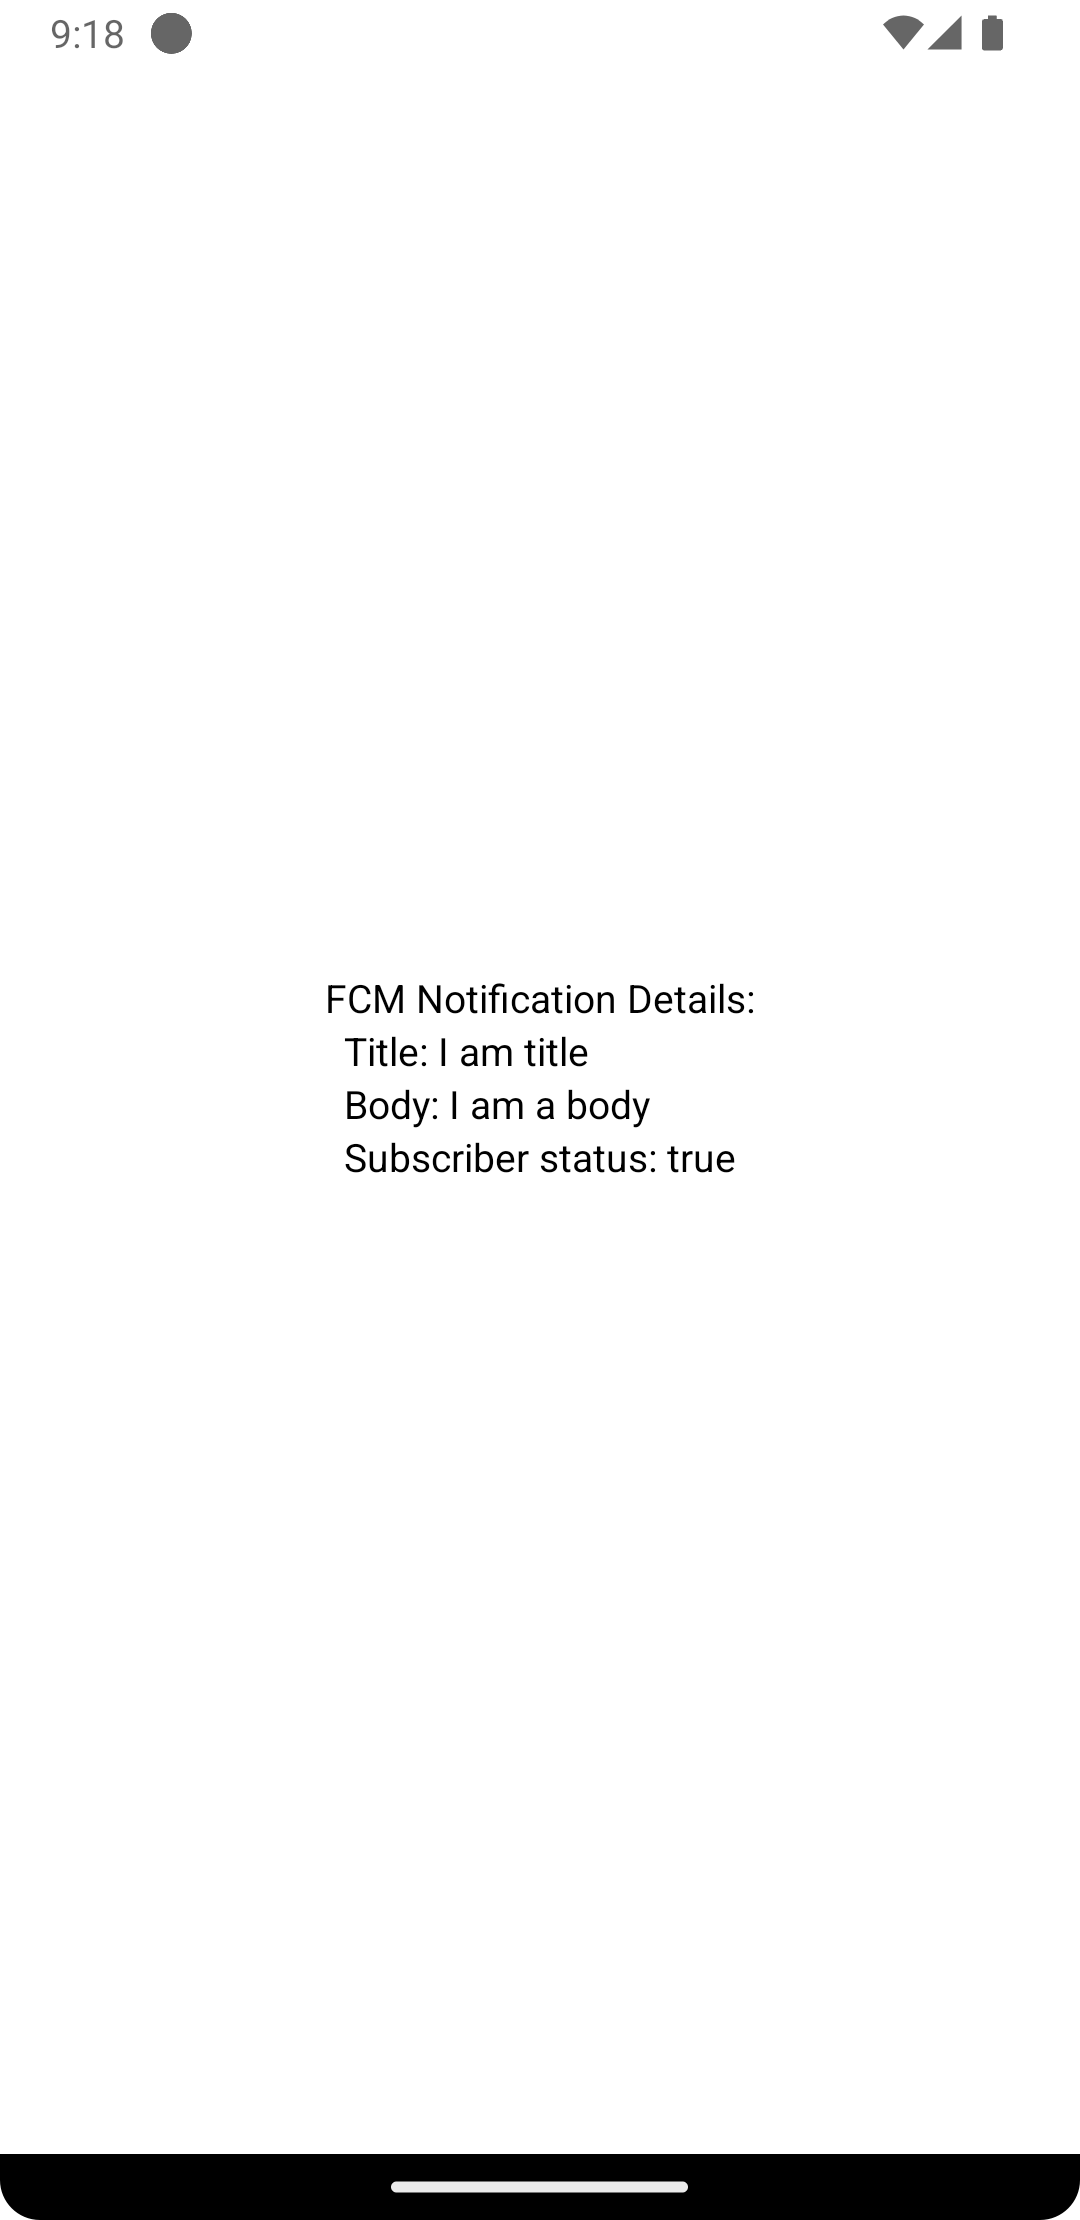
On the user's device, you can extract this out and have it displayed like this:
## Handling data type messages
With FCM, you can send `Notification` and `Data` messages. We have handled sending notification messages. Let’s handle data messages. Data type messages are useful when, in addition to the usual data, you want to send some custom data. Maybe whether a subscriber has purchased the pro plan of our product or not, maybe which tier of usage they have purchased etc. You can do this easily by modifying the override. Here's an example of sending the subscription status using the identifier `subStatus`:
```jsx theme={null}
novu.trigger('rna-2', {
to: {
subscriberId: 'newSubForRNA'
},
payload: {
title: payloadTitle,
body: payloadBody
},
overrides: {
fcm: {
android: {
data: {
subStatus: "true"
},
}
}
}
});
```
On the user's device, you can extract this out and have it displayed like this:
 ## Priority of a notification
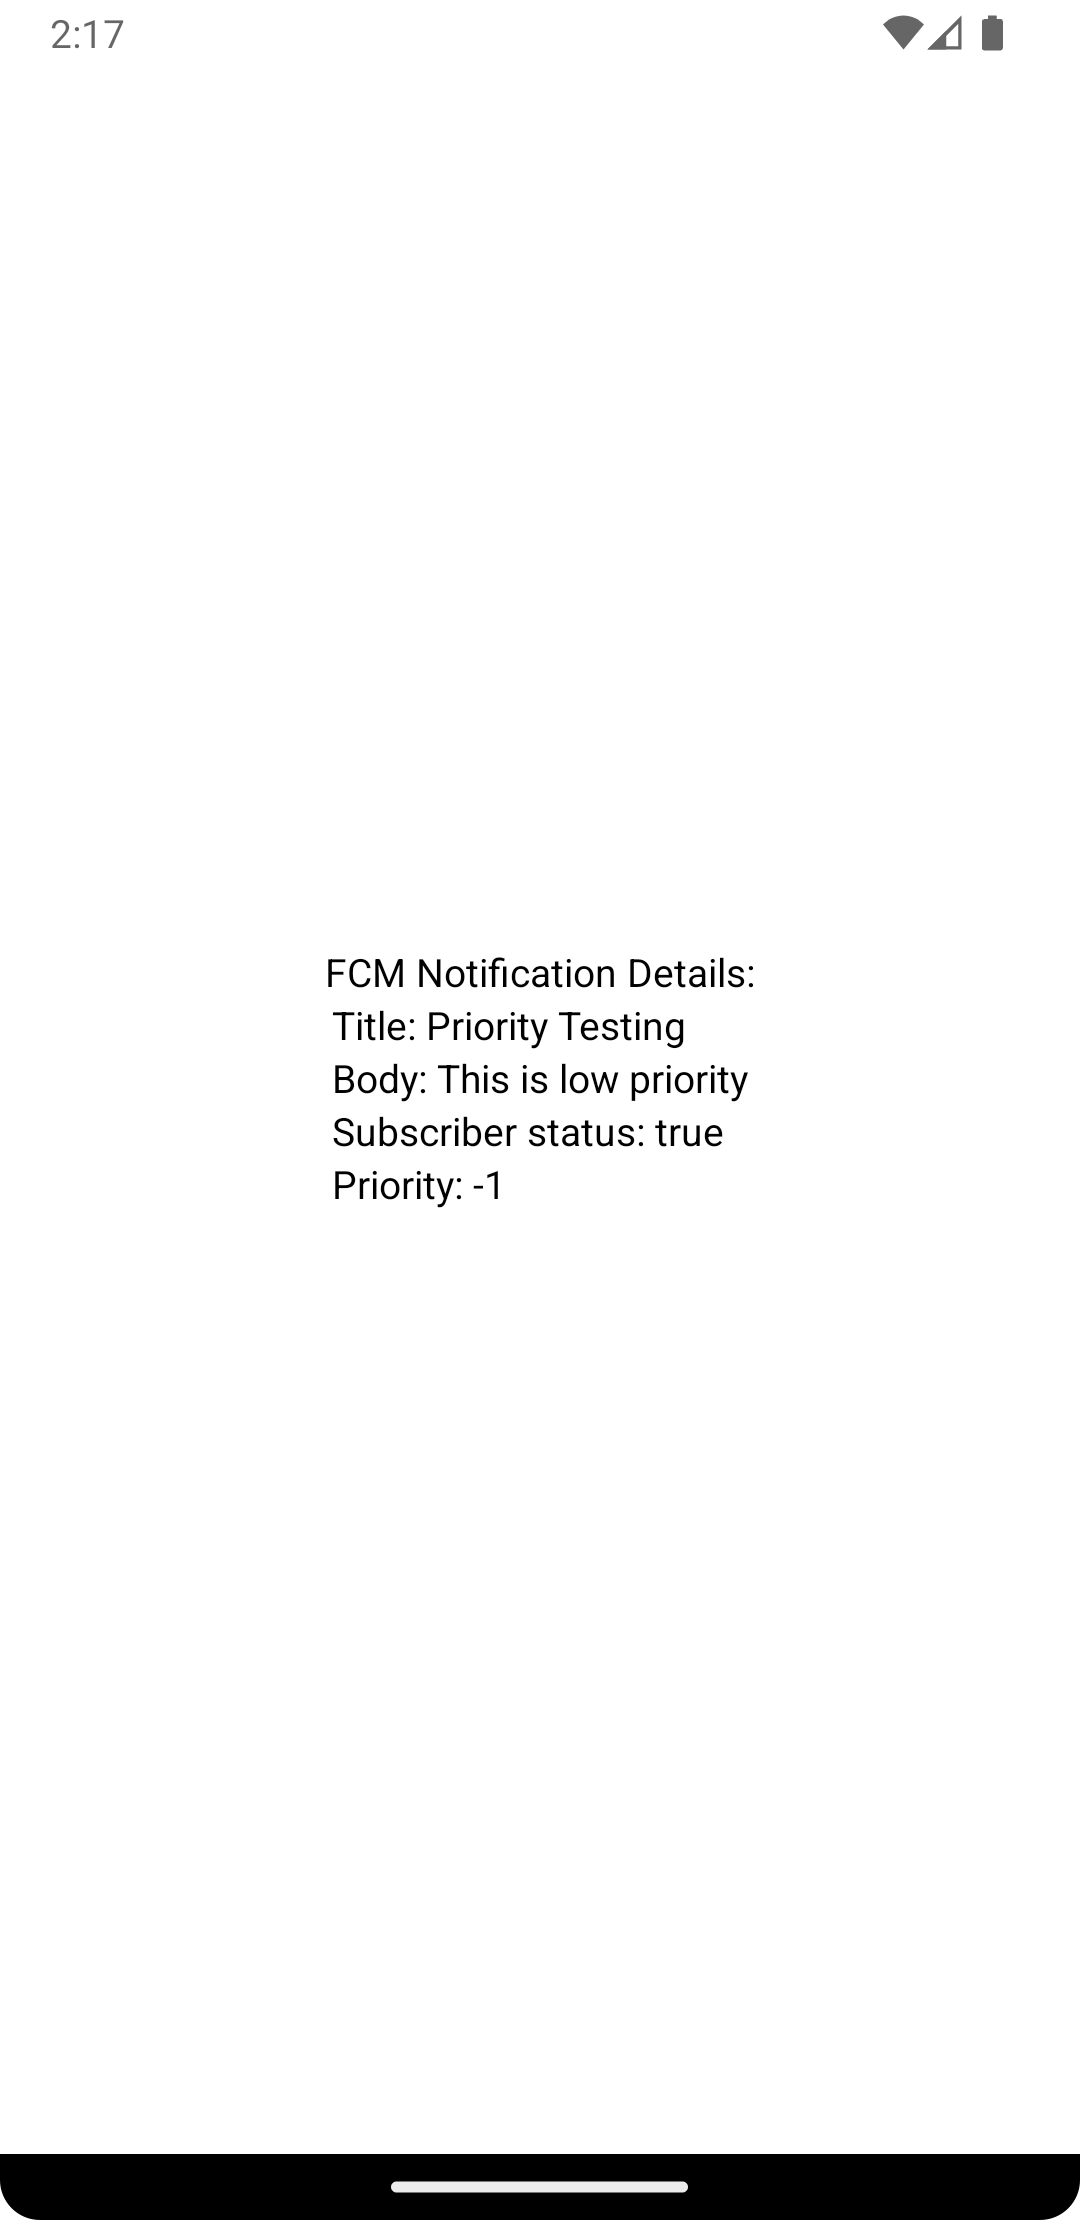
FCM tries to deliver high-priority messages immediately. The priority of a notification can also be altered by changing the overrides, as shown below:
```jsx theme={null}
novu.trigger('rna-2', {
to: {
subscriberId: 'newSubForRNA'
},
payload: {
title: payloadTitle,
body: payloadBody
},
overrides: {
fcm: {
android: {
data: {
subStatus: "true"
},
notification: {
priority: 'low'
}
}
}
}
});
```
## Priority of a notification
FCM tries to deliver high-priority messages immediately. The priority of a notification can also be altered by changing the overrides, as shown below:
```jsx theme={null}
novu.trigger('rna-2', {
to: {
subscriberId: 'newSubForRNA'
},
payload: {
title: payloadTitle,
body: payloadBody
},
overrides: {
fcm: {
android: {
data: {
subStatus: "true"
},
notification: {
priority: 'low'
}
}
}
}
});
```
 ## Additional resources
* [Firebase Cloud Messaging](https://firebase.google.com/docs/cloud-messaging)
* [FCM Architectural Overview](https://firebase.google.com/docs/cloud-messaging/fcm-architecture)
## Additional resources
* [Firebase Cloud Messaging](https://firebase.google.com/docs/cloud-messaging)
* [FCM Architectural Overview](https://firebase.google.com/docs/cloud-messaging/fcm-architecture)