> ## Documentation Index
> Fetch the complete documentation index at: https://v0.x-docs.novu.co/llms.txt
> Use this file to discover all available pages before exploring further.
# Java quickstart
> Learn how to use Novu to quickly send multi-channel (SMS, Email, Chat, Push) notifications with Java.
## Java Quickstart
Learn how to integrate Novu into your Java project on the fly and send notifications across different channels (SMS, Email, Chat, Push).
In this Quickstart, you will learn how to:
* [Install and Set up the Novu Java SDK.](#install-and-set-up-the-novu-java-sdk-in-your-project)
* [Configure a Notification Channel Provider.](#set-up-a-channel-provider)
* [Set up a Notification Workflow.](#create-a-notification-workflow)
* [Create a Subscriber and update a Subscriber's information.](#create-a-subscriber-and-update-a-subscribers-information)
* [Send your first Notification to a Subscriber.](#trigger-a-notification)
* [Send Notifications via Topics.](#topics)
Let's get started! :muscle:
## Requirements
To be able to use this Quickstart, you would need to have the following:
* A Novu account, if you don't have one yet, [sign up](https://web.novu.co?utm_campaign=docs-gs-quick-java) for free.
* A working Java development environment with JDK 17 and Springboot Framework of 3.1.2+.
The completed code for this quick start is available on GitHub. Check it out [here](https://github.com/novuhq/novu-java-quickstart).
## Install and Set up the Novu Java SDK in your project
First, you need to import the library into your application.
If you use Maven, add the dependency to the `pom.xml` file;
```xml theme={null}
co.novu
novu-java
{use-latest-version}
```
The latest version can be found [on GitHub.](https://github.com/novuhq/novu-java#installation)
If you use Gradle, add the dependency to the `build.gradle` file;
```groovy theme={null}
dependencies {
implementation 'co.novu:novu-java:{use-latest-version}'
}
```
Sync your project, and you should have the artifacts downloaded.
To use the SDK, you need to have your API key handy, it can be gotten from [settings page](https://web.novu.co/settings?utm_campaign=docs-quick-java) of the web dashboard.
To initialize the library, you can create an instance of `Novu.java` class using any of the following constructors:
```java theme={null}
//Using the API Key only
String apiKey = "INSERT_API_KEY_HERE";
Novu novu = new Novu(apiKey);
```
```java theme={null}
//Using the API Key plus an instance of NovuConfig
String apiKey = "INSERT_API_KEY_HERE";
NovuConfig novuConfig = new NovuConfig(apiKey);
Novu novu = new Novu(novuConfig);
```
Once that is done successfully, head over to the [web dashboard](https://web.novu.co?utm_campaign=docs-quick-java) for the next steps.
## Set up a Channel Provider
A channel provider is a service that provides one or more notification functionality such as sending an email, SMS, push notification, etc. Our [integration store](https://web.novu.co/integrations?utm_campaign=docs-quick-java) includes four channels: Email, SMS, Chat, and Push. These channels have multiple providers associated with them.
| Channel | Providers |
| ------- | ------------------------------------------------------------------- |
| Email | MailGun, Mandrill, MailJet, Amazon SES, Sendgrid, Postmark, Netcore |
| SMS | Twilio, Amazon SNS, Plivo, SMS, SMSCentral, Kannel, Infobip, Termii |
| Chat | Mattermost, Slack, Microsoft Teams, Discord |
| Push | FCM, APNS, Expo |
Only one provider can be **active** per **channel**. Connect any of your favorite providers to get started. The email channel comes with Novu's email provider, which is active by default and includes 300 credits.
## Create a Notification Workflow
A notification workflow is the blueprint for the notifications that will be sent. It holds the entire flow of messages sent to the subscriber. This is where all the different channels are tied together under a single entity.
The workflow includes the following:
* Notification workflow name and Identifier.
* Channel tailored content:
| Channel
| Content Style
| Custom Variables
`{{handlebars}}` format |
| ------------------- | ------------------------- | :-------------------------------------------: |
| **Email** | HTML | ✅ |
| | Visual Editor | ✅ |
| **SMS** | Text | ✅ |
| **Chat** | Text | ✅ |
| **In-App** | Text | ✅ |
| **Push** | Text | ✅ |
Proper authorization needs to be set for the Chat channel for subscribers.
Please proceed to create a notification workflow.
1. Click **Workflows** on the left sidebar of your Novu dashboard.
2. Click the **Create Workflow** button on the top right.
 3. The name of a new notification workflow is currently **Untitled**, rename it to a more suitable title.
 4. Select **Email** as the channel you want to add, by dragging it from the right sidebar.
 5. Click on the **Email** in the workflow and edit it as per this image. Don't forget to add the fields in the editor which is supposed to be updated with dynamic values that will be sent when calling the API.
 6. Also, add the variables in the **Variables** section in the test tab and try testing it by sending the email to your email address using the **Send Test Email** button at the bottom right.
 You should get an email within seconds! :ok\_hand:
Great, you have successfully sent your first notification via the Novu dashboard! Now, let's take a step further to trigger notifications via code.
## Create and Update a Subscriber's Information
The recipients of a triggered notification are called subscribers.
Click **Subscribers** on the left sidebar of the Novu dashboard to see all subscribers. By default, the dashboard will display a subscriber, as you were added automatically during sign-up.
You should get an email within seconds! :ok\_hand:
Great, you have successfully sent your first notification via the Novu dashboard! Now, let's take a step further to trigger notifications via code.
## Create and Update a Subscriber's Information
The recipients of a triggered notification are called subscribers.
Click **Subscribers** on the left sidebar of the Novu dashboard to see all subscribers. By default, the dashboard will display a subscriber, as you were added automatically during sign-up.
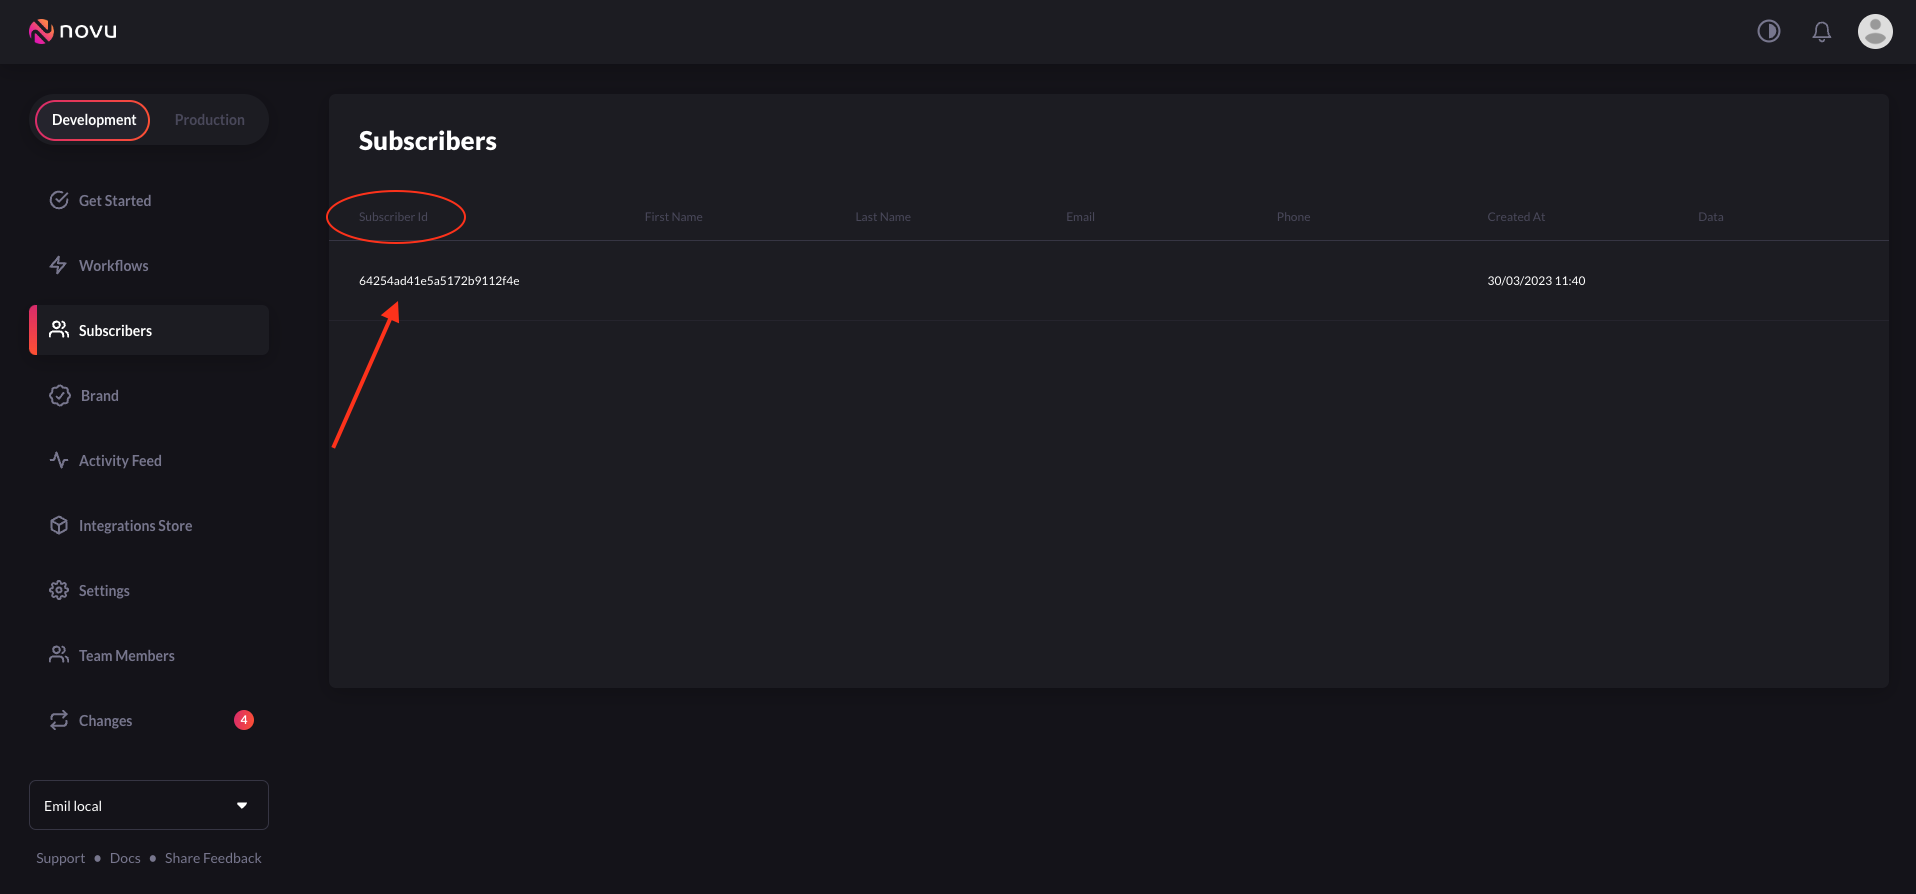 Now, let's create a subscriber on Novu. Copy and paste the following code to do so:
```java theme={null}
String apiKey = "API_KEY";
Novu novu = new Novu(apiKey);
SubscriberRequest subscriberRequest = new SubscriberRequest();
subscriberRequest.setEmail("email");
subscriberRequest.setFirstName("fName");
subscriberRequest.setLastName("lName");
subscriberRequest.setPhone("phone");
subscriberRequest.setAvatar("avatar");
subscriberRequest.setSubscriberId("subscriberId");
try {
return novu.createSubscriber(subscriberRequest);
}catch (Exception e){
log.error("Error Creating Subscriber", e);
}
return null;
```
When you run this code snippet, you should see the subscriber on your Novu dashboard.
Now, let's assume you want to modify the email address of the subscriber you just created, you can do that with the following code:
```java theme={null}
String apiKey = "API_KEY";
Novu novu = new Novu(apiKey);
UpdateSubscriberRequest updateSubscriberRequest = new UpdateSubscriberRequest();
updateSubscriberRequest.setEmail("updatedEmail");
updateSubscriberRequest.setFirstName("fName");
updateSubscriberRequest.setLastName("lName");
updateSubscriberRequest.setPhone("phone");
updateSubscriberRequest.setAvatar("avatar");
String subscriberId = "subscriberId";
try {
return novu.updateSubscriber(updateSubscriberRequest, subscriberId);
}catch (Exception e){
log.error("Error updating Subscriber", e);
}
return null;
```
Other valid fields that can be updated are `phone`, `avatar`, and `data`. The `data` field can accept an Object or a Map with the info you want to attach to the subscriber.
To create all of your subscribers, you need to programmatically add them to Novu.
## Trigger a Notification
Copy and paste the following code into your app to trigger a notification to a Subscriber:
```java theme={null}
String apiKey = "API_KEY";
Novu novu = new Novu(apiKey);
SubscriberRequest subscriberRequest = new SubscriberRequest();
subscriberRequest.setSubscriberId("subscriberId");
subscriberRequest.setEmail("email;");
subscriberRequest.setFirstName("fName");
subscriberRequest.setLastName("lName");
TriggerEventRequest triggerEventRequest = new TriggerEventRequest();
triggerEventRequest.setName("name");
triggerEventRequest.setTo(subscriberRequest);
triggerEventRequest.setPayload(Collections.singletonMap("customVariables", "Hello"));
try {
return novu.triggerEvent(triggerEventRequest);
}catch (Exception e){
log.error("Error triggering event", e);
}
return null;
```
Before running the code, make sure you understand the following:
* The value of `payload` is an array of the data that you want to be dynamically injected into the notification workflow content.
* The value of `subscriberId` is the ID of the subscriber on Novu. Replace `12345` with your subscriber ID.
Run the code to trigger a notification!
## Topics
Novu provides a simple API that offers an easy interface for triggering notifications to multiple subscribers at once. This API is called **Topics** and allows users to manage their bulk notifications without having to implement complex loops. A topic is identified by a custom key that is provided by the user, and this key will be the identifier used in the Topics API.
The topic key should be unique and can't be changed once chosen. Novu also caters for key uniqueness behind the scenes.
A topic can have multiple subscribers who will receive a notification whenever a message is sent to the topic.
## Create a Topic
Copy and paste the following code into your app to create a topic:
```java theme={null}
String apiKey = "API_KEY";
Novu novu = new Novu(apiKey);
TopicRequest createTopicRequest = new TopicRequest();
createTopicRequest.setKey("key");
createTopicRequest.setName("name");
try {
return novu.createTopic(createTopicRequest);
}catch (Exception e){
log.error("Error creating Topic", e);
}
return null;
```
Before running the code, make sure you understand the following:
* When creating a `key`, ensure it is unique and accurately identifies the topic. Document naming conventions and communicate them to team members to avoid confusion and ensure a smooth workflow.
* The value of `name` should be a descriptive topic name.
## Add Subscribers to a Topic
Copy and paste the following code into your app to add subscribers a topic:
```java theme={null}
String apiKey = "API_KEY";
Novu novu = new Novu(apiKey);
String topicKey = "key";
SubscriberAdditionRequest requestBody = new SubscriberAdditionRequest();
requestBody.setSubscribers(Collections.singletonList("aSubscriberId"));
try {
return novu.addSubscriberToTopic(requestBody,topicKey);
}catch (Exception e){
log.error("Error Adding Subscriber To Topic", e);
}
return null;
```
On the other hand, if you want to remove subscribers from a topic, do the following:
```java theme={null}
String apiKey = "API_KEY";
Novu novu = new Novu(apiKey);
String topicKey = "key";
SubscriberAdditionRequest requestBody = new SubscriberAdditionRequest();
requestBody.setSubscribers(Collections.singletonList("aSubscriberId"));
try {
return novu.removeSubscriberFromTopic(requestBody, topicKey);
}catch (Exception e){
log.error("Error Removing Subscriber From Topic", e);
}
return null;
```
## Send a Notification to a Topic
Thanks to the topics feature, it is possible to trigger a notification to all subscribers assigned to a topic. This helps avoid listing all subscriber identifiers in the `to` field of the notification trigger.
To trigger a notification to all subscribers of a topic, copy and paste the code below:
```java theme={null}
String apiKey = "API_KEY";
Novu novu = new Novu(apiKey);
Topic topic = new Topic();
topic.setType("Topic");
topic.setTopicKey("topicKey");
TriggerEventRequest triggerEventRequest = new TriggerEventRequest();
triggerEventRequest.setName("name");
triggerEventRequest.setTo(topic);
triggerEventRequest.setPayload(Collections.singletonMap("customVariables", "Hello"));
try {
return novu.triggerEvent(triggerEventRequest);
}catch (Exception e){
log.error("Error sending notification to topic", e);
}
return null;
```
## Next Steps
Great job! :clap: If you've reached this point, you should have successfully created a subscriber, notification workflow, configured a channel provider, triggered a single notification, created a topic, added a subscriber to a topic in your application.
To learn more about notifications and explore Novu's features and capabilities, check out:
* [Novu Java SDK](https://github.com/novuhq/novu-java) - Dive deeper into the SDK and explore a lot of features.
* [Novu Digest Engine](/guides/add-digest-to-inapp-notifications) - Learn how to aggregate multiple trigger events into a single message and deliver it to the subscriber.
* [Novu Notification Center](/getting-started/introduction) - Learn how to integrate a rich, ready-to-use real-time UI notification center into your app.
Now, let's create a subscriber on Novu. Copy and paste the following code to do so:
```java theme={null}
String apiKey = "API_KEY";
Novu novu = new Novu(apiKey);
SubscriberRequest subscriberRequest = new SubscriberRequest();
subscriberRequest.setEmail("email");
subscriberRequest.setFirstName("fName");
subscriberRequest.setLastName("lName");
subscriberRequest.setPhone("phone");
subscriberRequest.setAvatar("avatar");
subscriberRequest.setSubscriberId("subscriberId");
try {
return novu.createSubscriber(subscriberRequest);
}catch (Exception e){
log.error("Error Creating Subscriber", e);
}
return null;
```
When you run this code snippet, you should see the subscriber on your Novu dashboard.
Now, let's assume you want to modify the email address of the subscriber you just created, you can do that with the following code:
```java theme={null}
String apiKey = "API_KEY";
Novu novu = new Novu(apiKey);
UpdateSubscriberRequest updateSubscriberRequest = new UpdateSubscriberRequest();
updateSubscriberRequest.setEmail("updatedEmail");
updateSubscriberRequest.setFirstName("fName");
updateSubscriberRequest.setLastName("lName");
updateSubscriberRequest.setPhone("phone");
updateSubscriberRequest.setAvatar("avatar");
String subscriberId = "subscriberId";
try {
return novu.updateSubscriber(updateSubscriberRequest, subscriberId);
}catch (Exception e){
log.error("Error updating Subscriber", e);
}
return null;
```
Other valid fields that can be updated are `phone`, `avatar`, and `data`. The `data` field can accept an Object or a Map with the info you want to attach to the subscriber.
To create all of your subscribers, you need to programmatically add them to Novu.
## Trigger a Notification
Copy and paste the following code into your app to trigger a notification to a Subscriber:
```java theme={null}
String apiKey = "API_KEY";
Novu novu = new Novu(apiKey);
SubscriberRequest subscriberRequest = new SubscriberRequest();
subscriberRequest.setSubscriberId("subscriberId");
subscriberRequest.setEmail("email;");
subscriberRequest.setFirstName("fName");
subscriberRequest.setLastName("lName");
TriggerEventRequest triggerEventRequest = new TriggerEventRequest();
triggerEventRequest.setName("name");
triggerEventRequest.setTo(subscriberRequest);
triggerEventRequest.setPayload(Collections.singletonMap("customVariables", "Hello"));
try {
return novu.triggerEvent(triggerEventRequest);
}catch (Exception e){
log.error("Error triggering event", e);
}
return null;
```
Before running the code, make sure you understand the following:
* The value of `payload` is an array of the data that you want to be dynamically injected into the notification workflow content.
* The value of `subscriberId` is the ID of the subscriber on Novu. Replace `12345` with your subscriber ID.
Run the code to trigger a notification!
## Topics
Novu provides a simple API that offers an easy interface for triggering notifications to multiple subscribers at once. This API is called **Topics** and allows users to manage their bulk notifications without having to implement complex loops. A topic is identified by a custom key that is provided by the user, and this key will be the identifier used in the Topics API.
The topic key should be unique and can't be changed once chosen. Novu also caters for key uniqueness behind the scenes.
A topic can have multiple subscribers who will receive a notification whenever a message is sent to the topic.
## Create a Topic
Copy and paste the following code into your app to create a topic:
```java theme={null}
String apiKey = "API_KEY";
Novu novu = new Novu(apiKey);
TopicRequest createTopicRequest = new TopicRequest();
createTopicRequest.setKey("key");
createTopicRequest.setName("name");
try {
return novu.createTopic(createTopicRequest);
}catch (Exception e){
log.error("Error creating Topic", e);
}
return null;
```
Before running the code, make sure you understand the following:
* When creating a `key`, ensure it is unique and accurately identifies the topic. Document naming conventions and communicate them to team members to avoid confusion and ensure a smooth workflow.
* The value of `name` should be a descriptive topic name.
## Add Subscribers to a Topic
Copy and paste the following code into your app to add subscribers a topic:
```java theme={null}
String apiKey = "API_KEY";
Novu novu = new Novu(apiKey);
String topicKey = "key";
SubscriberAdditionRequest requestBody = new SubscriberAdditionRequest();
requestBody.setSubscribers(Collections.singletonList("aSubscriberId"));
try {
return novu.addSubscriberToTopic(requestBody,topicKey);
}catch (Exception e){
log.error("Error Adding Subscriber To Topic", e);
}
return null;
```
On the other hand, if you want to remove subscribers from a topic, do the following:
```java theme={null}
String apiKey = "API_KEY";
Novu novu = new Novu(apiKey);
String topicKey = "key";
SubscriberAdditionRequest requestBody = new SubscriberAdditionRequest();
requestBody.setSubscribers(Collections.singletonList("aSubscriberId"));
try {
return novu.removeSubscriberFromTopic(requestBody, topicKey);
}catch (Exception e){
log.error("Error Removing Subscriber From Topic", e);
}
return null;
```
## Send a Notification to a Topic
Thanks to the topics feature, it is possible to trigger a notification to all subscribers assigned to a topic. This helps avoid listing all subscriber identifiers in the `to` field of the notification trigger.
To trigger a notification to all subscribers of a topic, copy and paste the code below:
```java theme={null}
String apiKey = "API_KEY";
Novu novu = new Novu(apiKey);
Topic topic = new Topic();
topic.setType("Topic");
topic.setTopicKey("topicKey");
TriggerEventRequest triggerEventRequest = new TriggerEventRequest();
triggerEventRequest.setName("name");
triggerEventRequest.setTo(topic);
triggerEventRequest.setPayload(Collections.singletonMap("customVariables", "Hello"));
try {
return novu.triggerEvent(triggerEventRequest);
}catch (Exception e){
log.error("Error sending notification to topic", e);
}
return null;
```
## Next Steps
Great job! :clap: If you've reached this point, you should have successfully created a subscriber, notification workflow, configured a channel provider, triggered a single notification, created a topic, added a subscriber to a topic in your application.
To learn more about notifications and explore Novu's features and capabilities, check out:
* [Novu Java SDK](https://github.com/novuhq/novu-java) - Dive deeper into the SDK and explore a lot of features.
* [Novu Digest Engine](/guides/add-digest-to-inapp-notifications) - Learn how to aggregate multiple trigger events into a single message and deliver it to the subscriber.
* [Novu Notification Center](/getting-started/introduction) - Learn how to integrate a rich, ready-to-use real-time UI notification center into your app.