Getting Started
1. Initialize New Nuxt Project
We will follow the official installation guide from Nuxt, open your terminal / IDE, and run the following command:2. Integrate Novu Framework Into Our App (Notification Workflow)
- We will install the
@novu/frameworkpackage in the root of our Nuxt app directory by running the following command:
- We must provide an API endpoint for the Novu Dev Studio to fetch our notification workflow. (Don’t worry; we guide you through all the steps.) Navigate to your app’s
app/serverdirectory and create a new directory namedapi.
app/server/api directory and name it novu.ts. Copy and paste the code snippet below:
- Now, let’s create the instance where we will build and maintain our notification workflow:
app/server directory and create another directory named novu.
app/server/novu directory and name it workflows.ts. Copy and paste the code snippet below:
- Select a name for our workflow.
- Declare Workflow Steps as we see fit for our use case
- Configure what could be passed in the payload of the Workflow Trigger (payloadSchema)
- Configure what inputs could be passed statically via Novu Web (inputSchema)
app/server/novu/workflows.ts; make sure to provide each workflow with a unique name.
3. Adding Vuemail in our notification workflow
- We will install the
vue-emailpackage in the root of our Nuxt app directory by running the following command:
- We will create one more directory in the root of our directory and name it
templates. That is where our vue-email templates will be stored.
- In the
app/templatesdirectory, we will create a file for our first vue-email template and name itsample-email.vue.
4. Launching The Dev Studio
Now that we have everything in our notification workflow configured along with the vue-email template we will use, it’s time to see a visual representation of what we have built.-
If you haven’t run the development environment for your Nuxt app, now is the time.
-
Do you remember that we exposed an Bridge API endpoint in our app for Dev Studio to catch? This is where it happens.
Run the following command in a separate terminal:
If you’ve followed this guide, you should see this:Here is where our exact API endpoint goes. If our application runs on a different port, we should change the URL manually to point Dev Studio in the right direction.
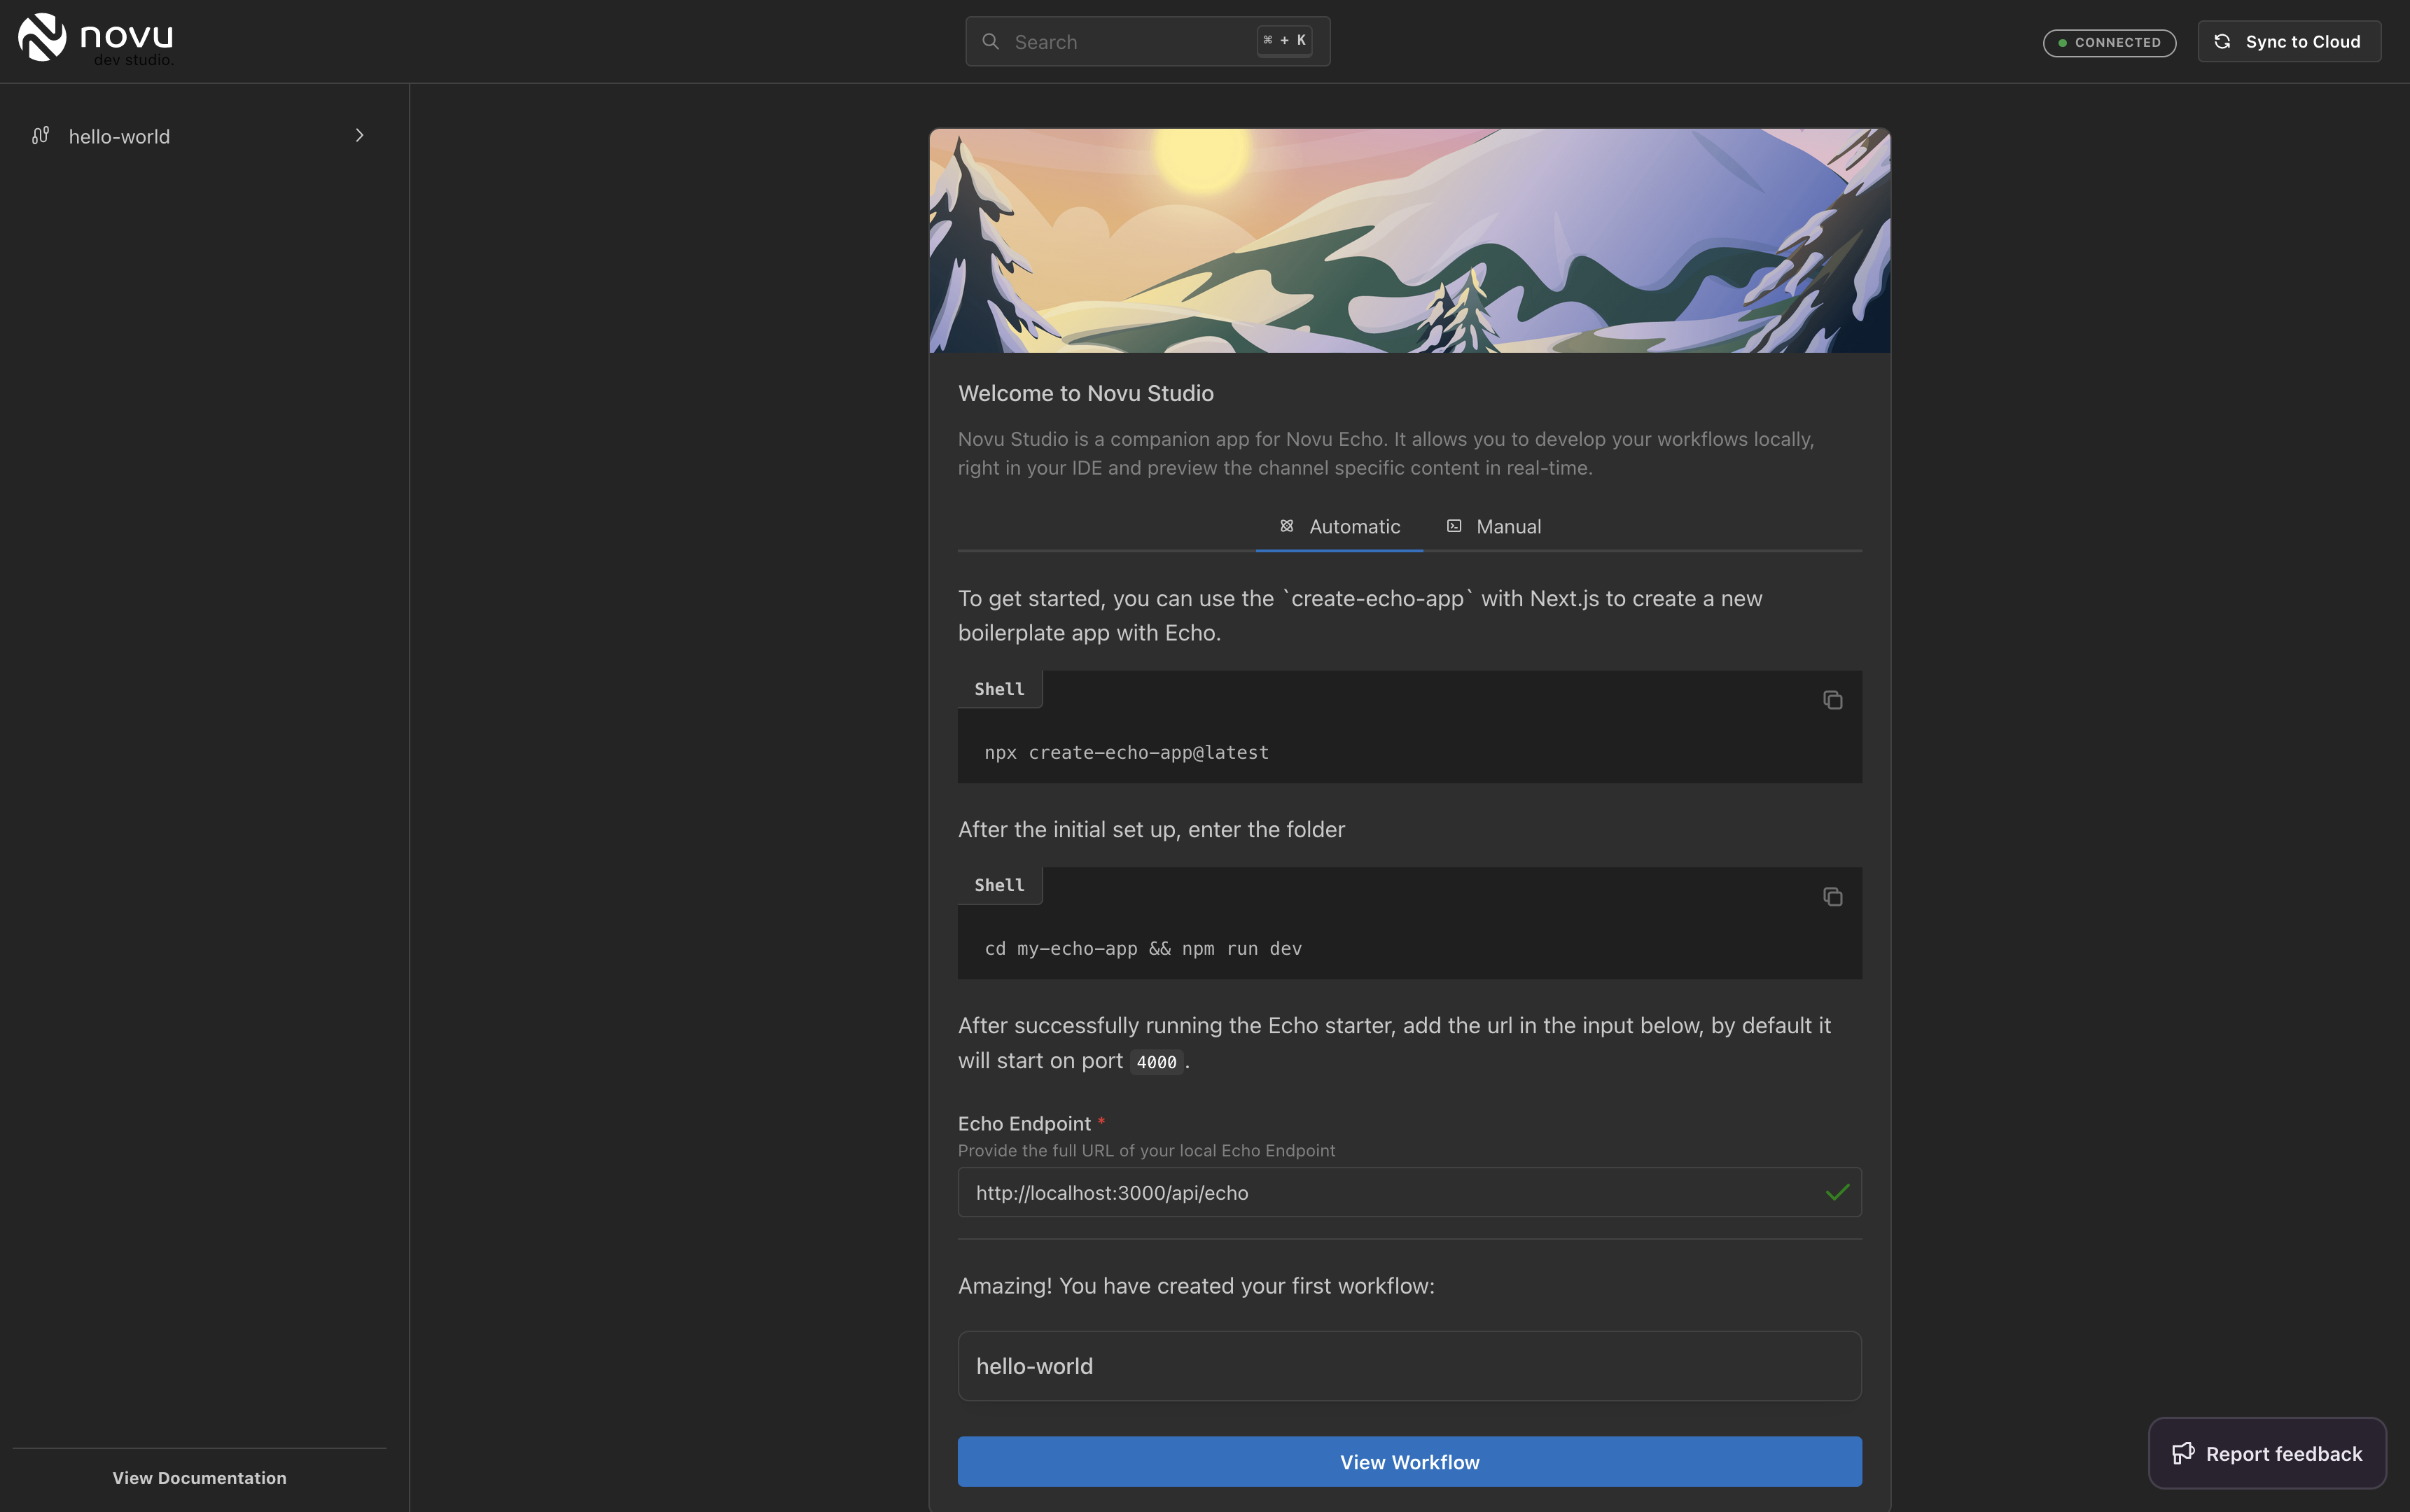
Launching the dev studio
Also, if we have configured everything correctly, we should see that Dev Studio sees our workflow identifier (Workflow unique name).
Provide Echo endpoint
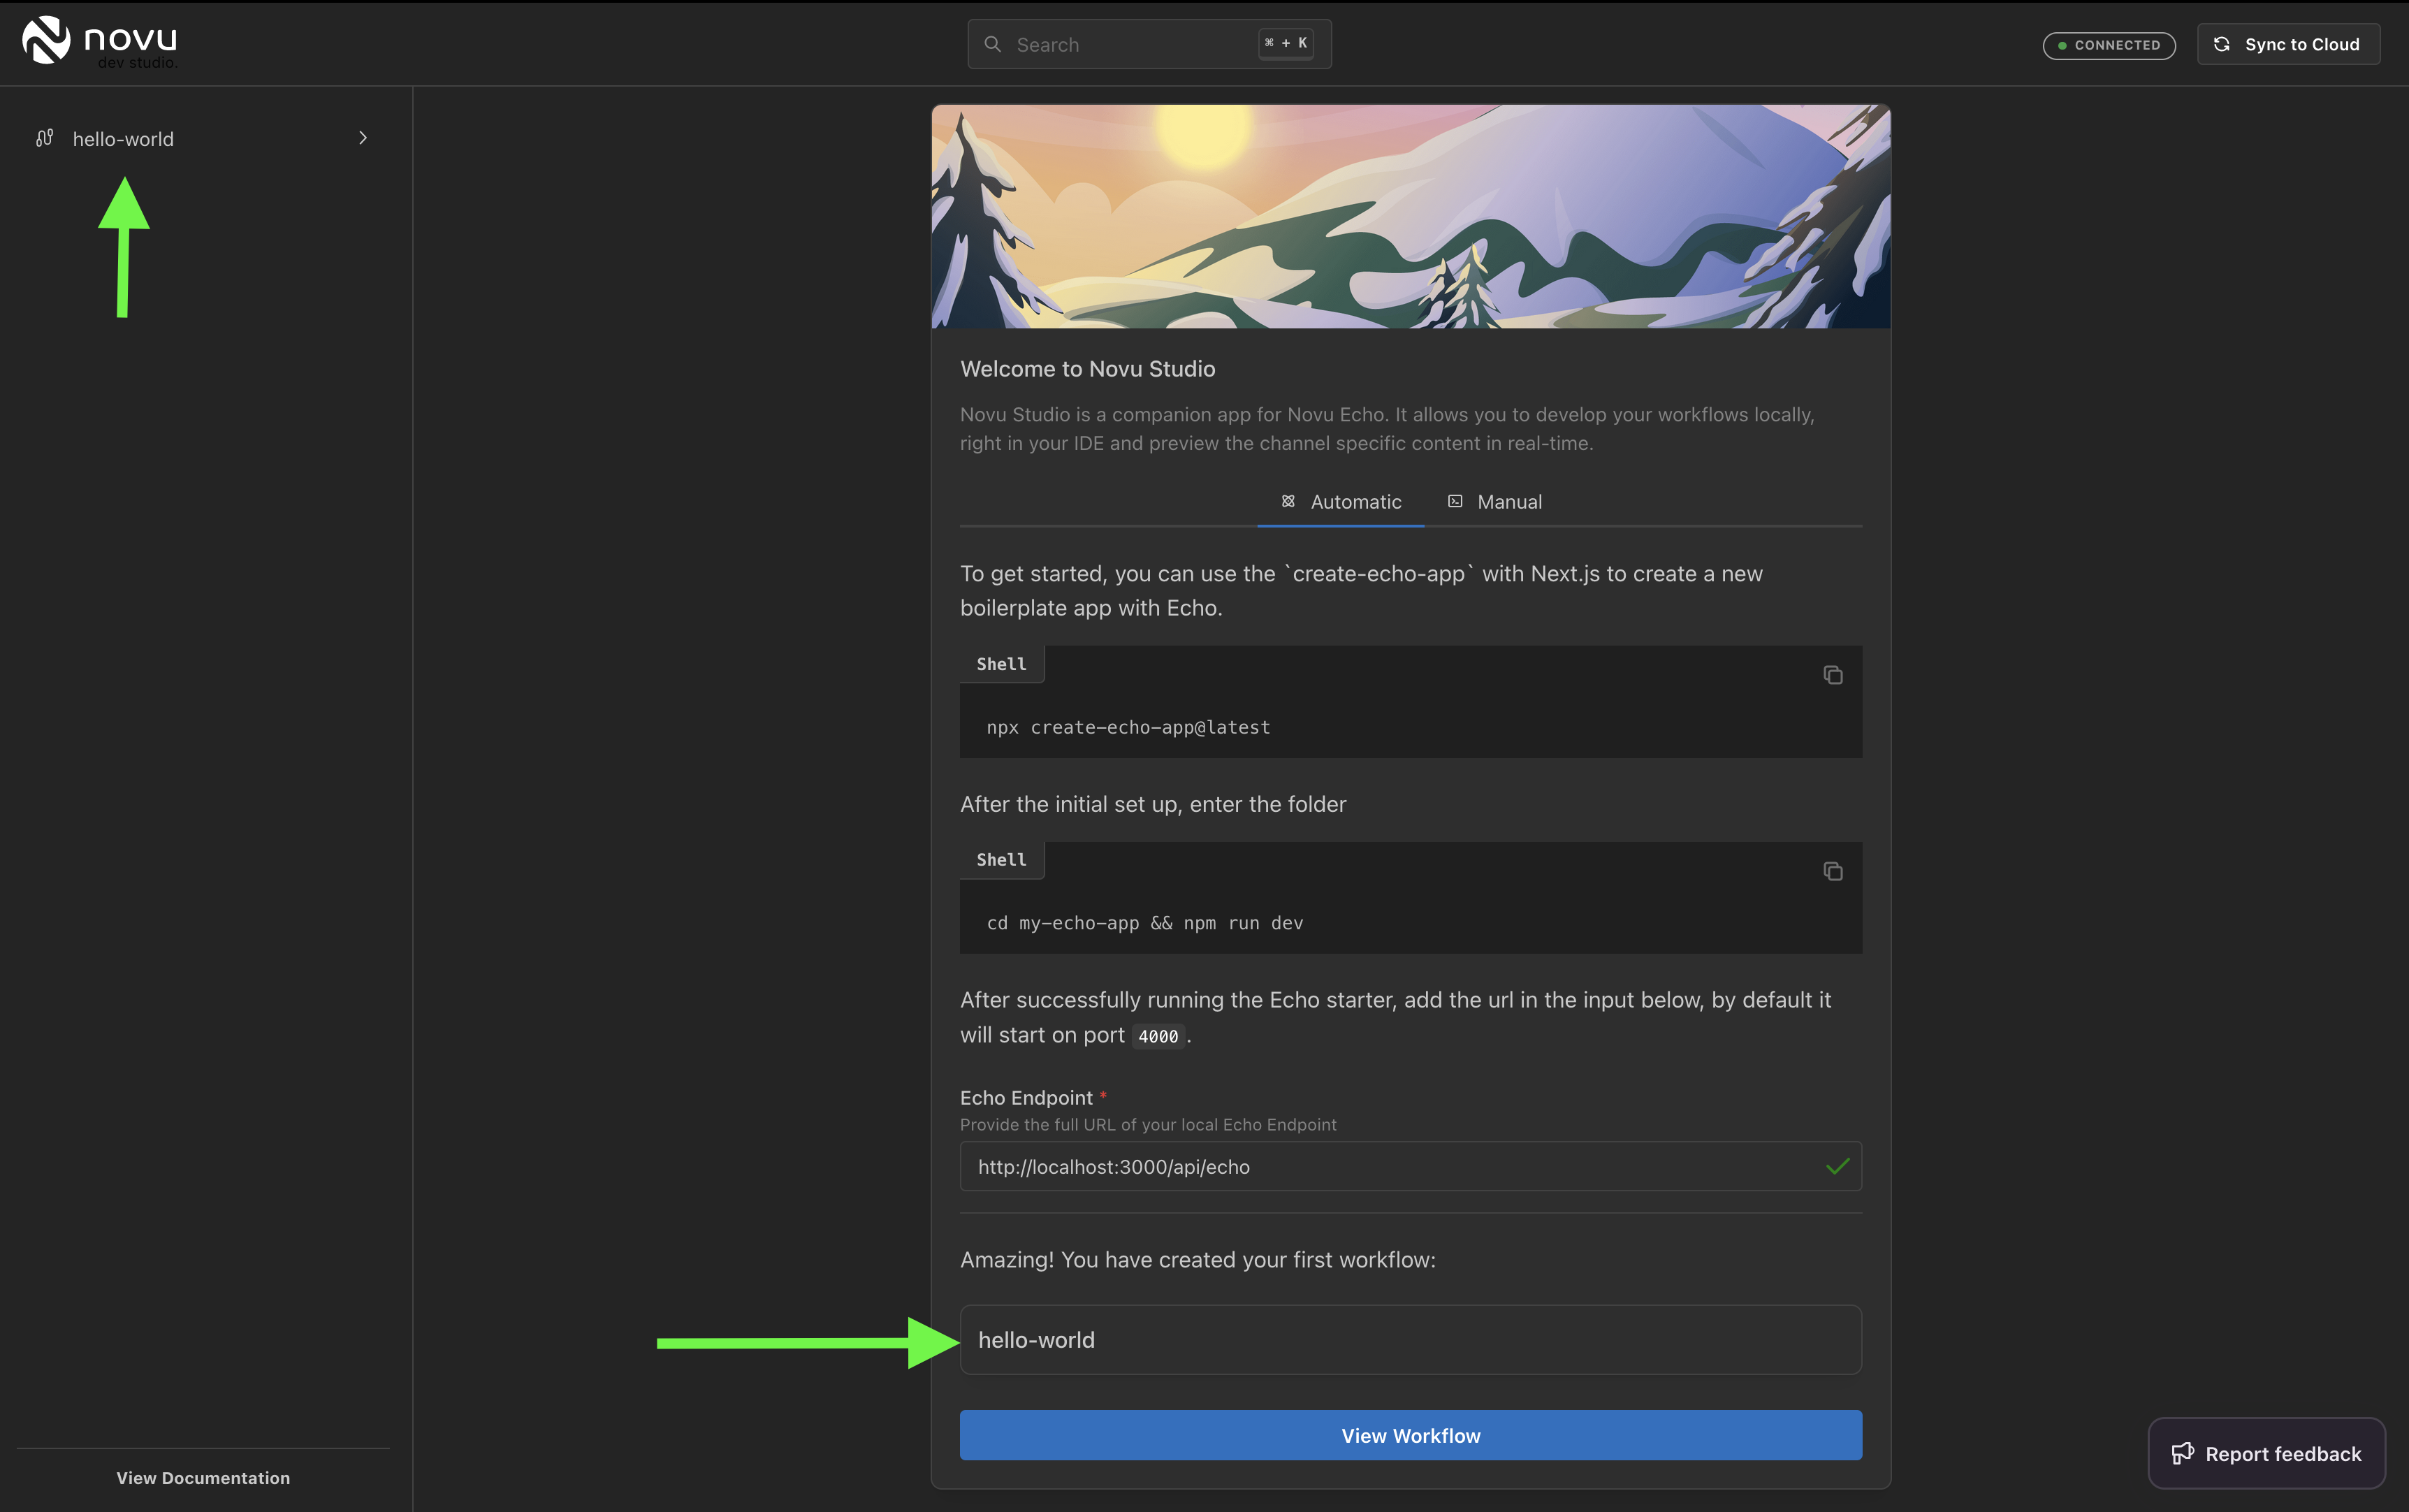
Dev studio locates our workflow
-
Click the “View Workflow” button in the Dev Studio to see the workflow.
We should see the following:
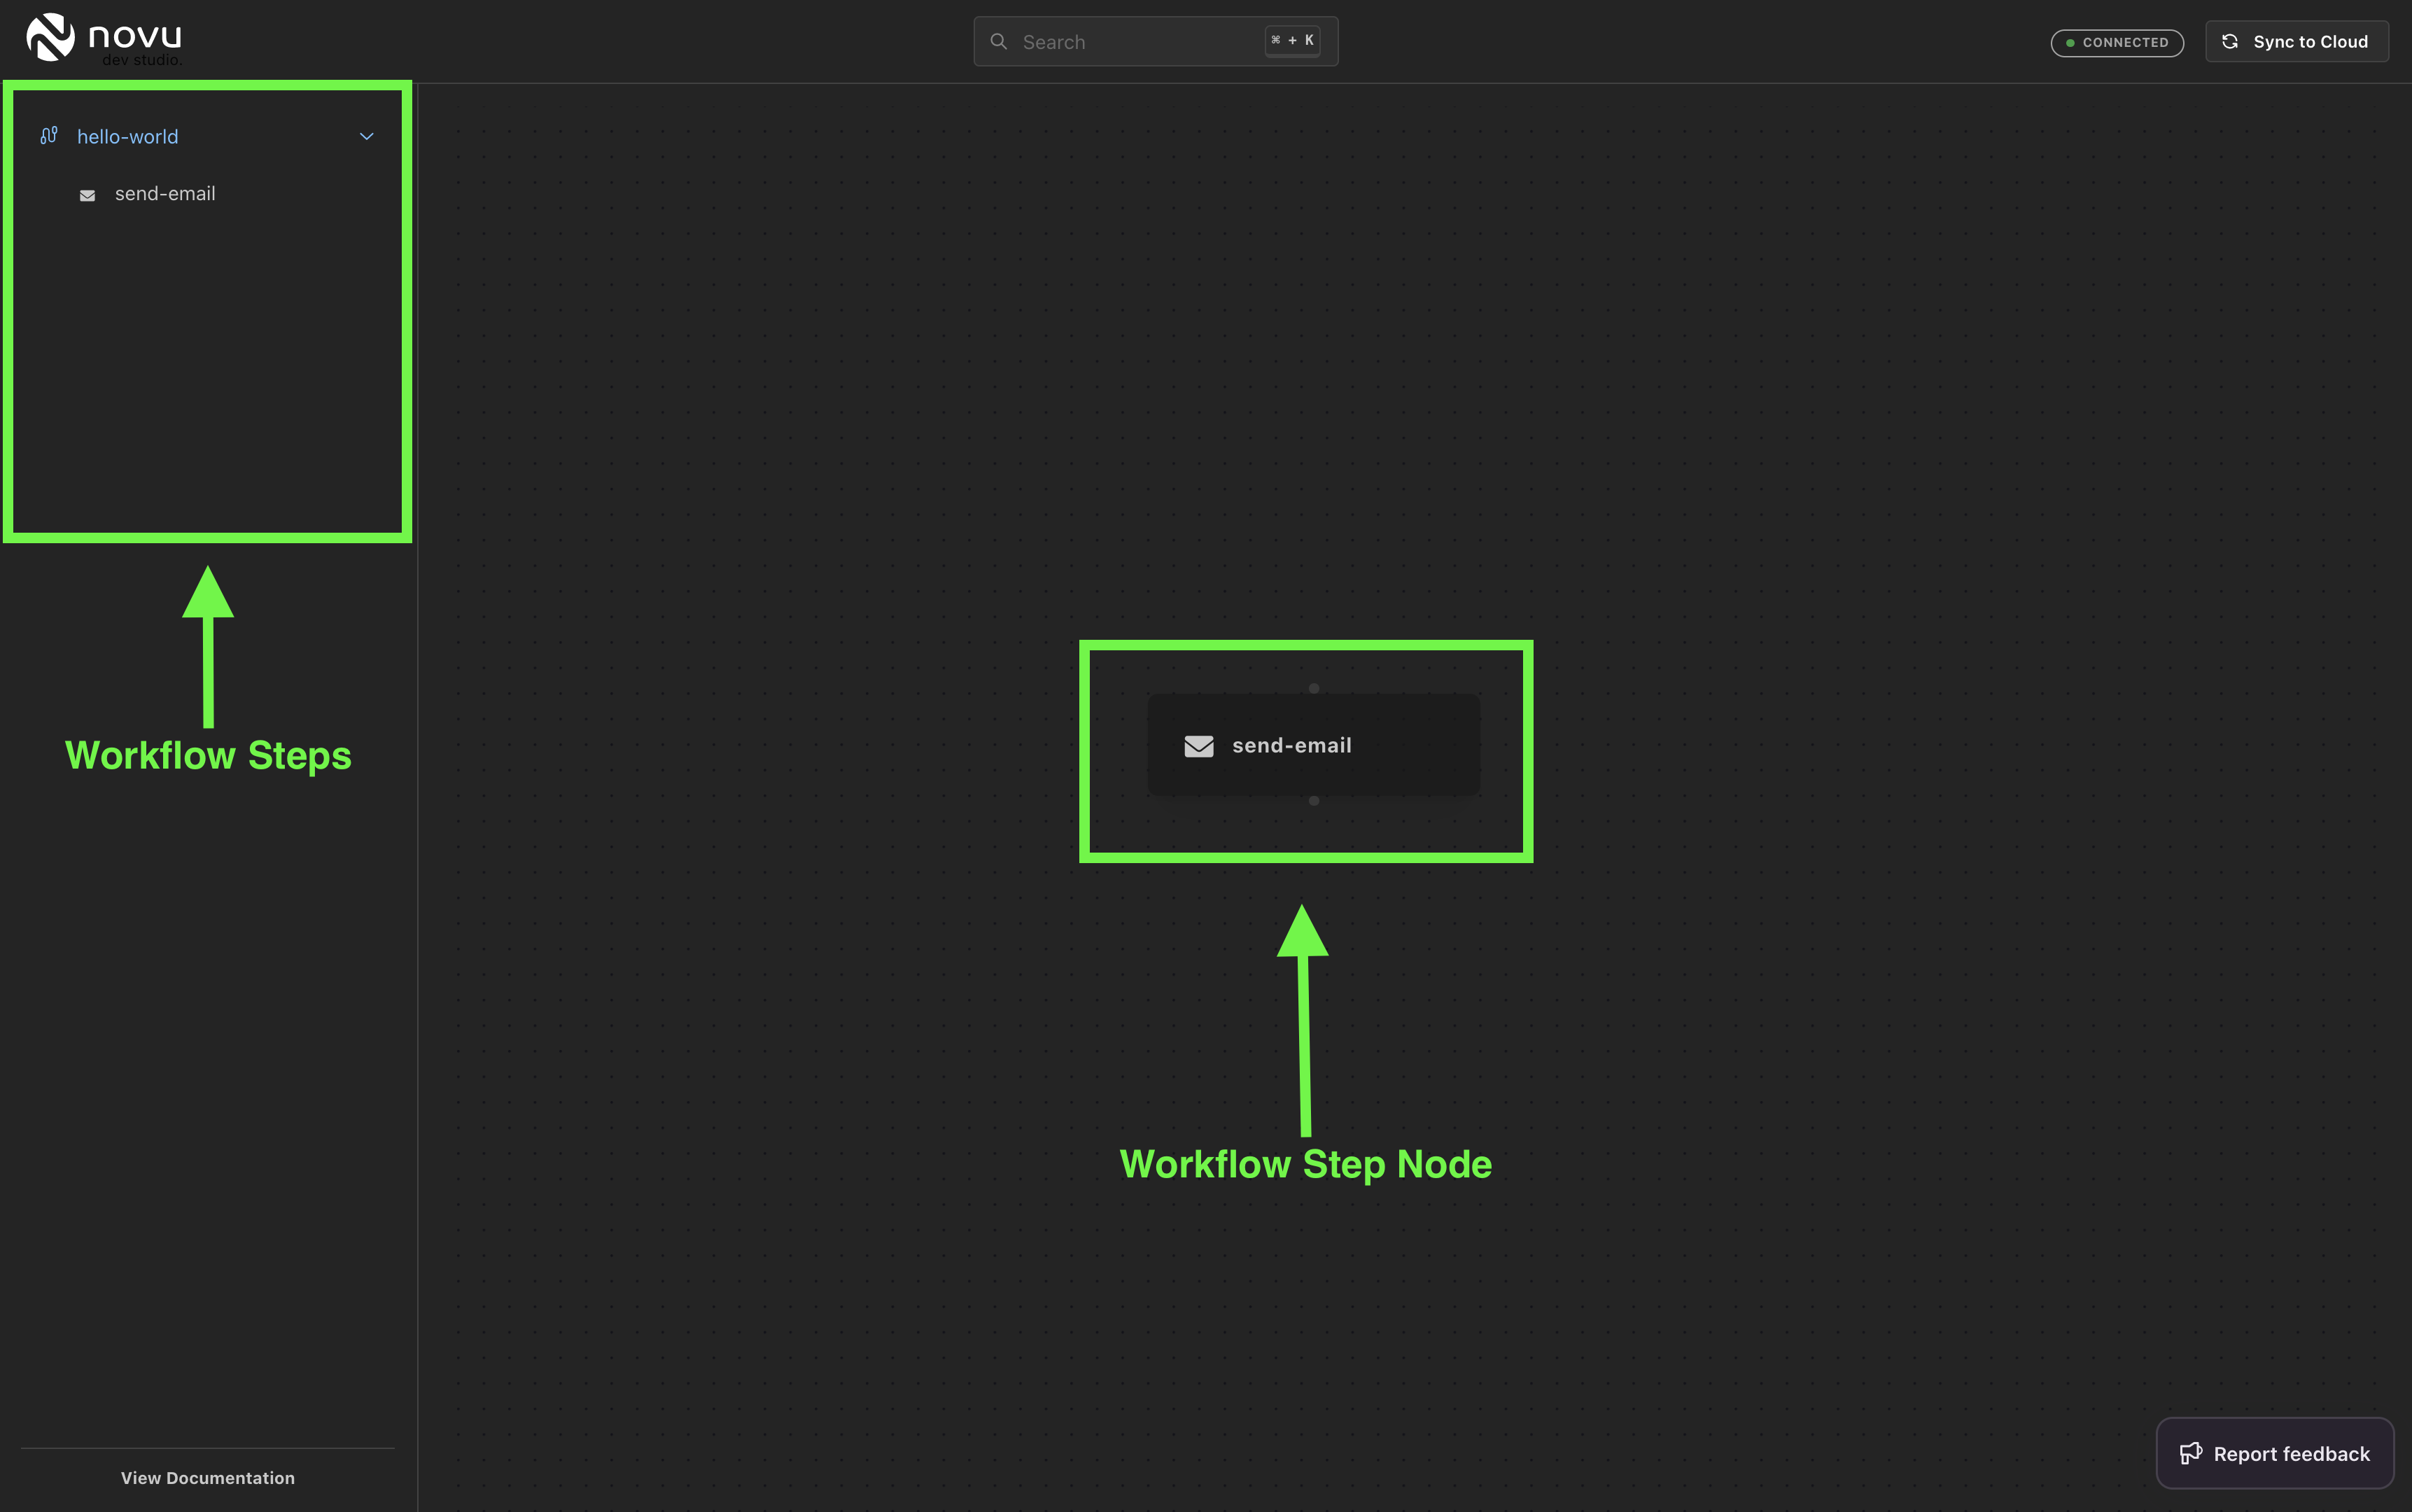
Viewing the workflow
send-email. We should see a preview of our email template and the Step Input and Payload variables we have configured in the workflow schemas.
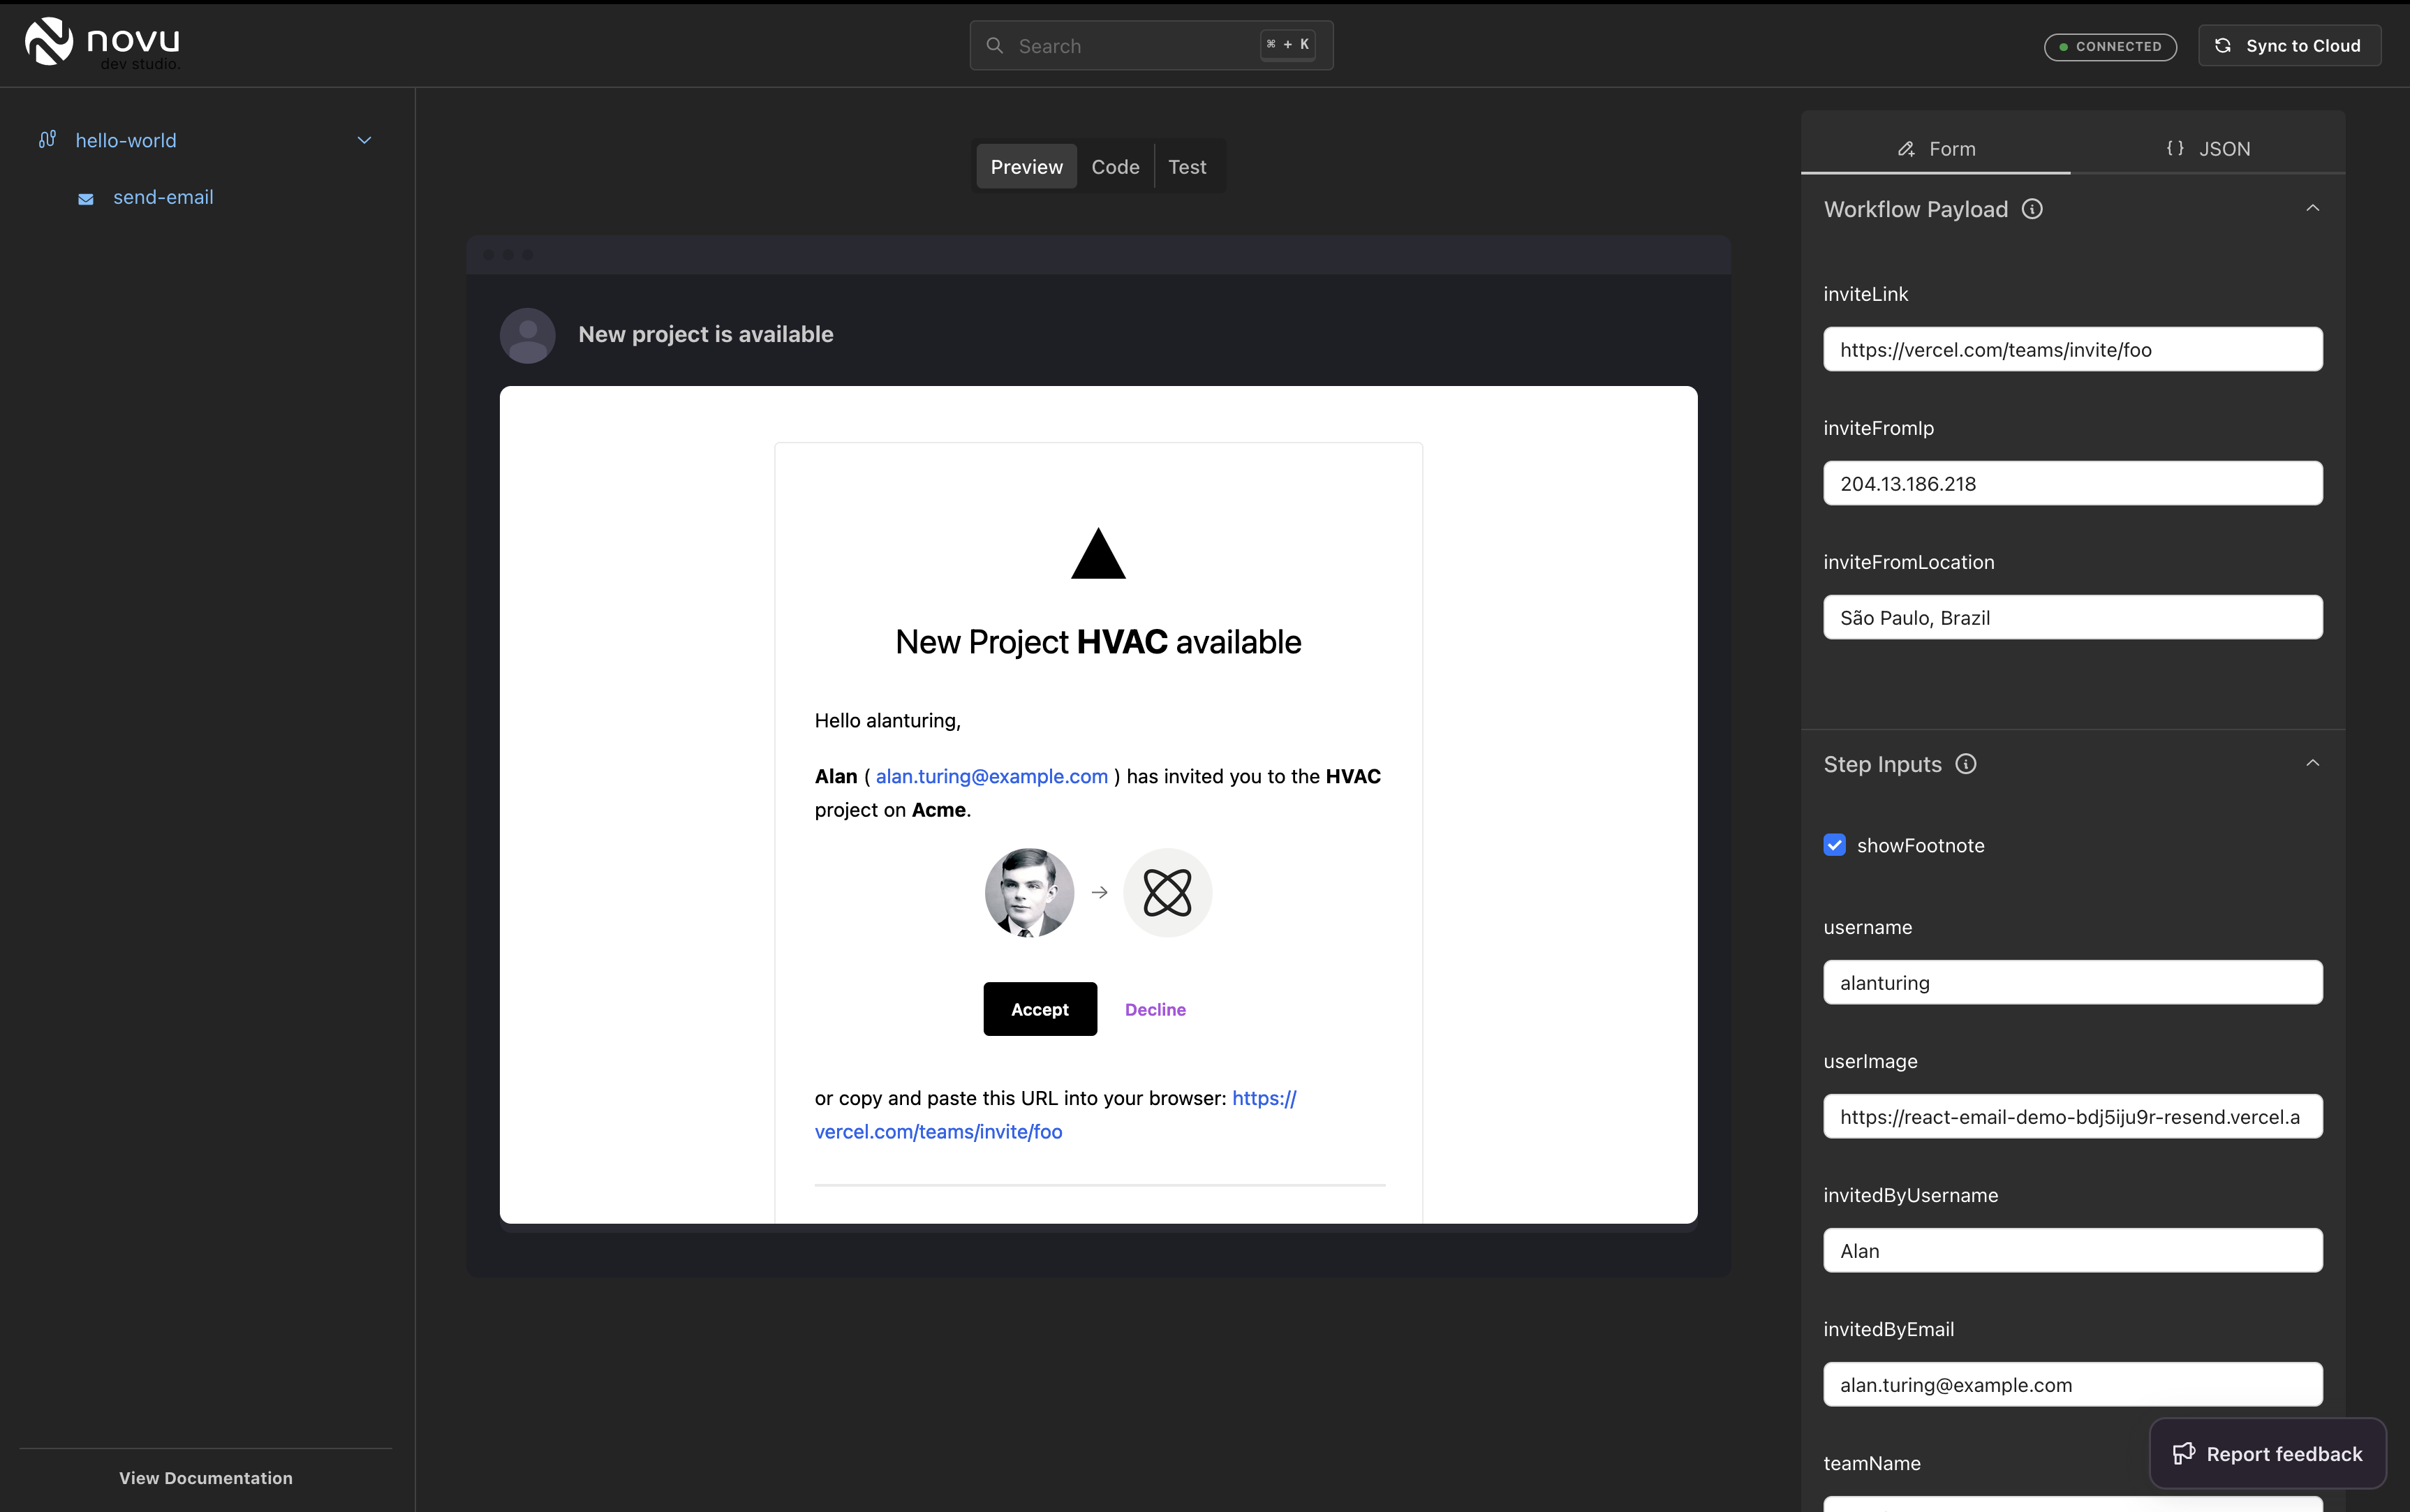
Preview of our email template
- This is the time to adjust the email template, step input schema, or define the properties we anticipate in the payload. We have a live representation of everything. You can add more steps like In-App, SMS, and chat.
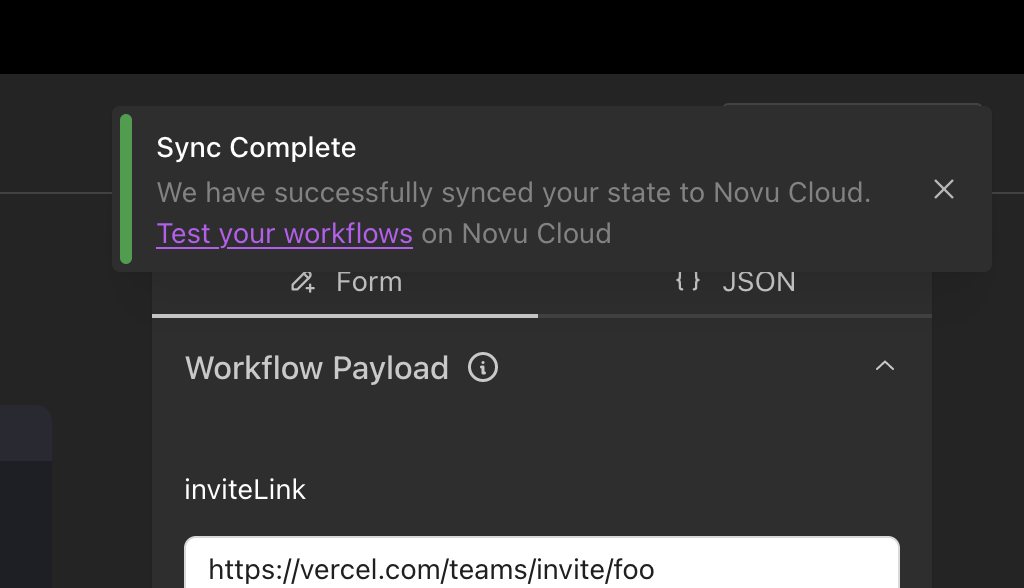
5. Syncing our workflow to Novu Cloud
Having completed crafting, designing, and modifying our notification workflow to suit our requirements, we’re ready to push it to Novu Cloud. There, it will handle the heavy lifting and seamlessly execute all the steps we’ve configured whenever we trigger the workflow.-
Click on the
Sync to Cloudbutton on the top right.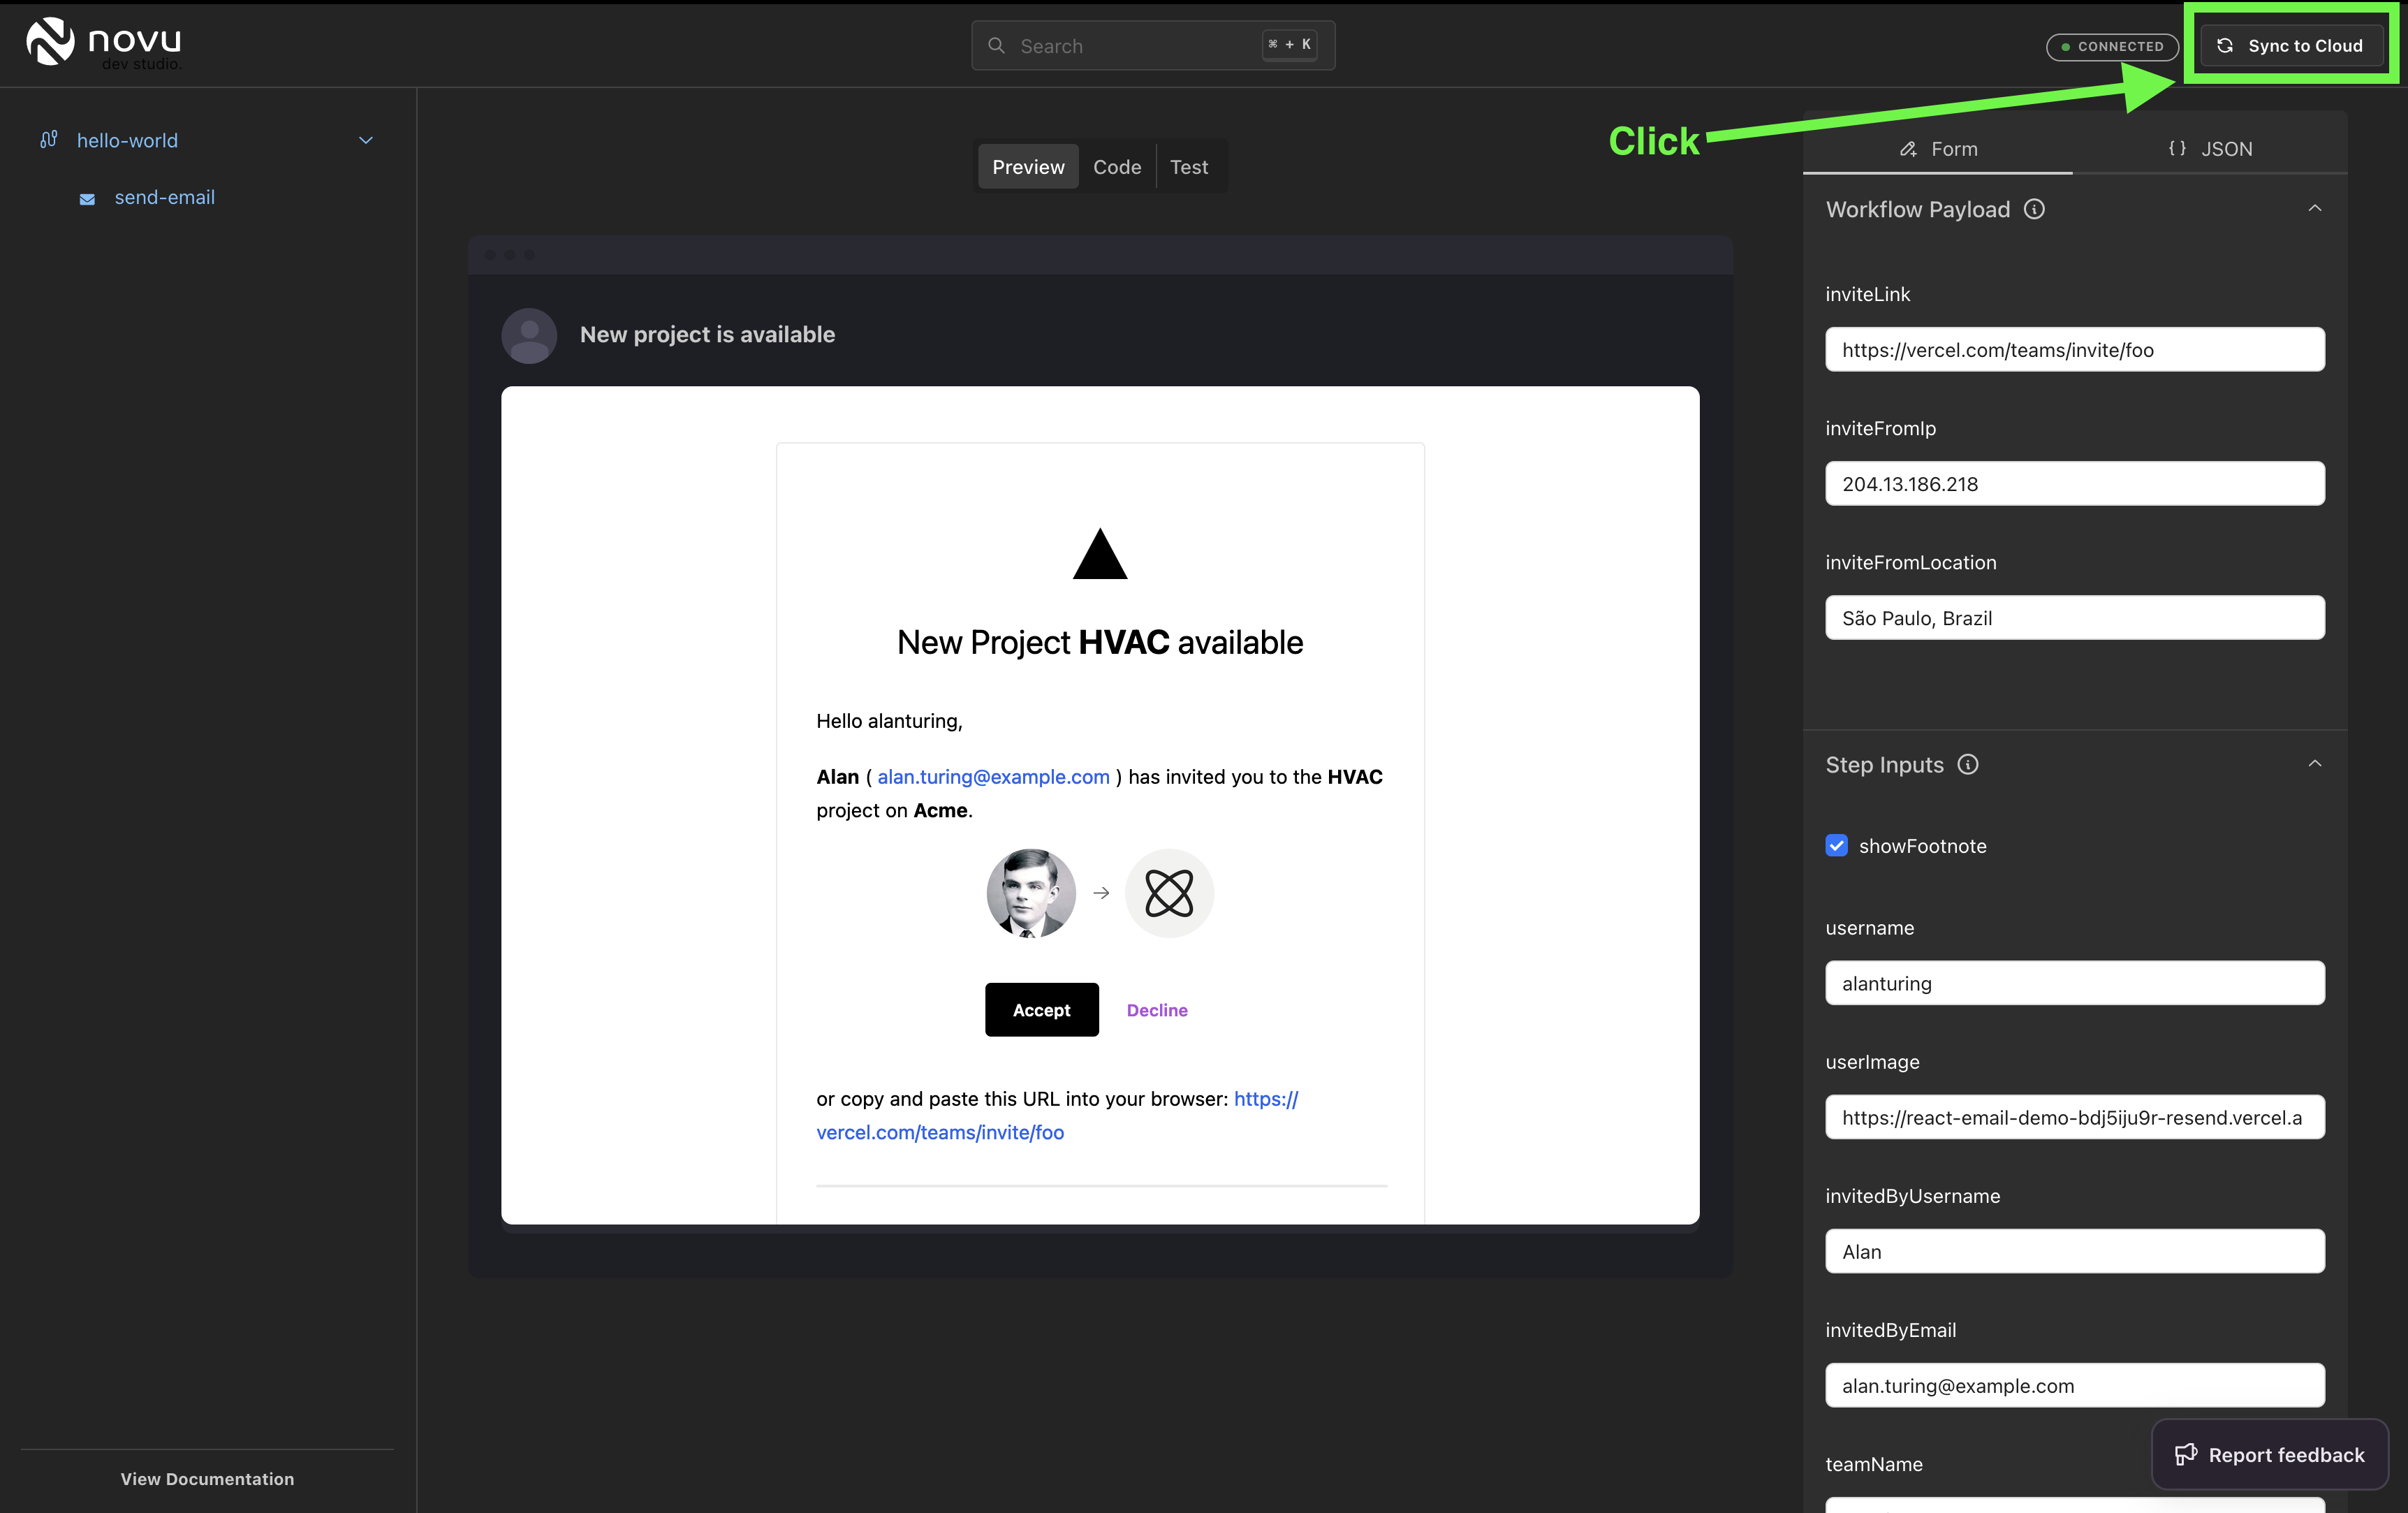
Sync to Cloud
-
We will need to create a local tunnel that the Novu Cloud environment can reach for local experimentation purposes.
On a separate terminal, run the following command:
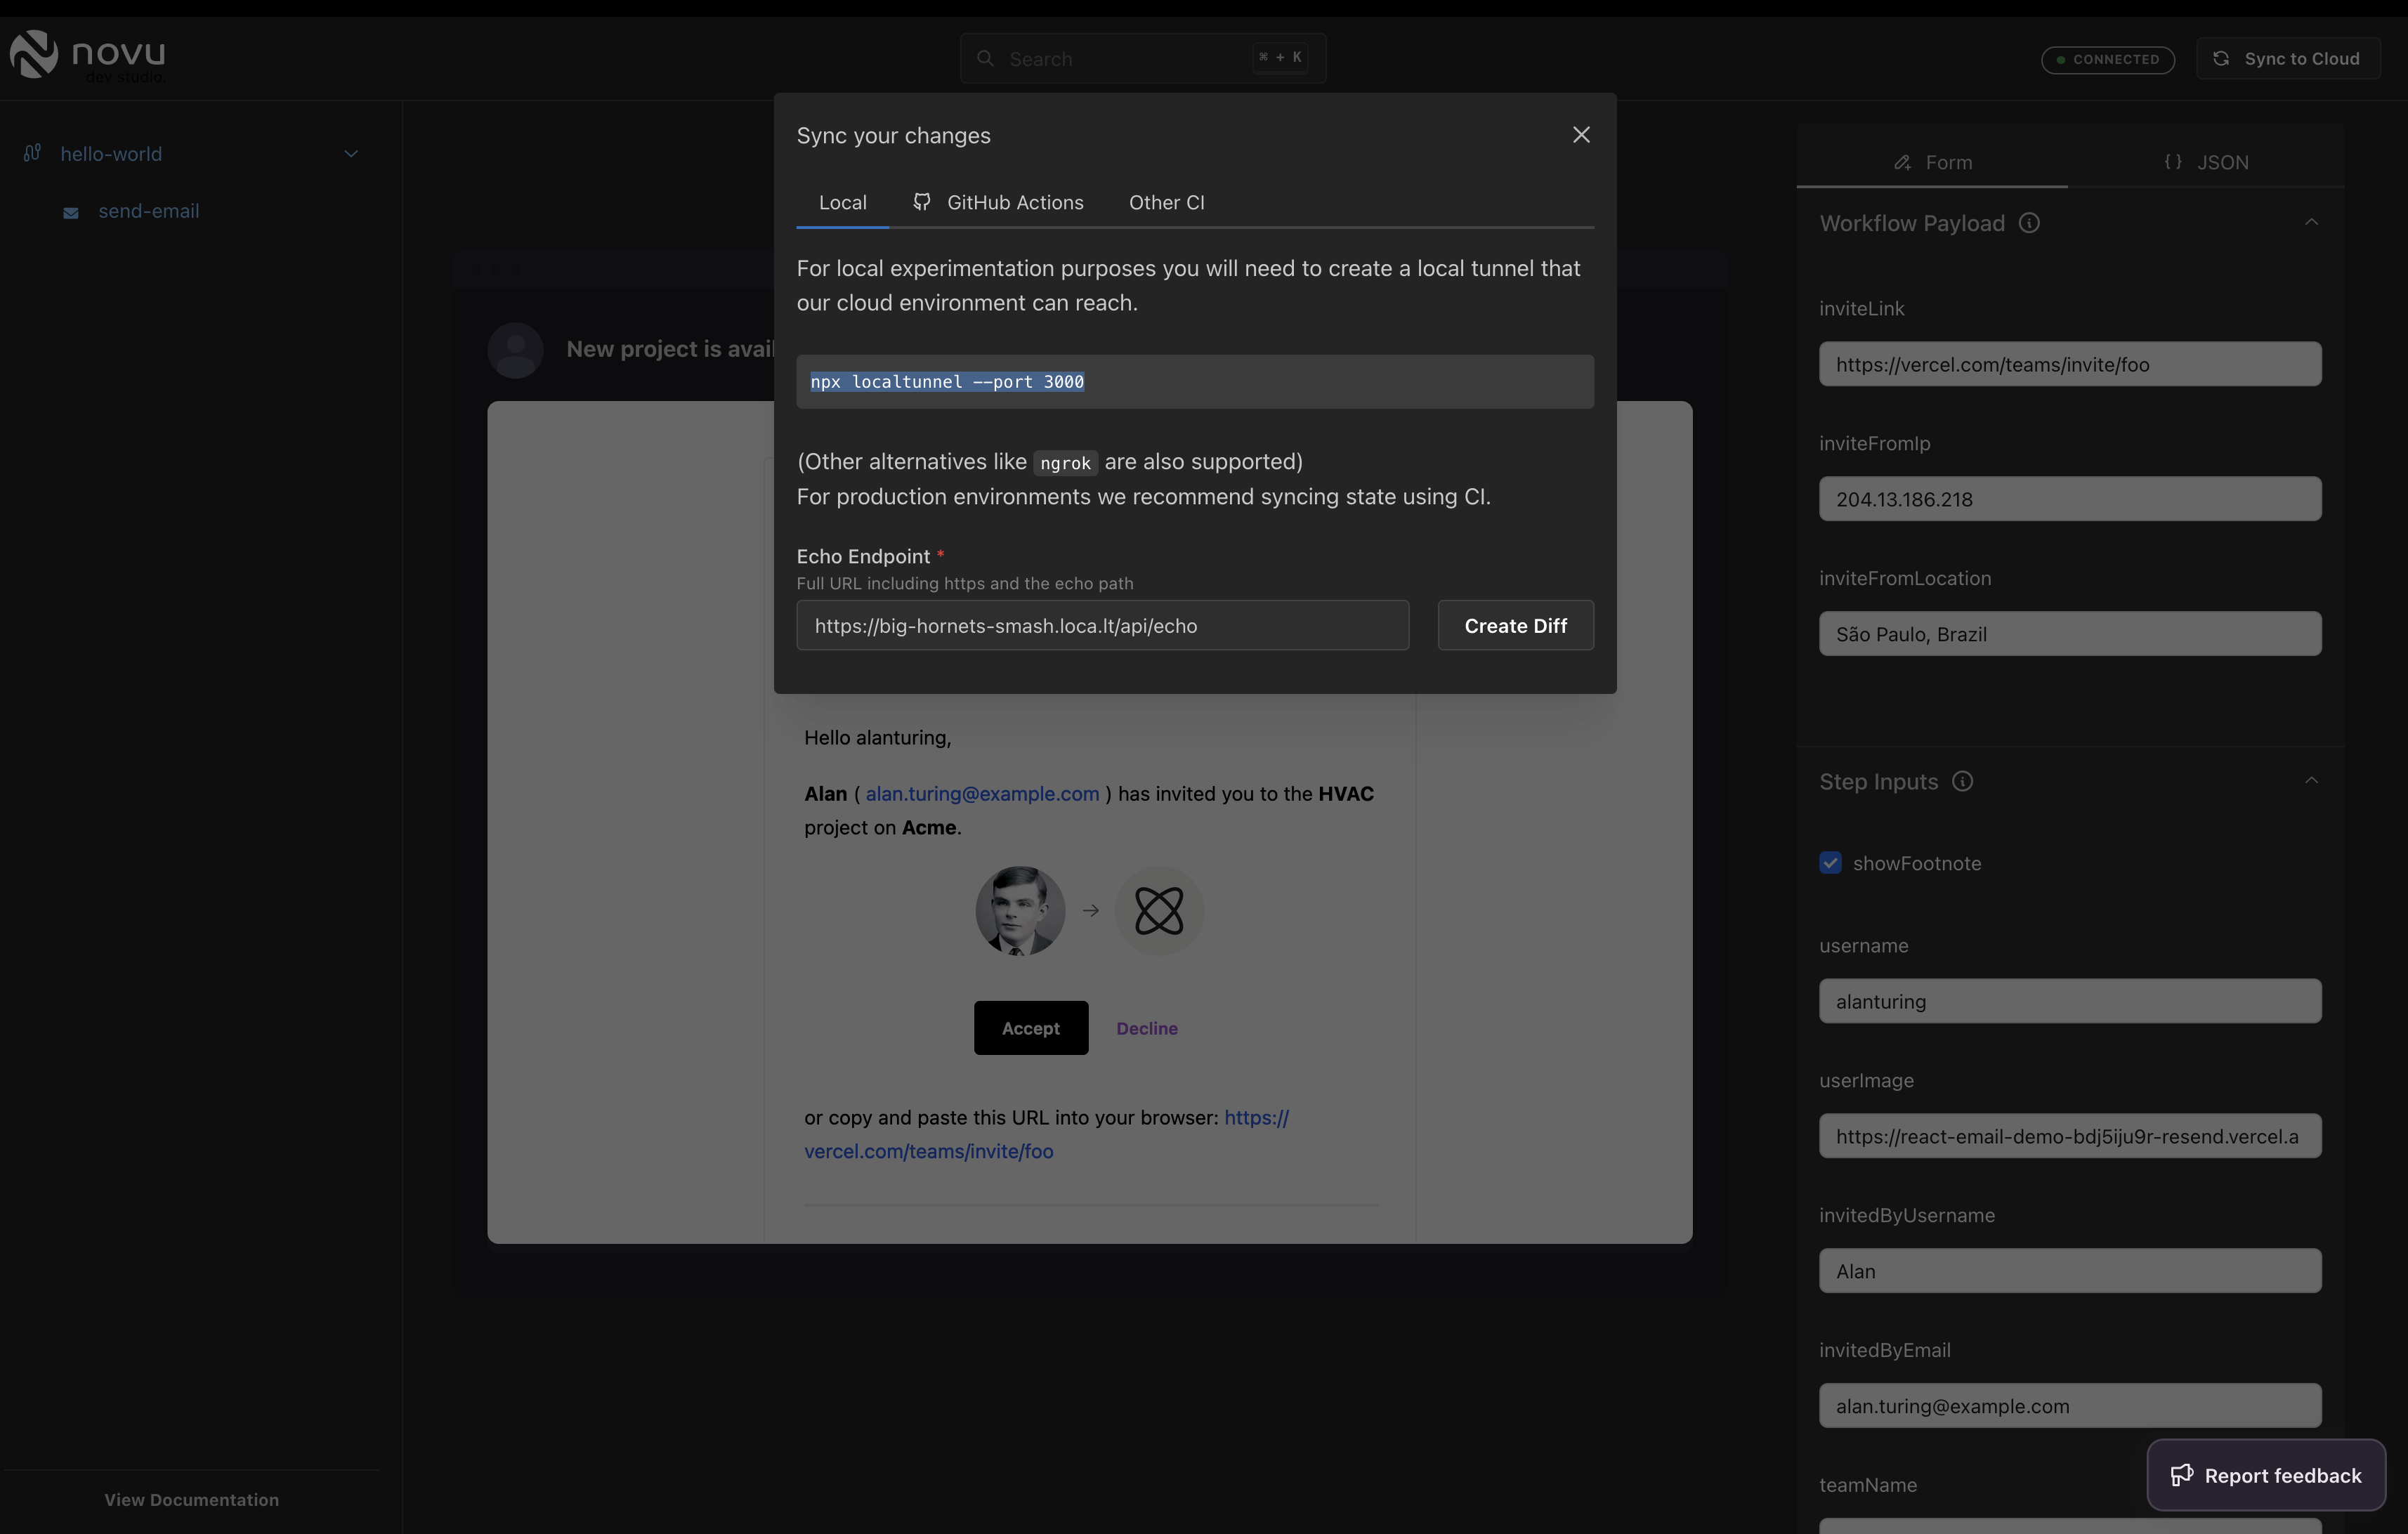
Create a local tunnel
We should get something like: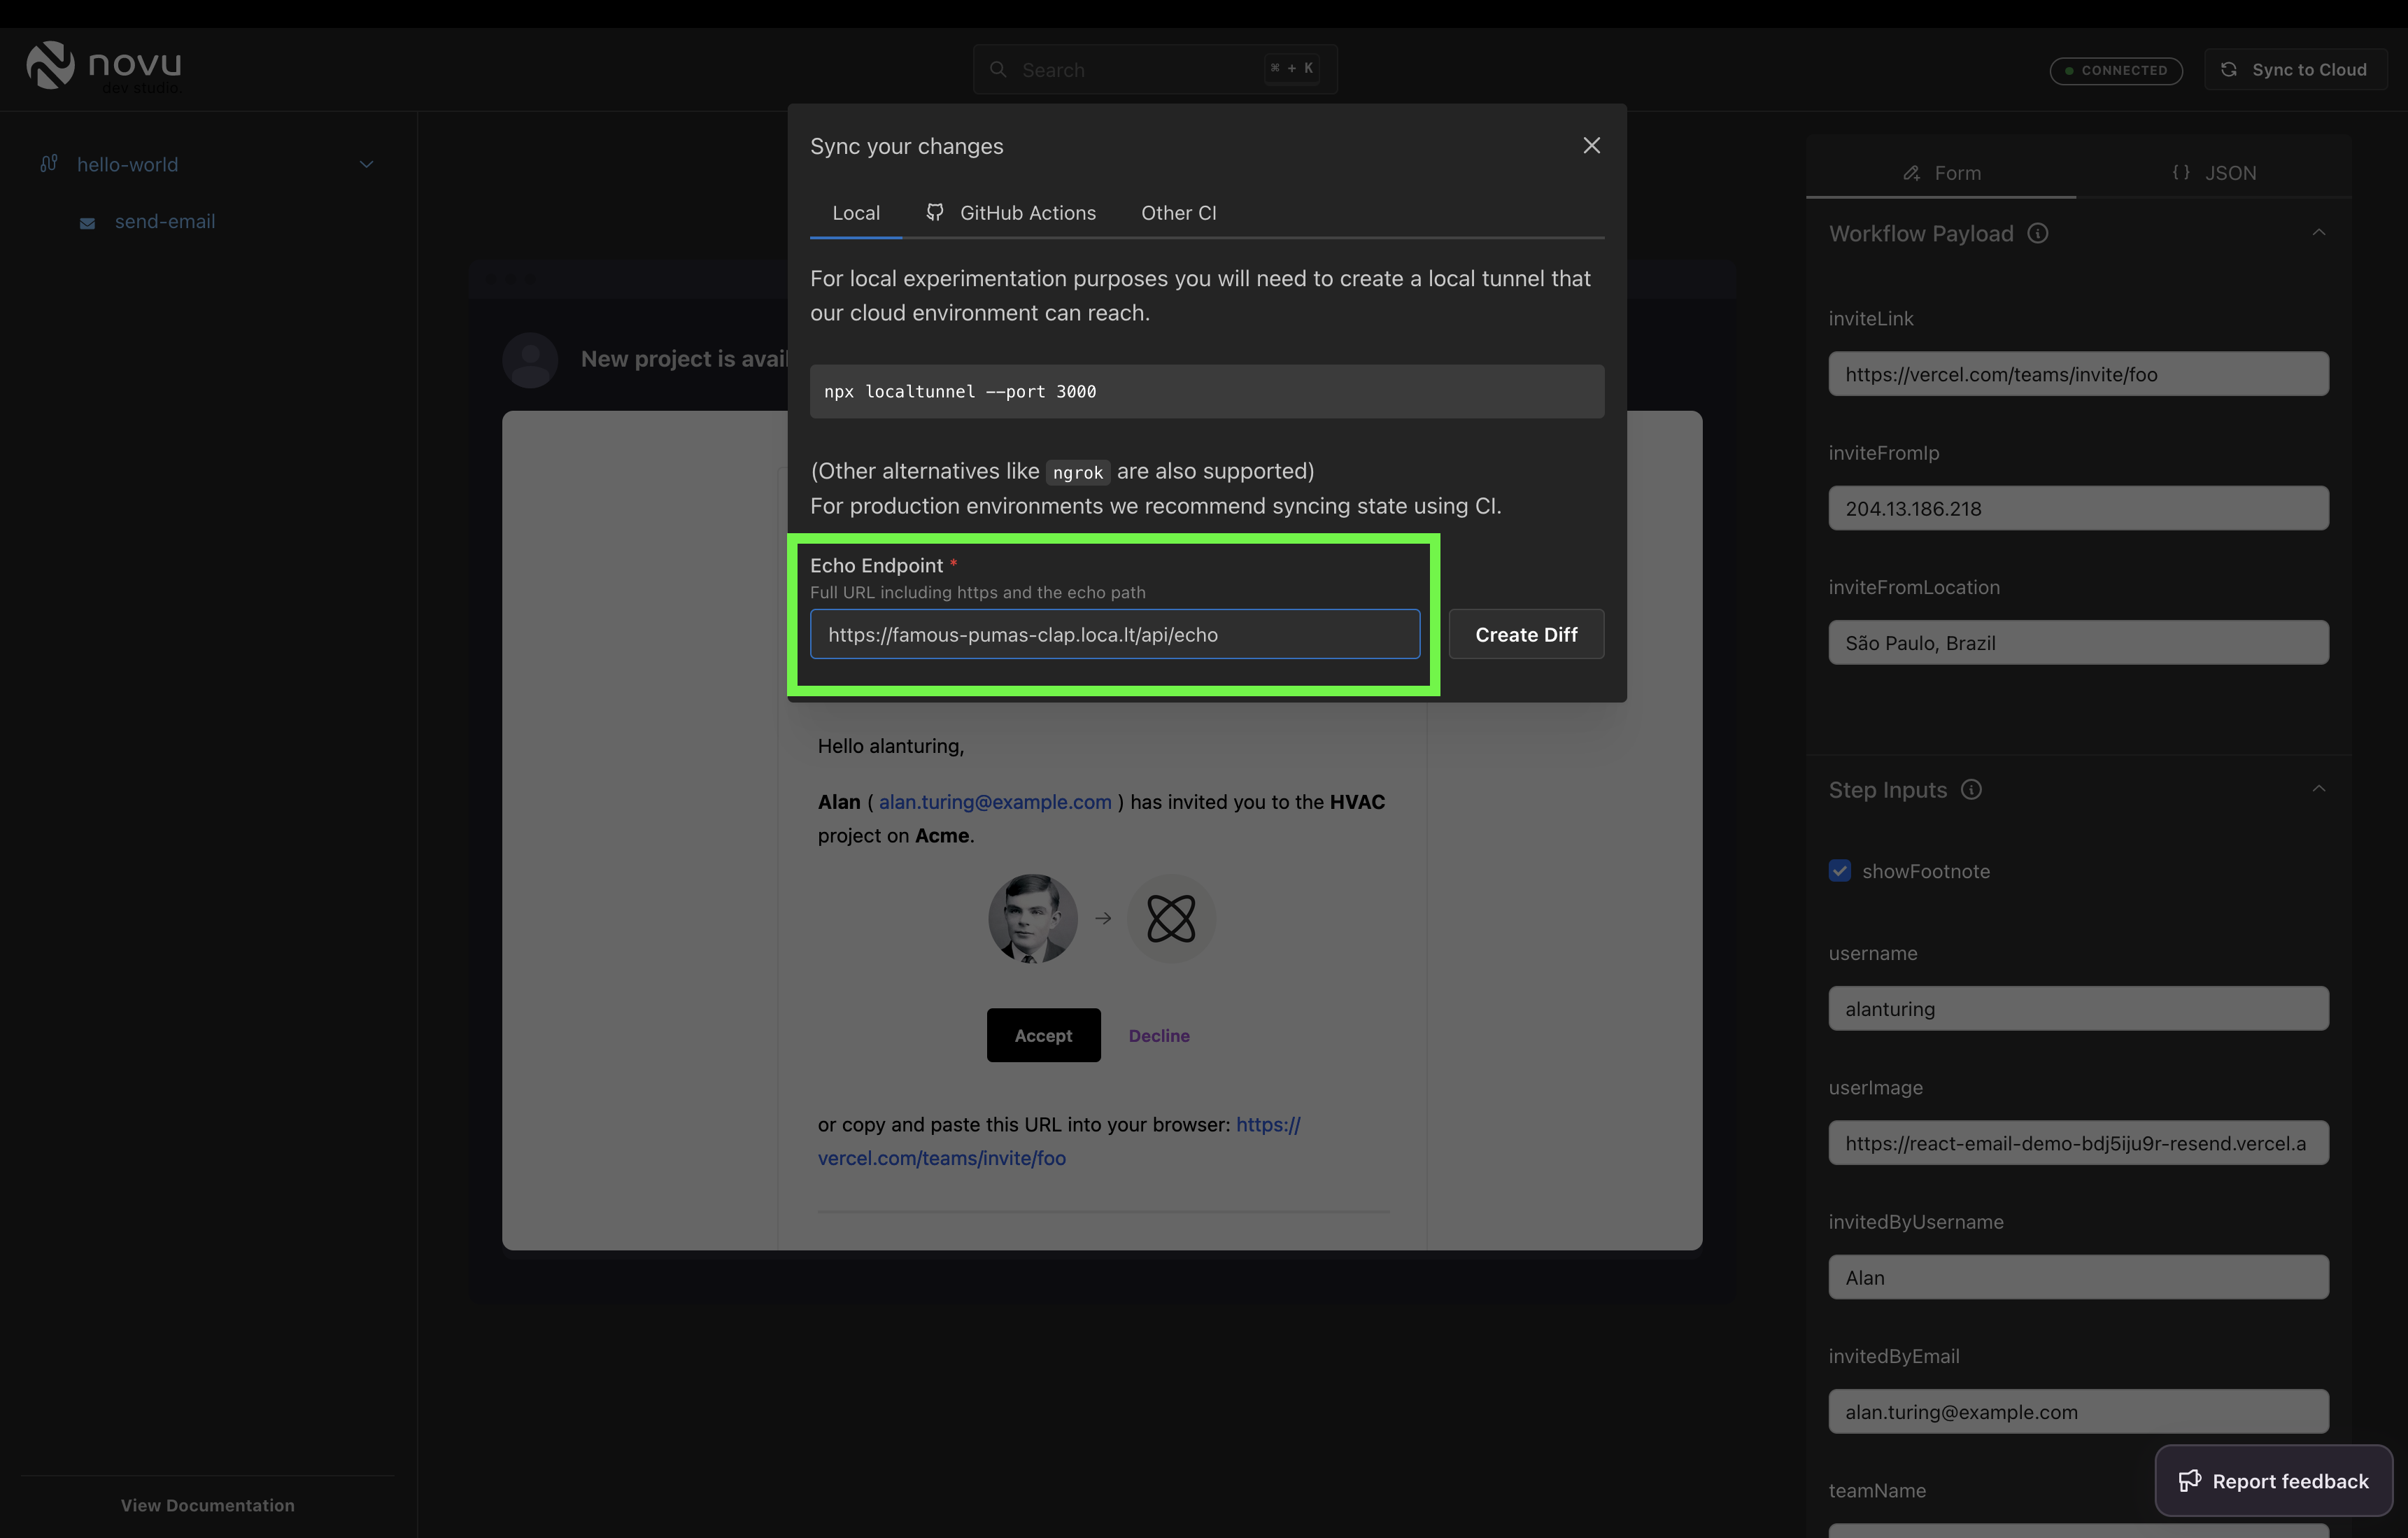
Local tunnel url should be the same in the image here
-
Click the
Create Diffbutton. To push (merge) the workflow code to the cloud, an API Key from our Novu account should be added to our Framework Client instance.Let’s navigate to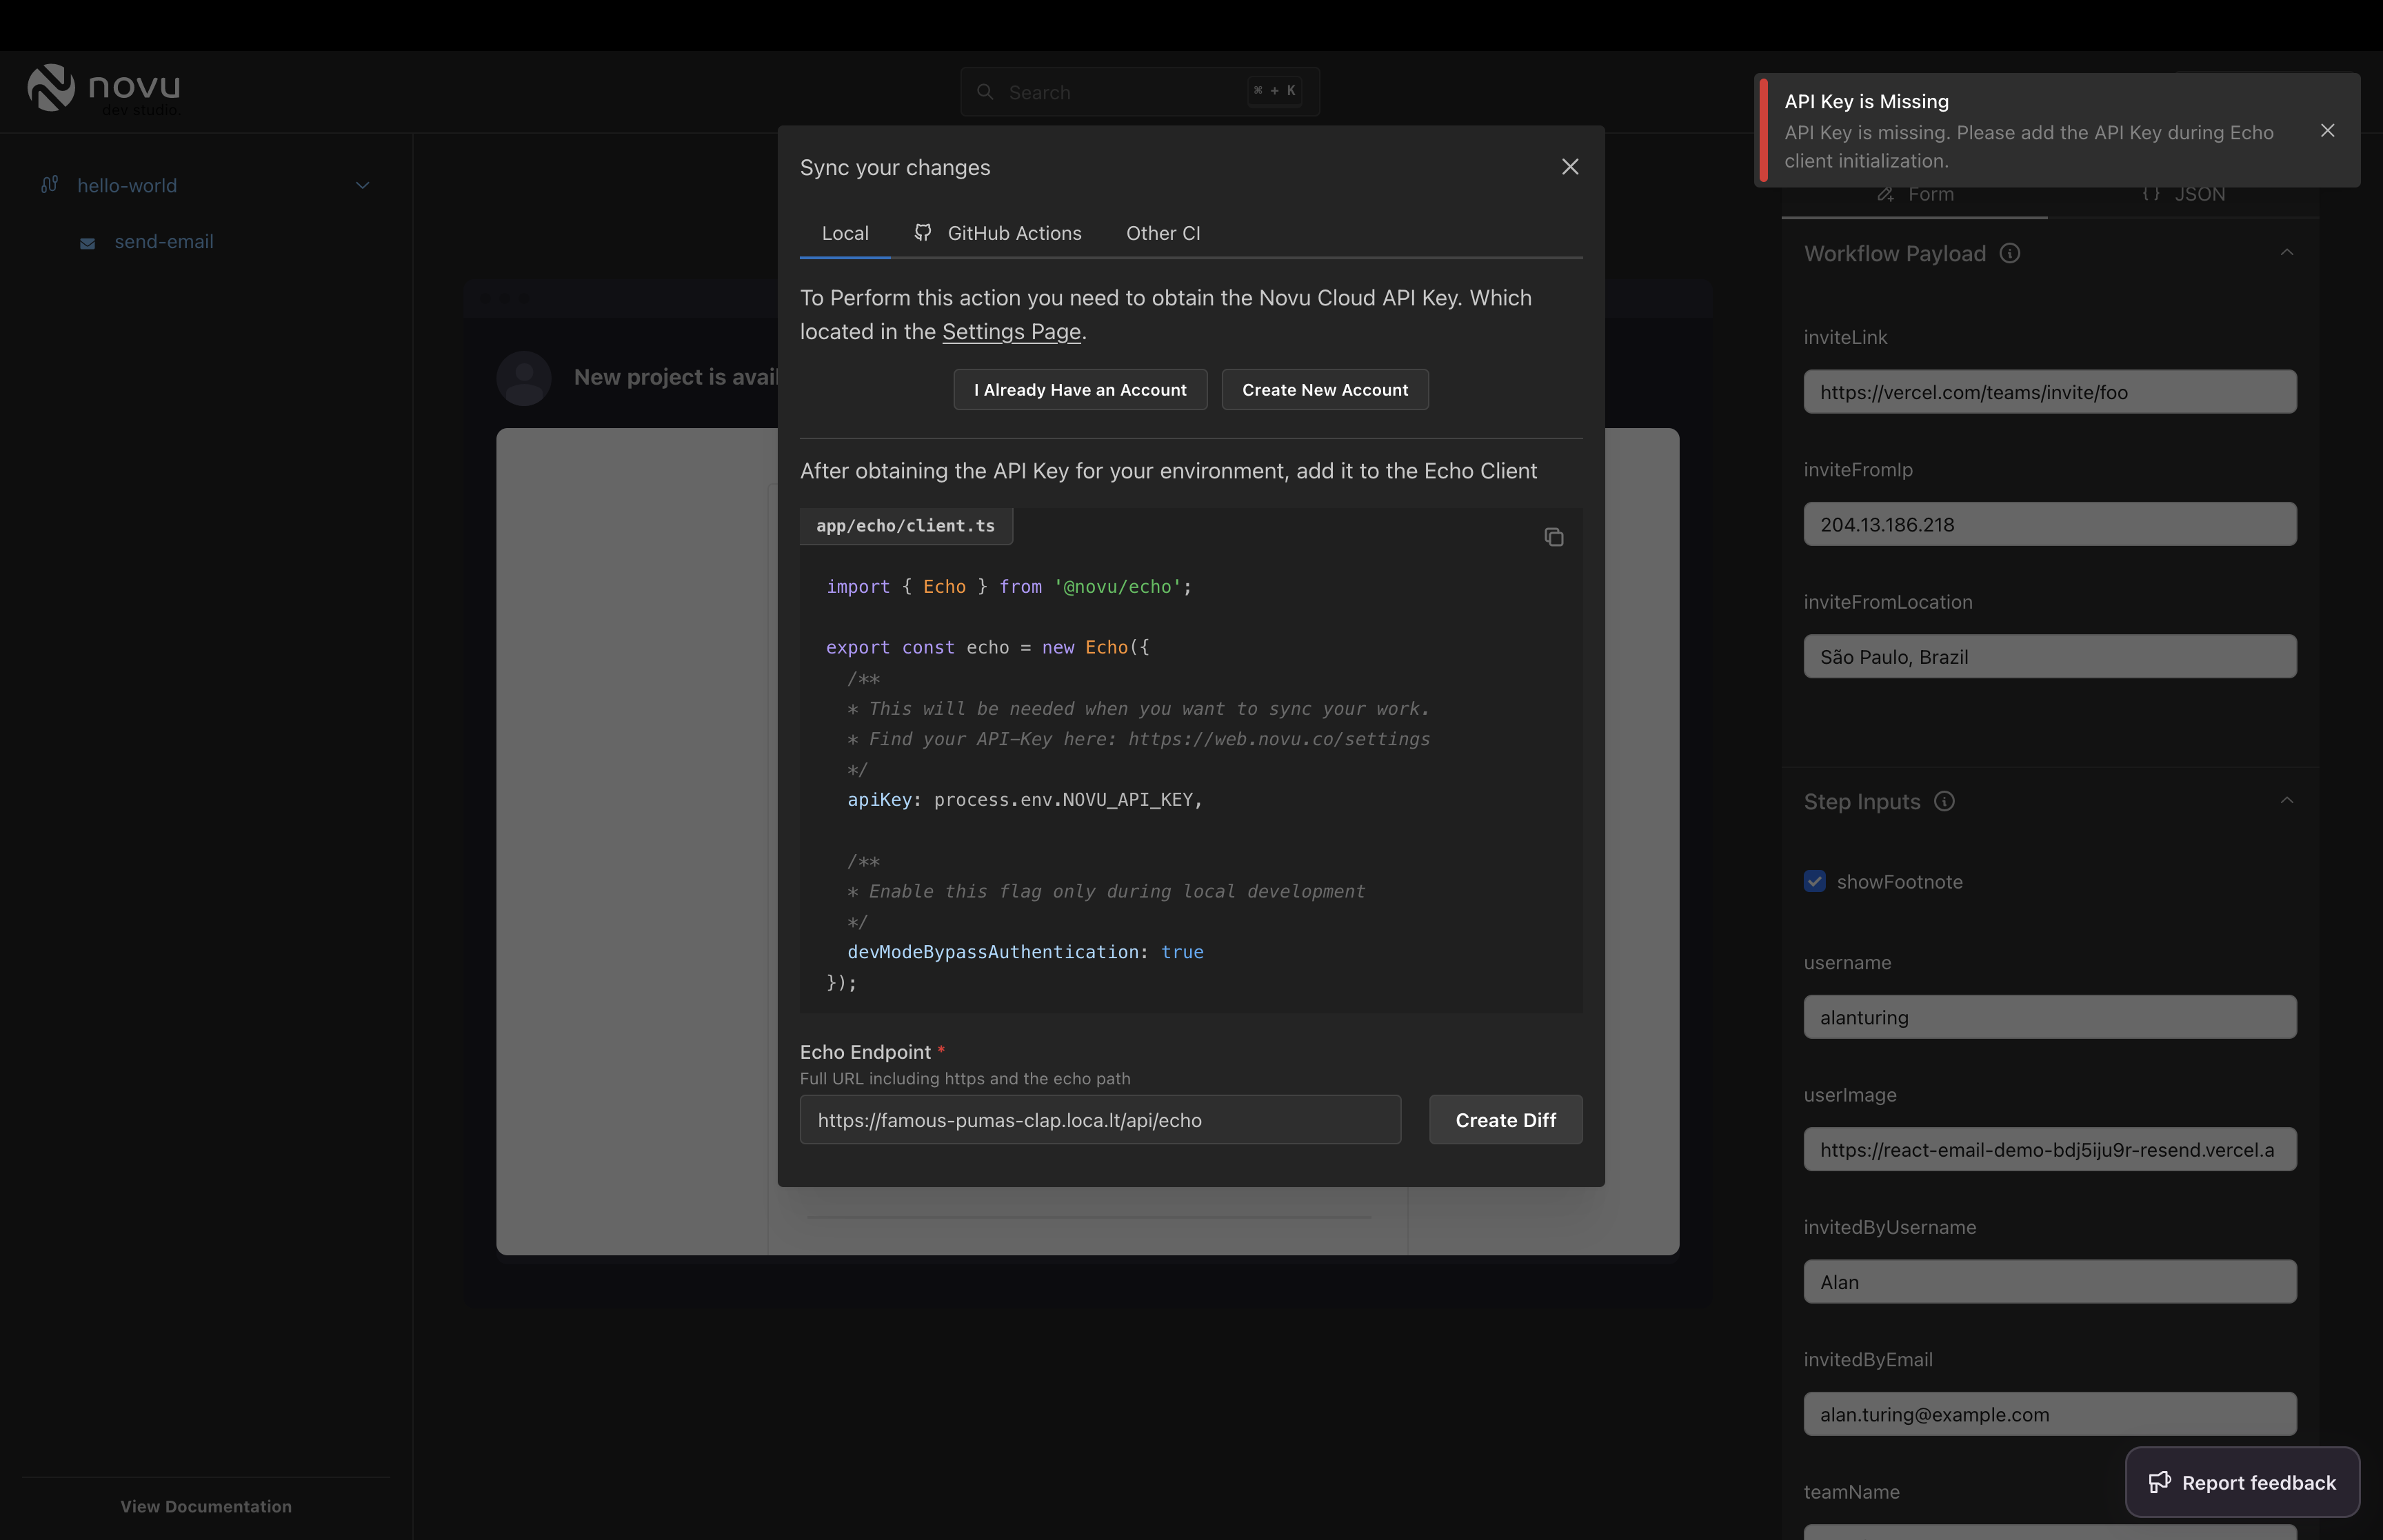
Create Diff
../app/server/novu/workflows.tsfile and add our Novu API Key.
Create Diff button again.
Launching the dev studio
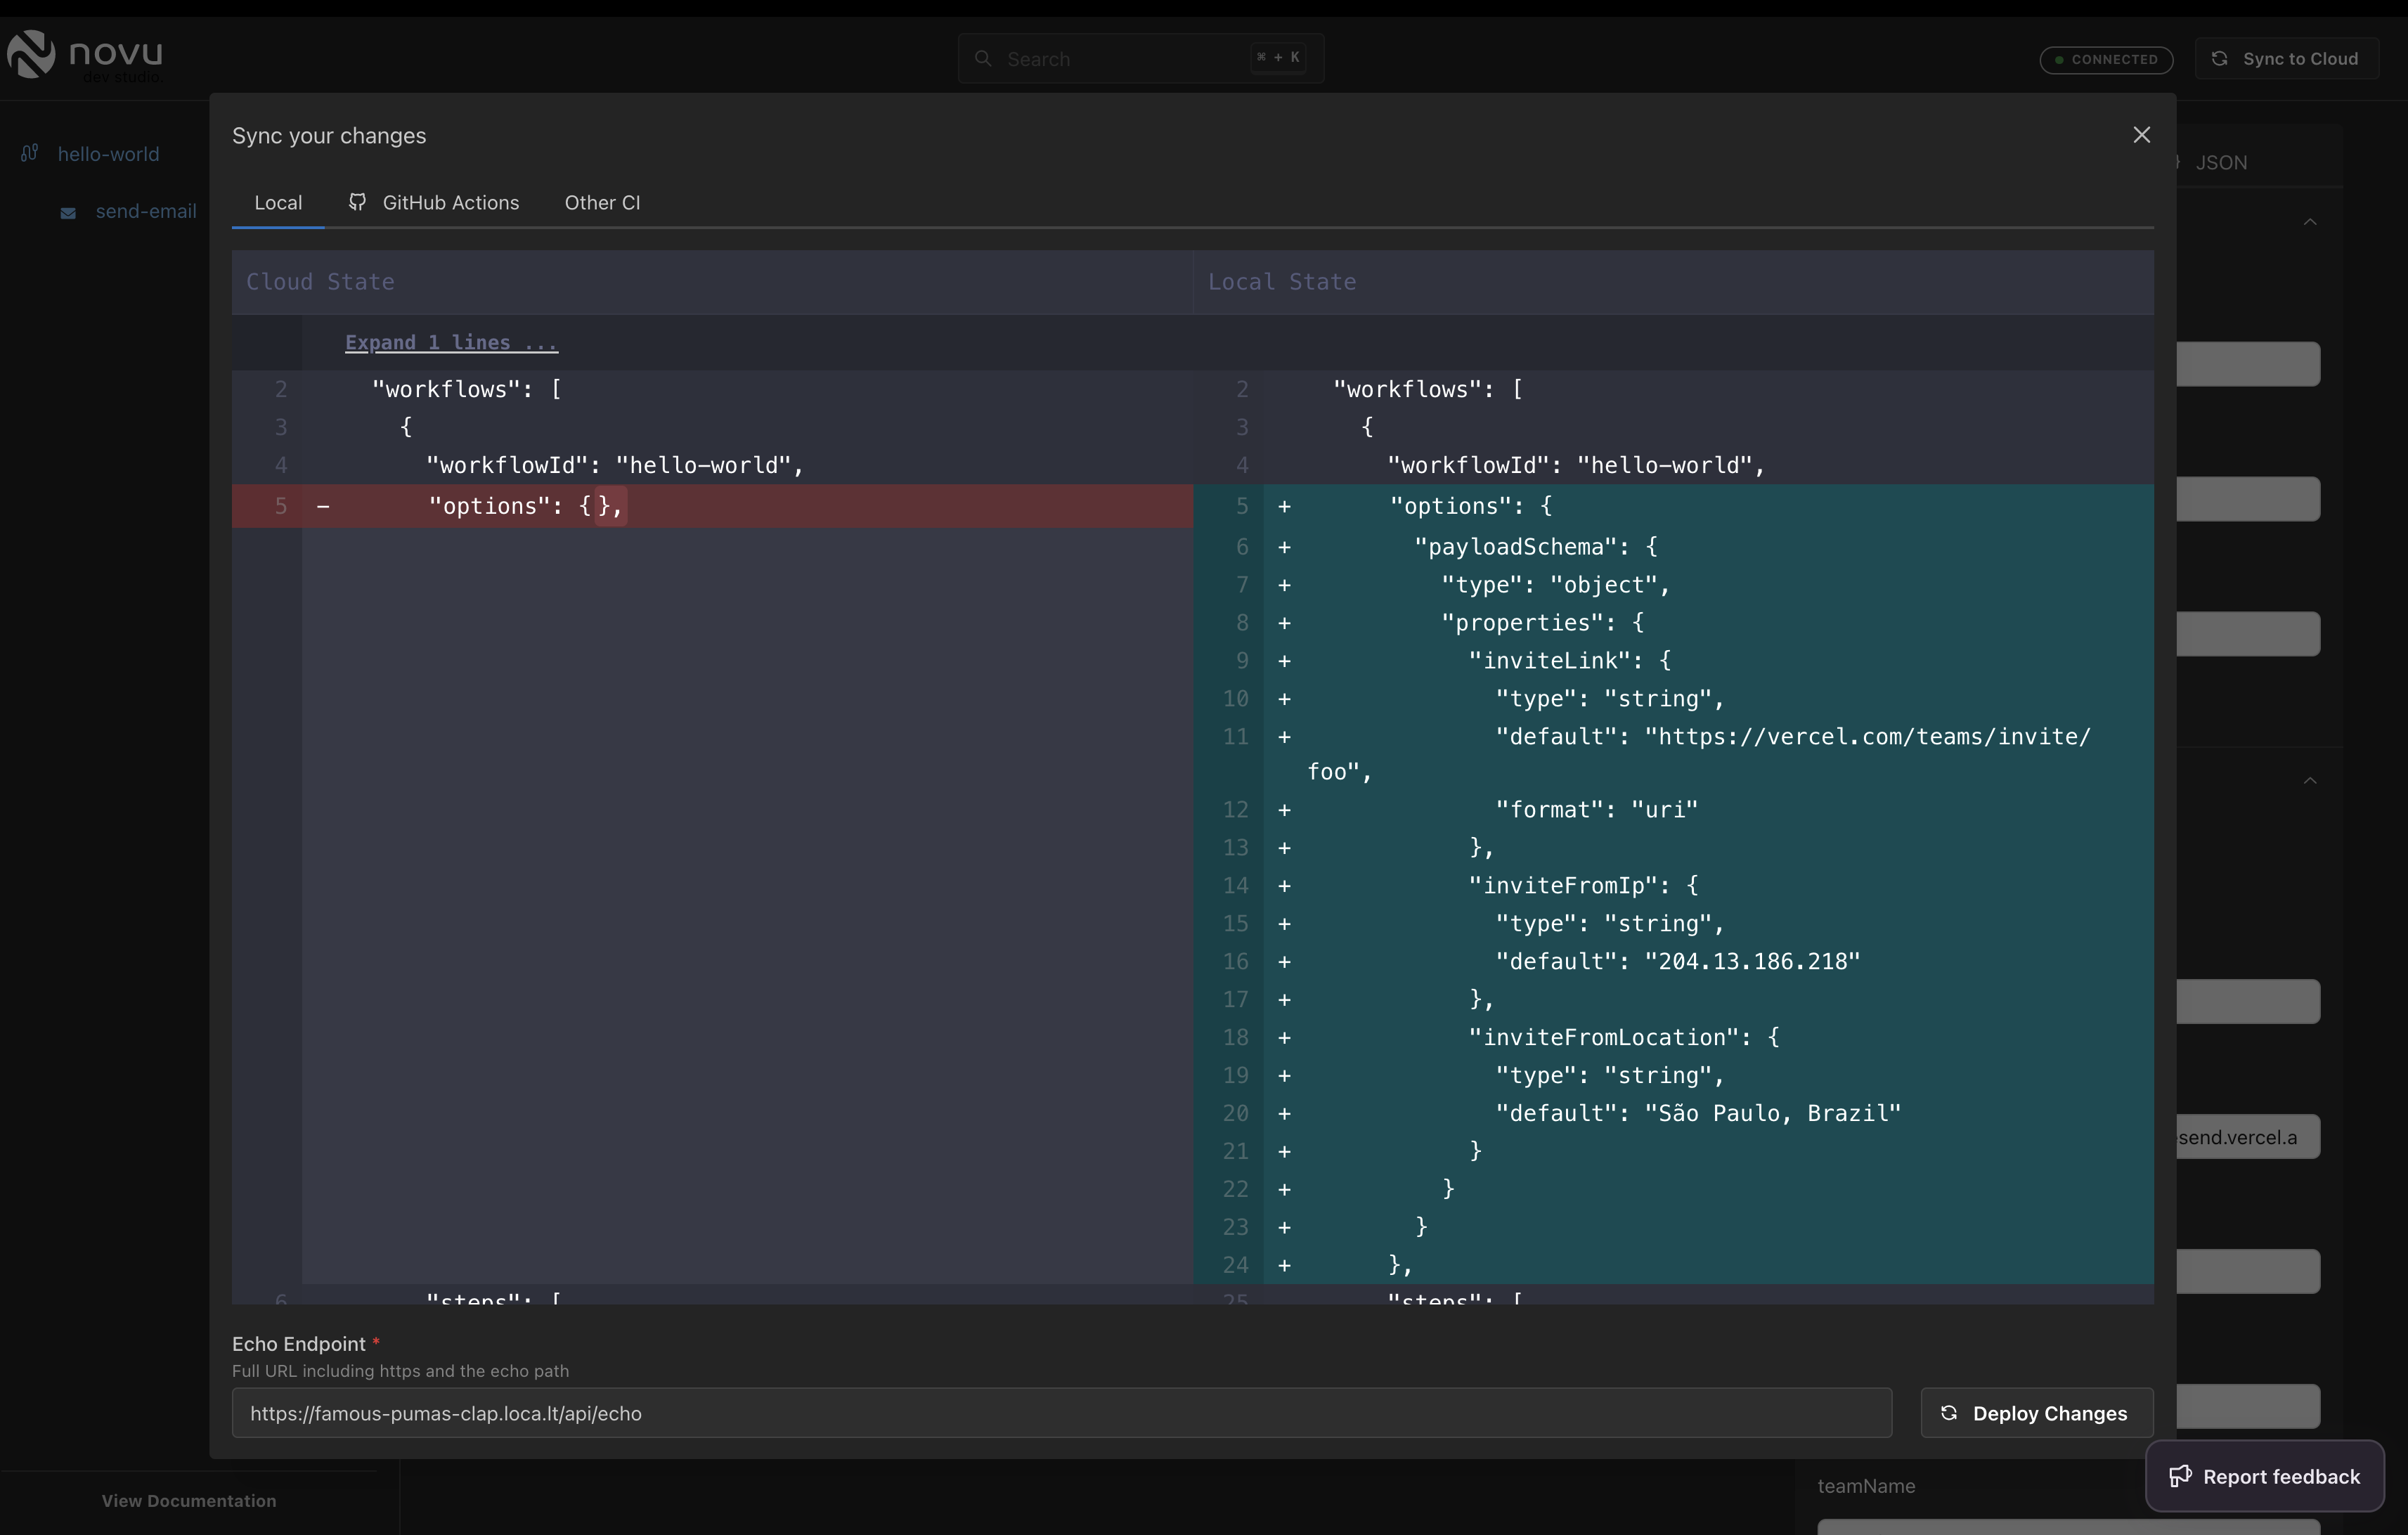
Deploy Changes button.
Deploy changes
6. Testing Our Notification Workflow
There are many ways to test and trigger our workflow, but we’ll make acURL API call to Novu Cloud from our terminal in this guide.
If we don’t have any subscribers or users in our database or within our Novu Cloud organization, we’ll send the test to ourselves for simplicity.
- In the
subscriberIdkey, input a random number or even our email address (as long as we do not try to assign the same ID key to another subscriber, we should be good). - For the
emailkey, we will need to insert a valid email address so we can actually receive the email.
Note: Learn more about the structure of subscriber properties.
payloadSchema we established in the workflow definition.
- No longer limited by UI notification steps and rigidity.
- No longer limited by notification content editors and systems. The more, the merrier!
- Now an IFTTT (If-This-Then-That) pro engineer!