@novu/notification-center a React library that helps to add a fully functioning notification center to your web application in minutes. Let’s do a quick recap on how you can easily use it in your application.
- Install
@novu/notification-centernpm package in your react app
- Add the below code in the app.tsx file
 Go to this react app browser tab, there will be a bell icon. On clicking that bell icon, you will see a notification component popover
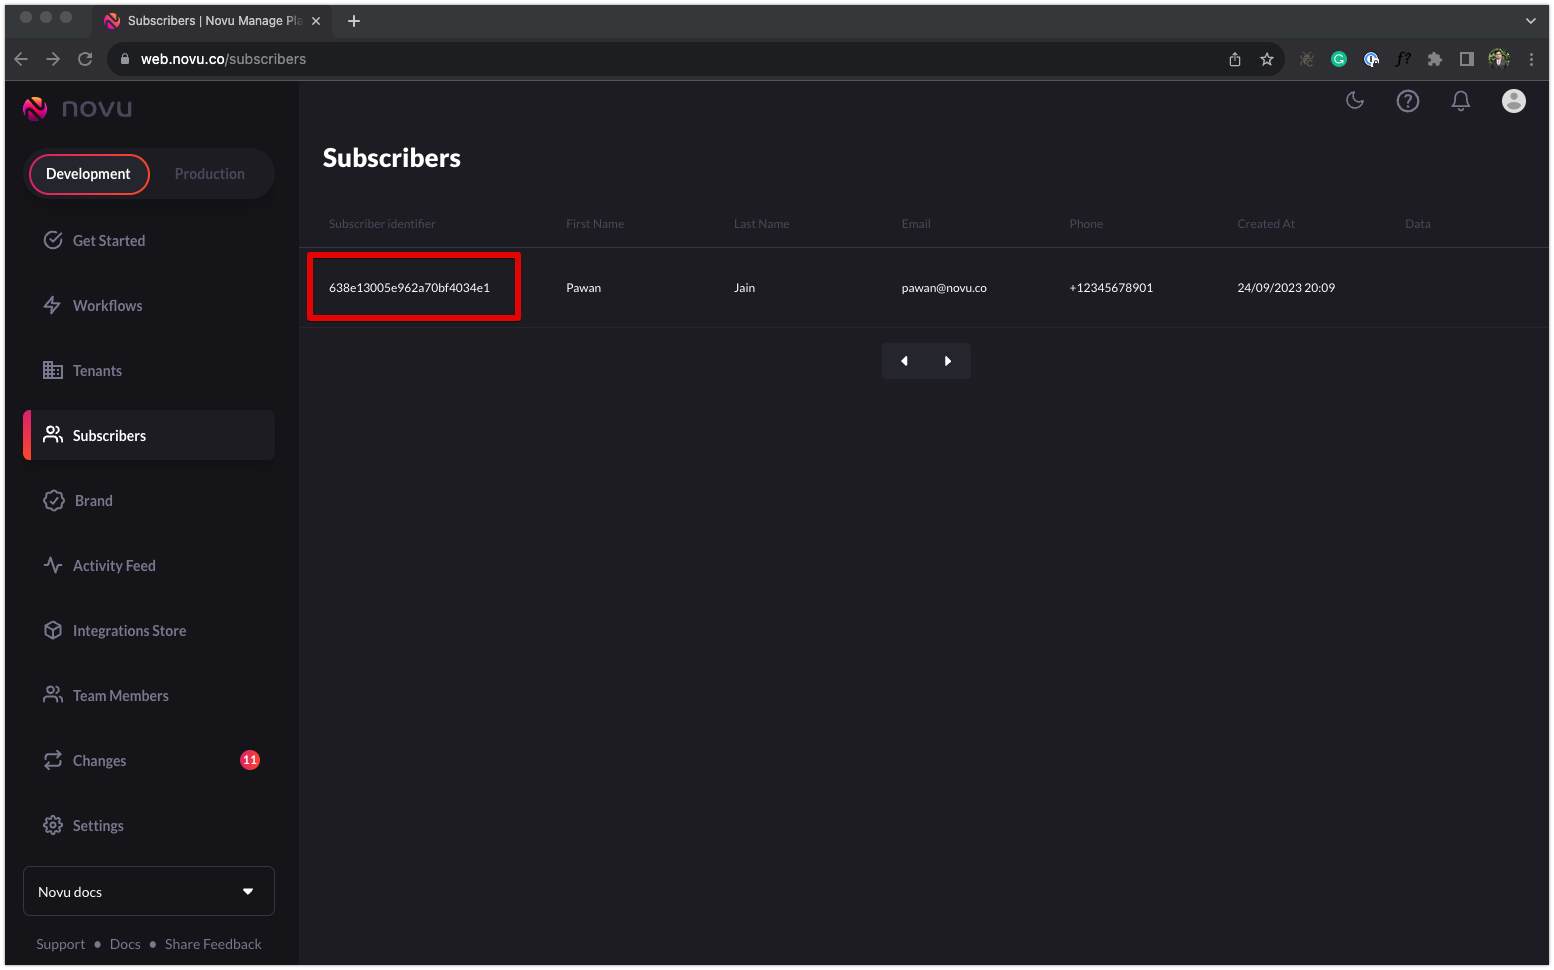
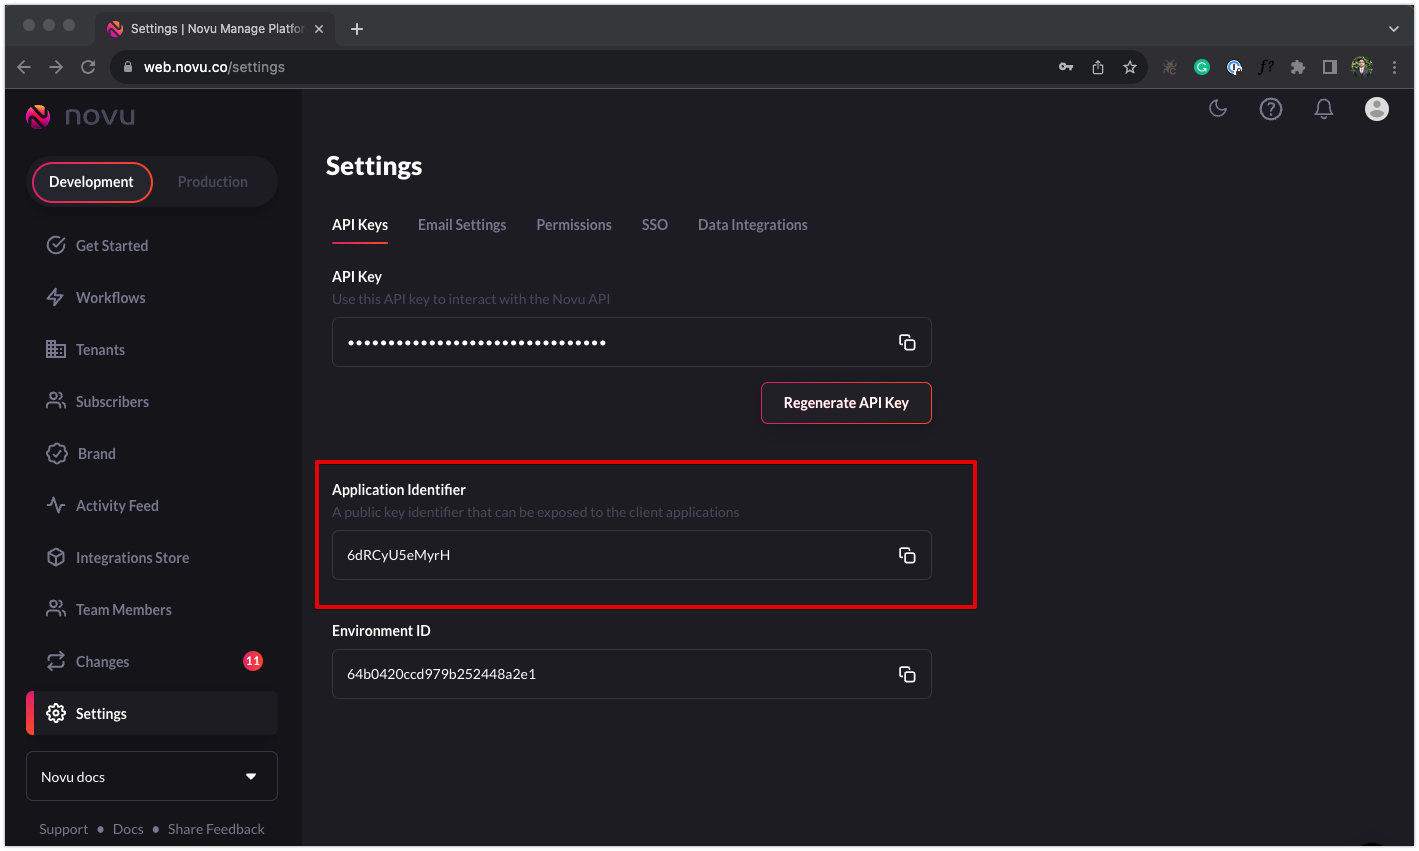
Use your own backend and socket URL
By default, Novu’s hosted services of API and socket are used. If you want, you can override them and configure your own.Notification center without bell
If you don’t want to show the bell icon, you can directly render the notification center component without passing the bell, use<NotificationCenter> component in place of <PopoverNotificationCenter>
HMAC Encryption
When Novu’s user adds the notification center to their application they are required to pass asubscriberId which identifies the user’s end-customer, and the application Identifier which is acted as a public key to communicate with the notification feed API.
A malicious actor can access the user feed by accessing the API and passing another subscriberId using the public application identifier.
HMAC encryption will make sure that a subscriberId is encrypted using the secret API key, and those will prevent malicious actors from impersonating users.
Enabling HMAC Encryption
In order to enable Hash-Based Message Authentication Codes, you need to visit the admin panel In-App settings page and enable HMAC encryption for your environment.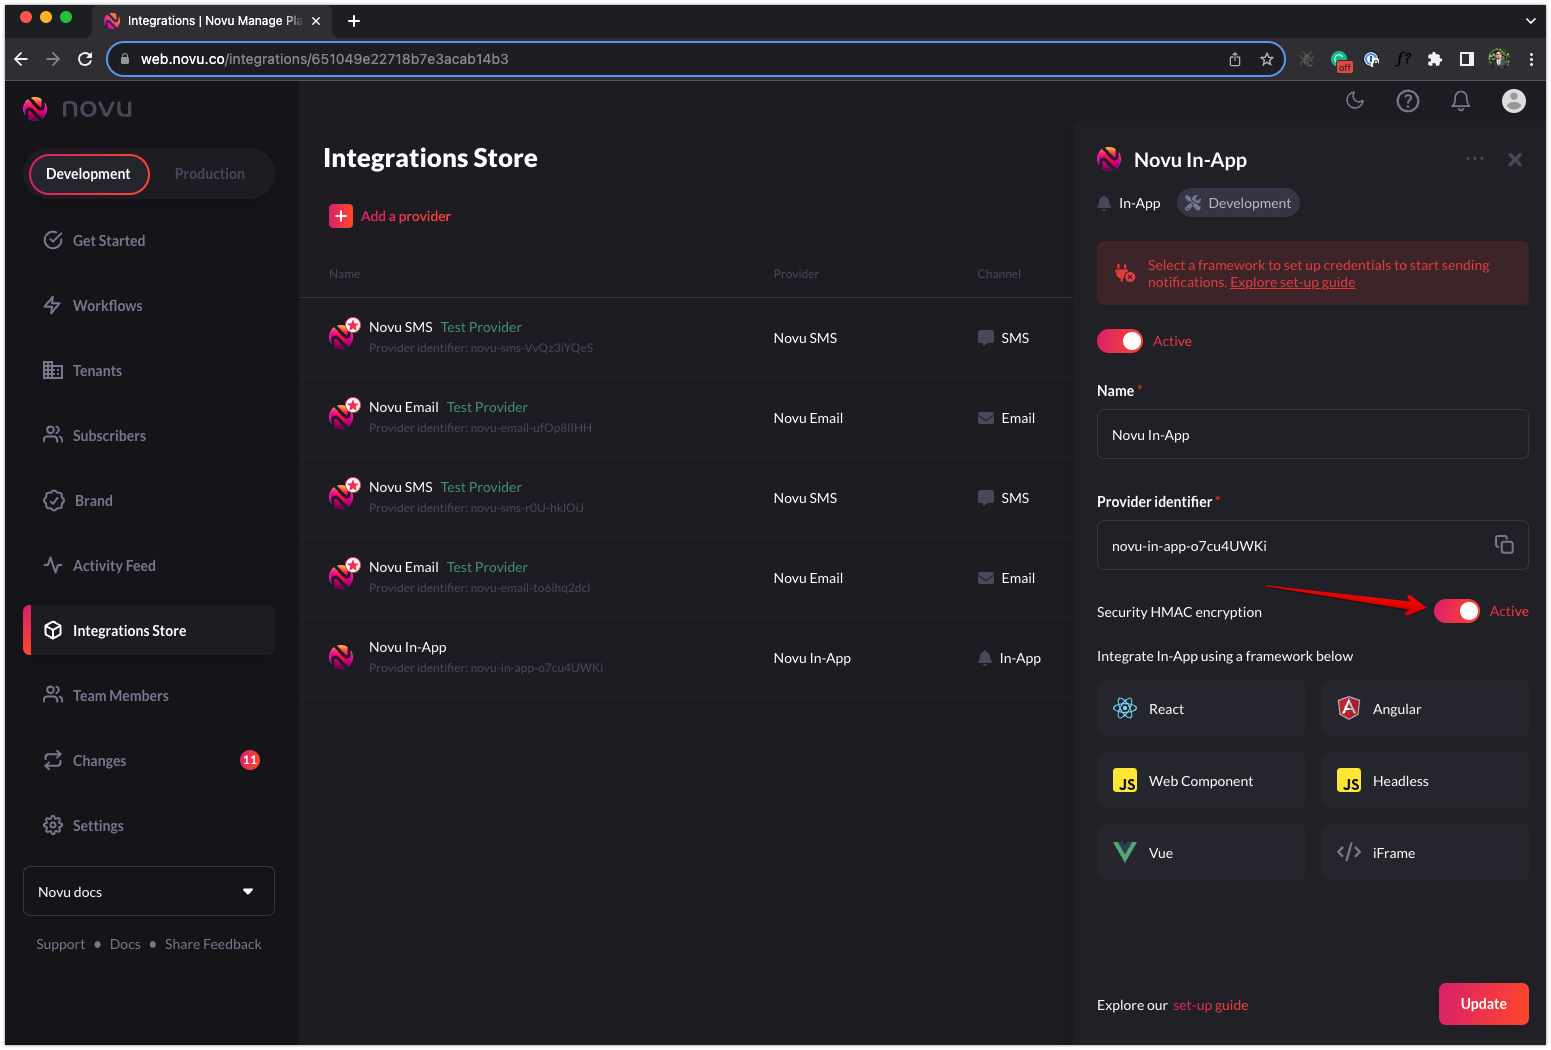
- Next step would be to generate an HMAC encrypted subscriberId on your backend:
- Then pass the created HMAC to your client side application forward it to the component:
If HMAC encryption is active in In-App provider settings and
subscriberHash along with subscriberId is not provided, then notification center will not loadNotification Actions
onNotificationClick
This function is invoked when the user clicks anywhere on the notification except for CTA actions.onActionClick
This function is invoked when the user clicks on the action CTA buttons of the notificationCTA buttons text and redirect url field supports dynamic variables
Avatar Icons
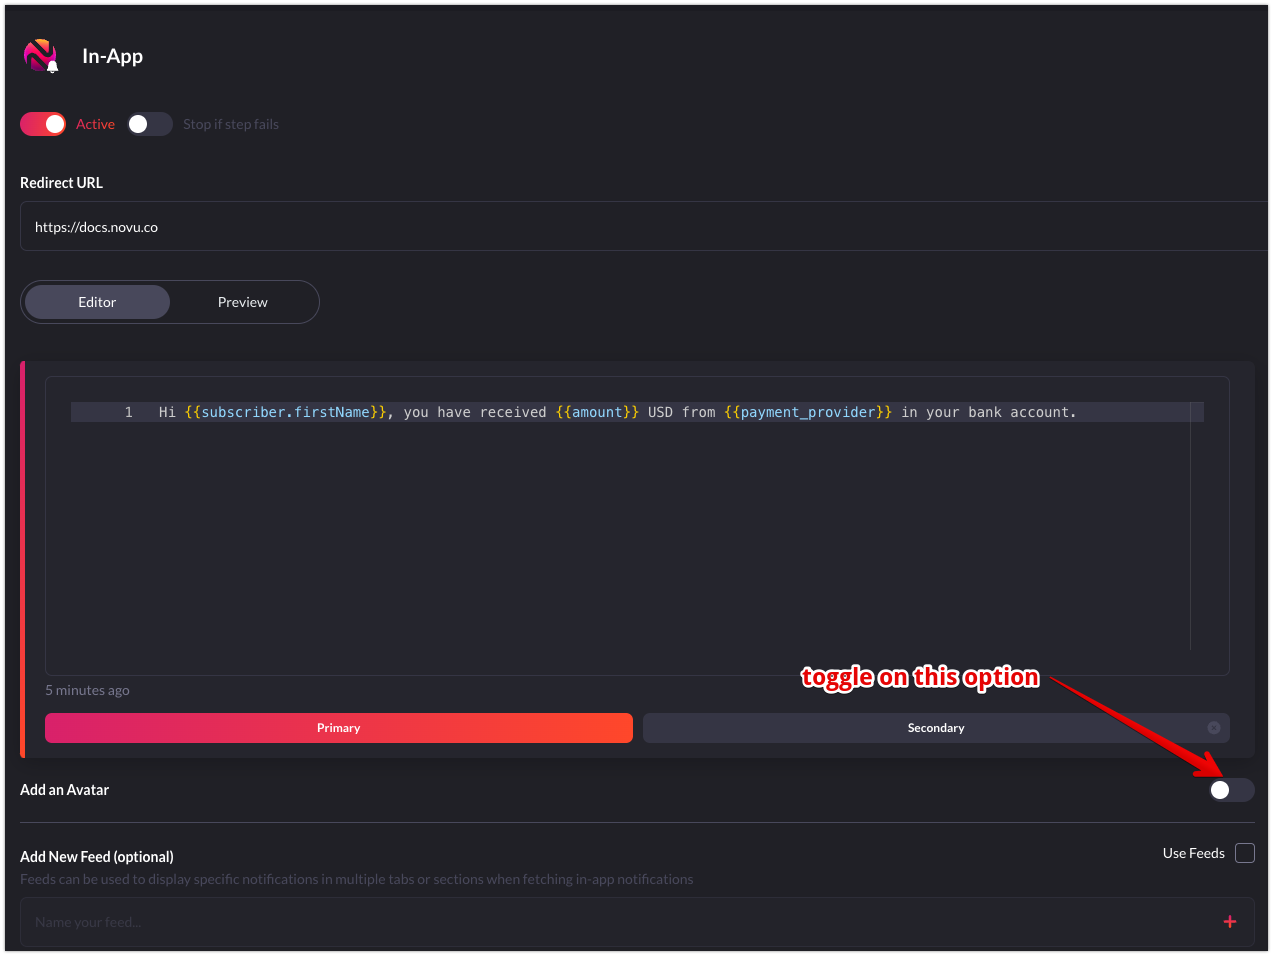
Avatar images can be shown with in-app notifications. To do so, enableAdd an Avatar option in in-app step editor as shown below
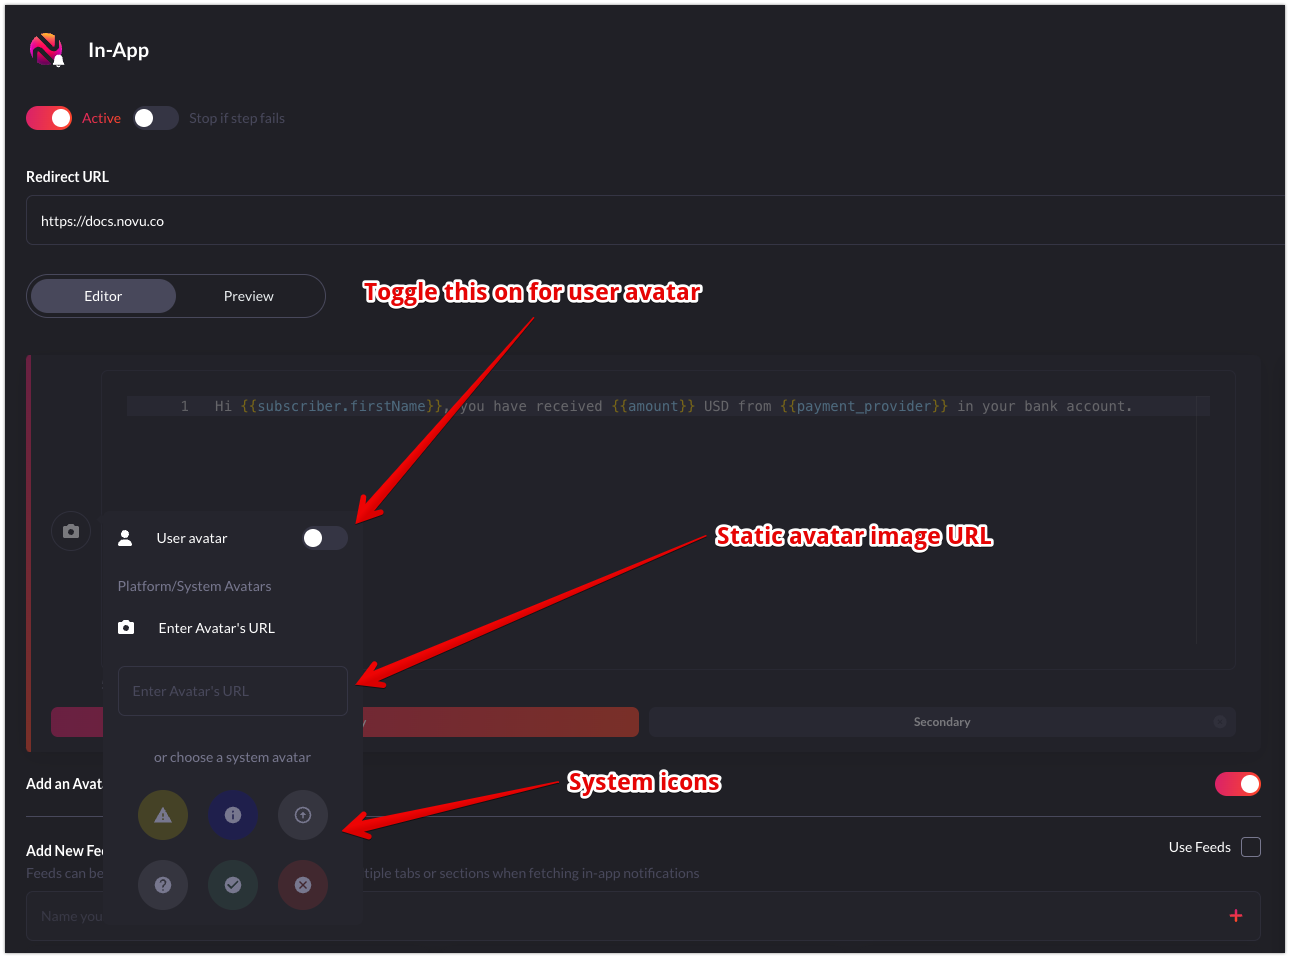
User Avatar
This option will show the avatar of the actor user. actor field can be sent while triggering the worklfow. Each subscriber hasavatar field. For this option to work actor should have avatar field set with valid publicly accessible image URL. If the actor doesn’t have avatar field, then the default avatar will be shown. Worklfow trigger example with avatar
Static Avatar Url
This option can be used if you want to show same, static and custom avatar icon for each in-app notification of this workflow in-app step. Make sure to toggle off User Avatar option to enable this. This is a input field where only valid publicly accessible image URL can be entered. Currently variables are not supported in this field.System Avatar Icons
Novu supports 6 system avatar icons. These are default icons that can be selected as avatar icon. Once selected, same icon will be used as avatar icons for all notifications of this in-app step.Realtime sockets
Novu provides a real-time socket API for you to consume and get updates about new notifications added to the user’s feed. To use the socket connection you can use theuseSocket hook provided by the @novu/notification-center library. Let’s see an example of that:
unseen_count_changedunread_count_changednotification_received
Toast notification
Novu does not have a native toast component. However, if your project is using any UI library like chakra, material-ui, mantine then toast component (snackbar in case of material-ui) of these libraries can be used withuseSocket hook. Add the toast opening code in socket.on callback.
toast.tsx
Example

Frequently Asked Questions
The notification center is not loading properly.
The notification center is not loading properly.
Possible reasons for the notification center not loading properly:
- Invalid subscriberId
- Invalid applicationIdentifier
- Invalid subscriberHash (in case of active HMAC encryption)
- Invalid backendUrl (in case of self-hosted)
- Invalid socketUrl (in case of self-hosted)
There is a render error due to the notification center in React.
There is a render error due to the notification center in React.
The notification center should be wrapped in
<NovuProvider>What is the difference between a redirect URL and CTA?
What is the difference between a redirect URL and CTA?
The redirect URL is for the entire notification item, When the user clicks the notification, the user will be routed to that url. CTA are two call-to-action buttons.
onNotificationClick function prop is used for redirecting url and the onActionClick function prop is used for CTA.Can bell icon in Novu dashboard be used for in-app channel testing?
Can bell icon in Novu dashboard be used for in-app channel testing?
Bell icon and notification center in Novu dashboard is only for receiving system related notifications like user you invited has joined, password reset request sent. It can not to used to test notification center. Consider using our codesandbox example instead.
How to fix CORS error with notification center?
How to fix CORS error with notification center?
Our notification center is configures for all hosts. Please disable root level
withCredentials config in axios or fetch http requests.